Just because you’re living in a college dorm doesn’t mean you can’t put a little creativity and design into your space! Decorating a dorm can be challenging. I mean, let’s be honest — they aren’t exactly known for being cute. Also, you don’t have much free space to work with, but with the area you are given, you can definitely have some fun!
All you need are a few key pieces to get started and add some pretty decor. We’ve rounded up some dorm room decor ideas that can totally transform a boring dorm into a stylish home.
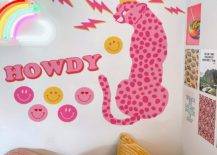
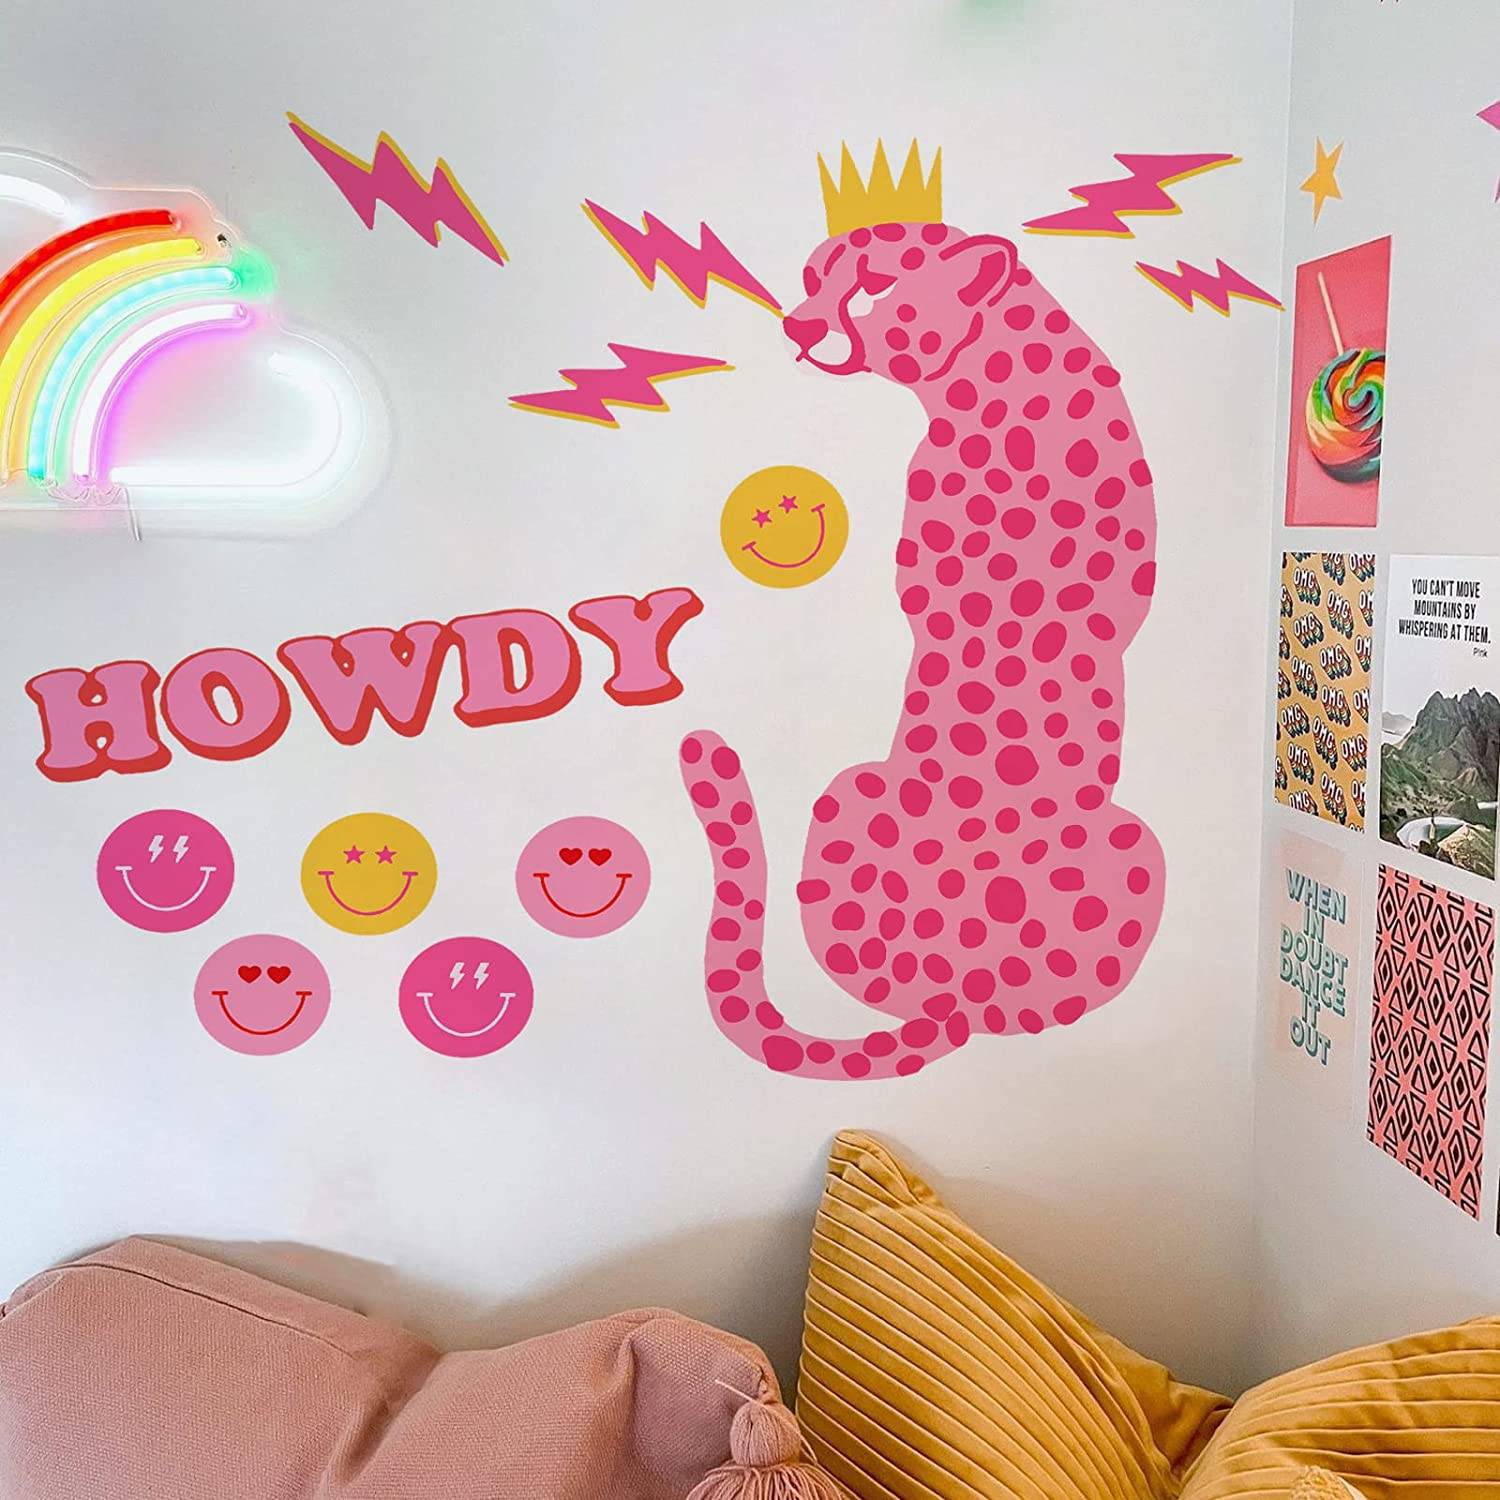
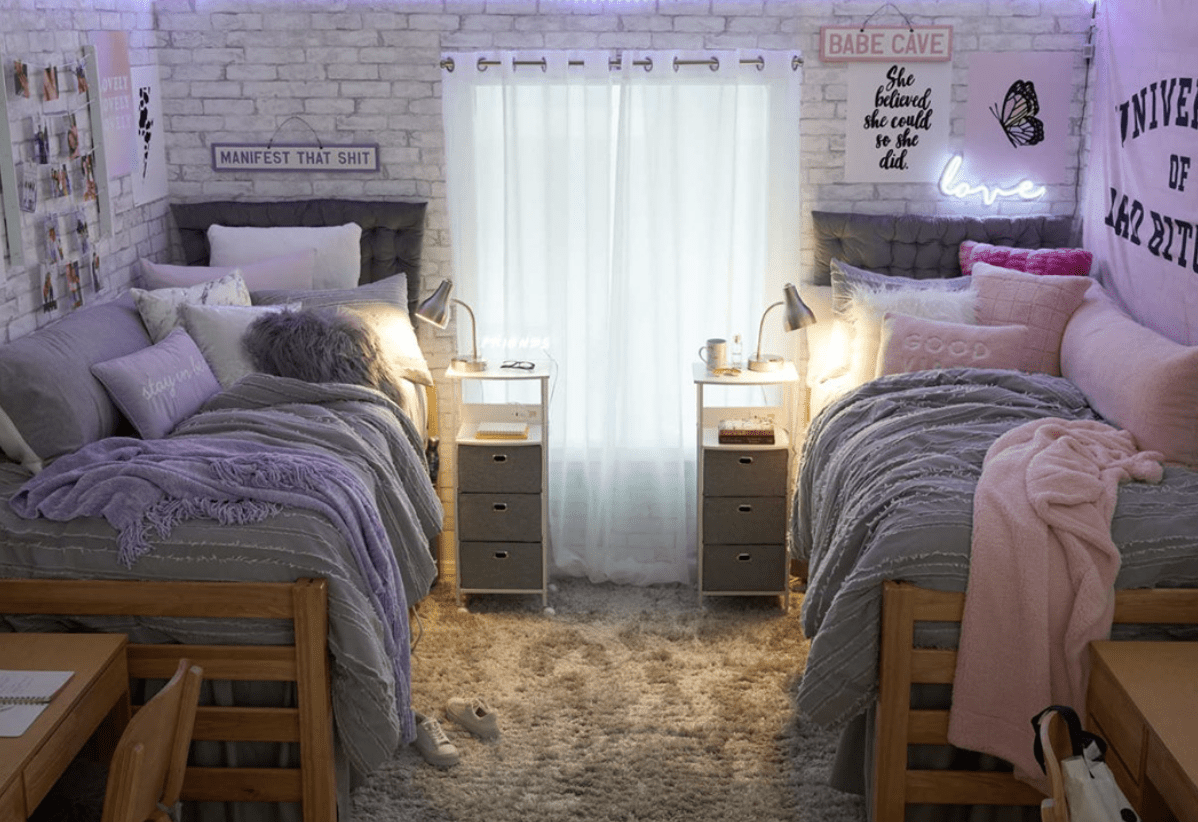
Dress your wall with decals
Sure, you’re not going to go all out and wallpaper your dorm. But you can get some stylish decals to add to the walls and make your space a little less boring and a little more you!
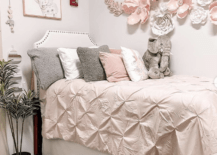
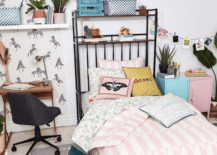
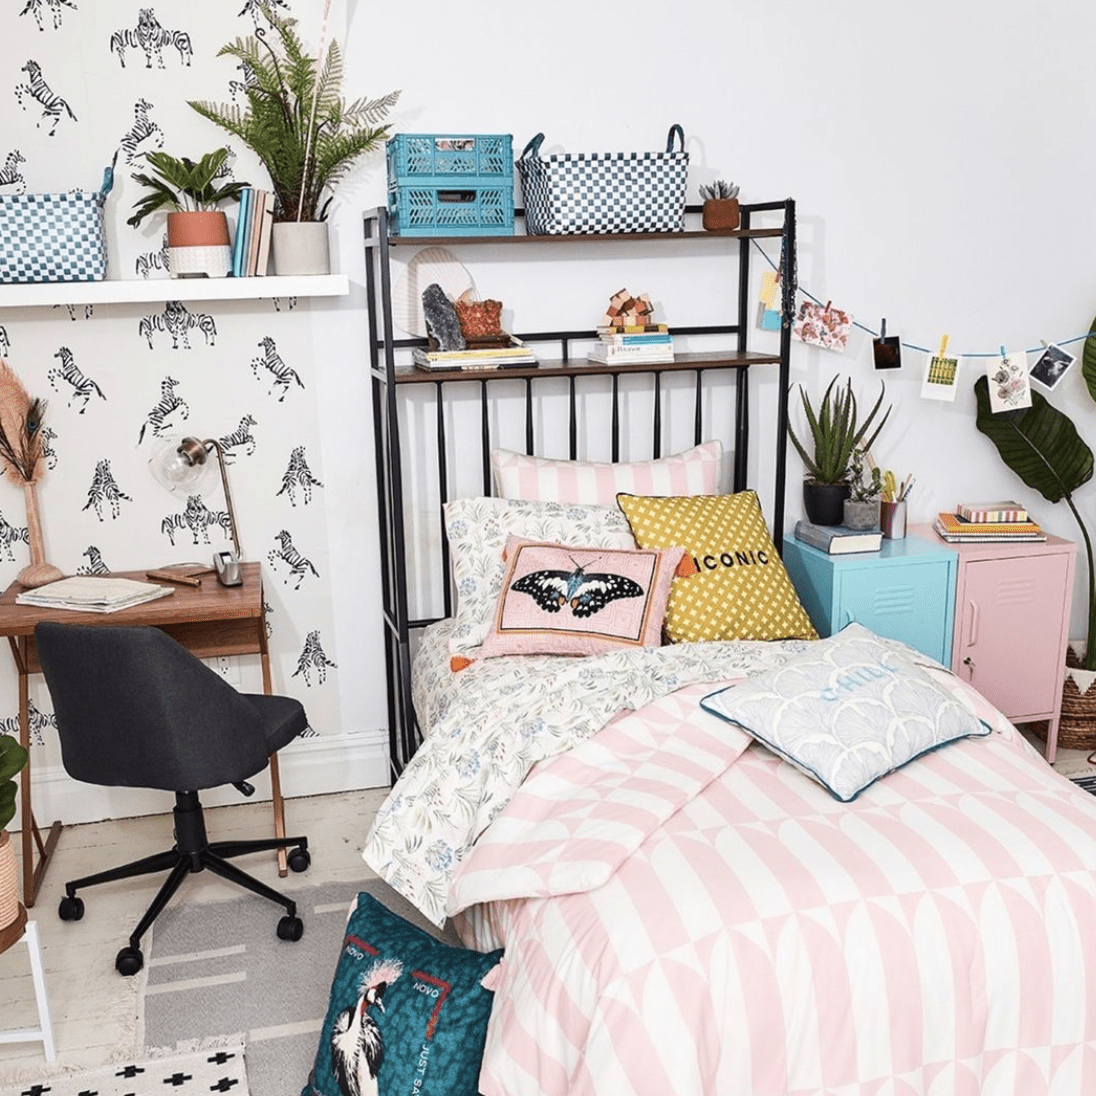
Cozy bedding
Probably the most important part of your dorm room is the bed. Make it a cozy space and beautify the room by splurging on some pretty and comfortable bedding. After some late-night studying, you will love to jump into your bed!
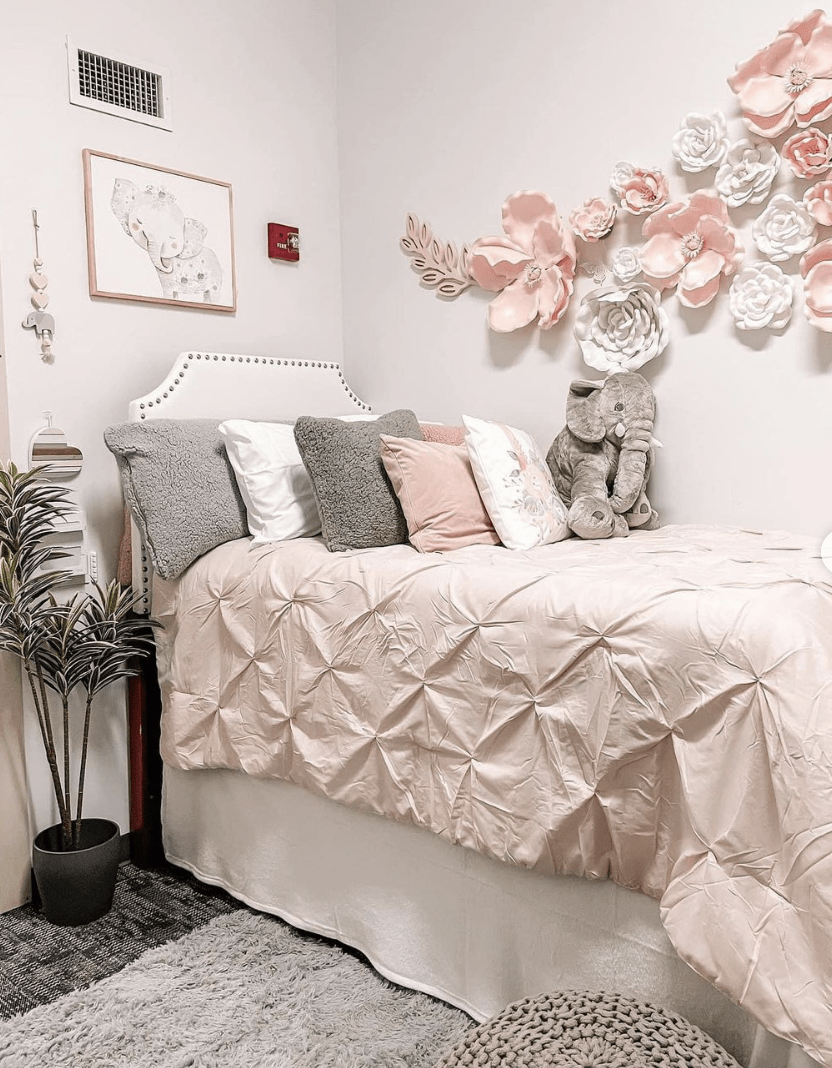
Photo wall
With fairy lights and some of your favorite photos, you can make a stunning photo wall that will make you feel right at home in your space.
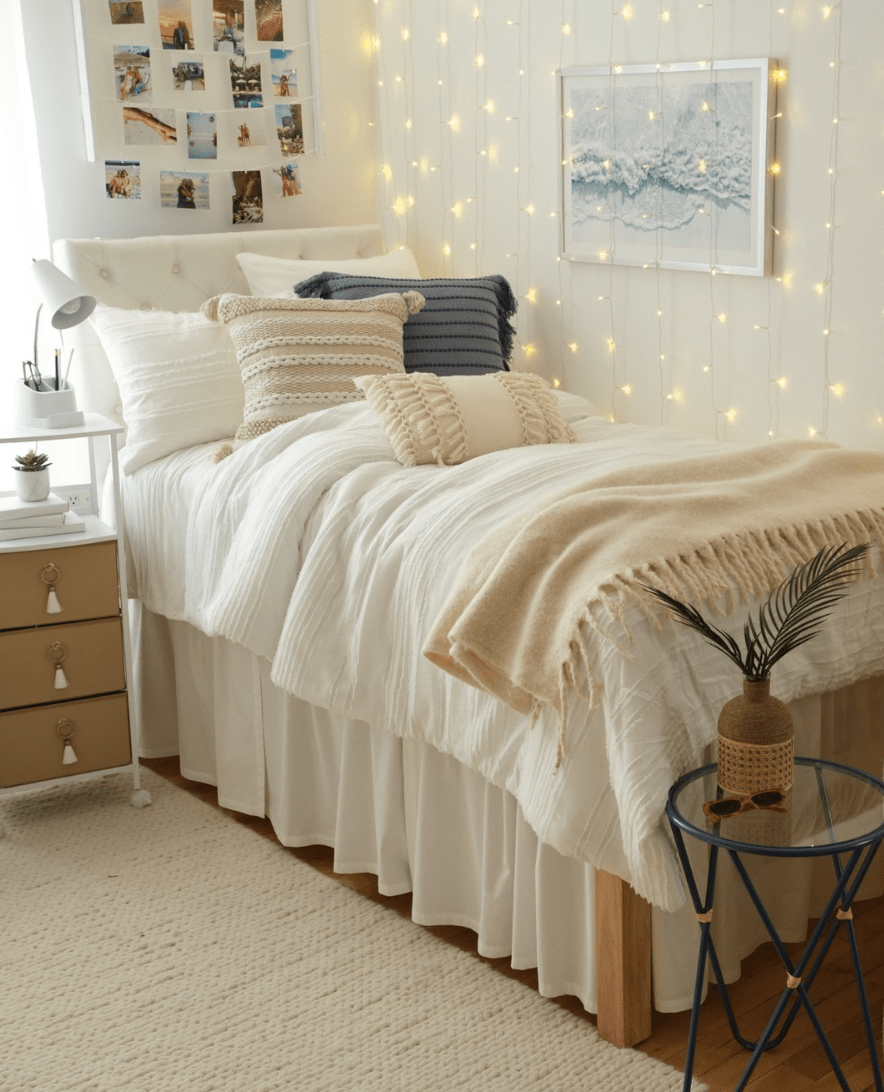
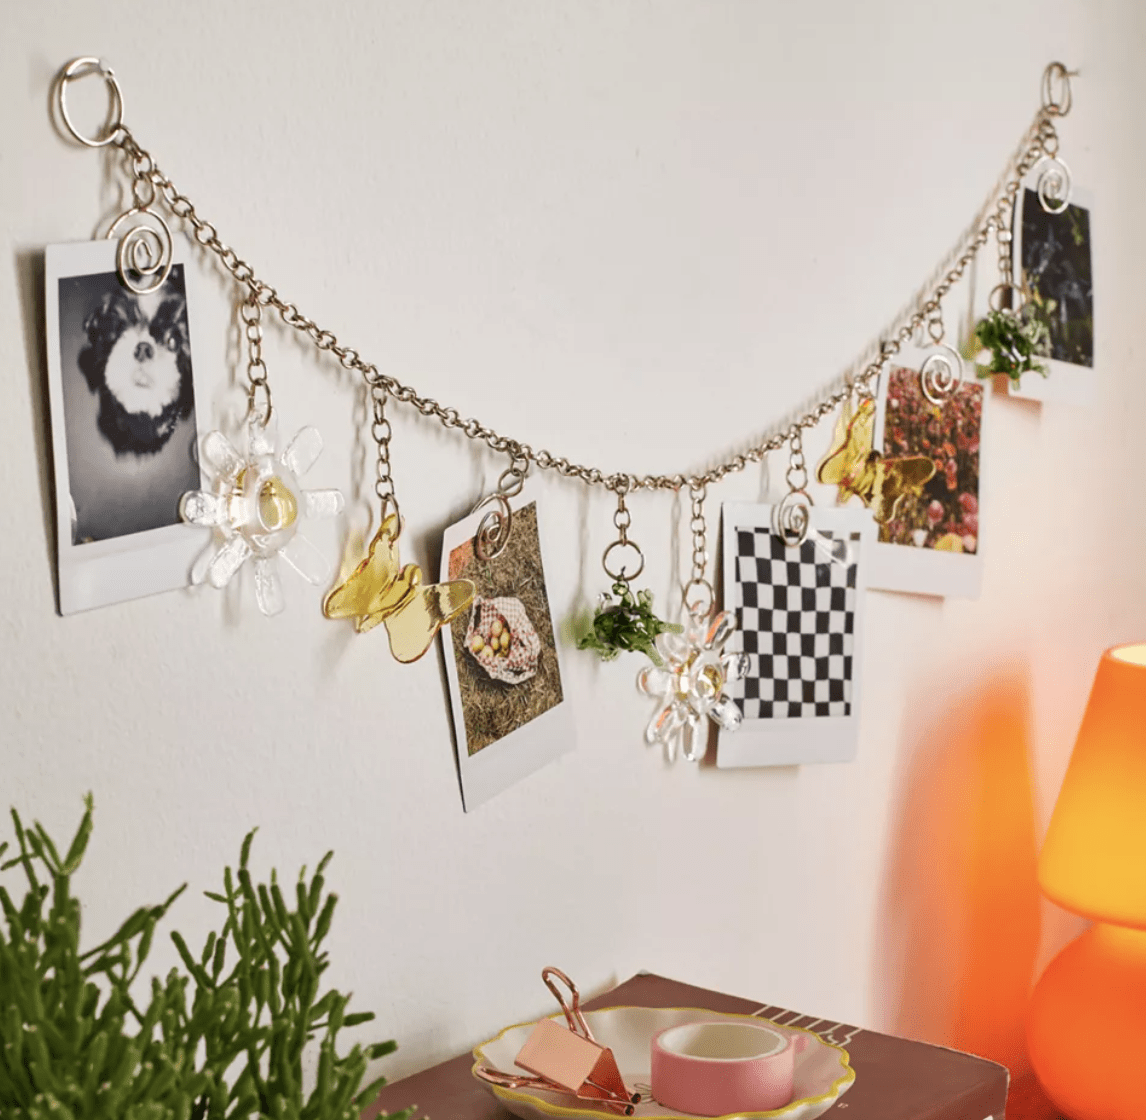
Photo banner
If a photo wall is not your style, you can opt for something simple and sweet, like a photo banner. You’re not limited to hanging photos from it; you can include inspirational messages, reminders, or mementos from home.
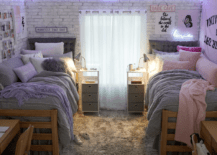
Add a rug
Cozy up the space with a plush fluffy rug. You will love stepping out of bed in the morning onto a high pile rub — plus, it will make the room feel less like a dorm and more like your childhood bedroom.
Hang up curtains
Nothing will make a dorm room feel less like a plain old box than adding some curtains. Before drilling into any walls, you will have to check and make sure that this is ok. If drilling into the walls to hang a curtain rod is not an option, you can always use a tension rod inside the window frame.
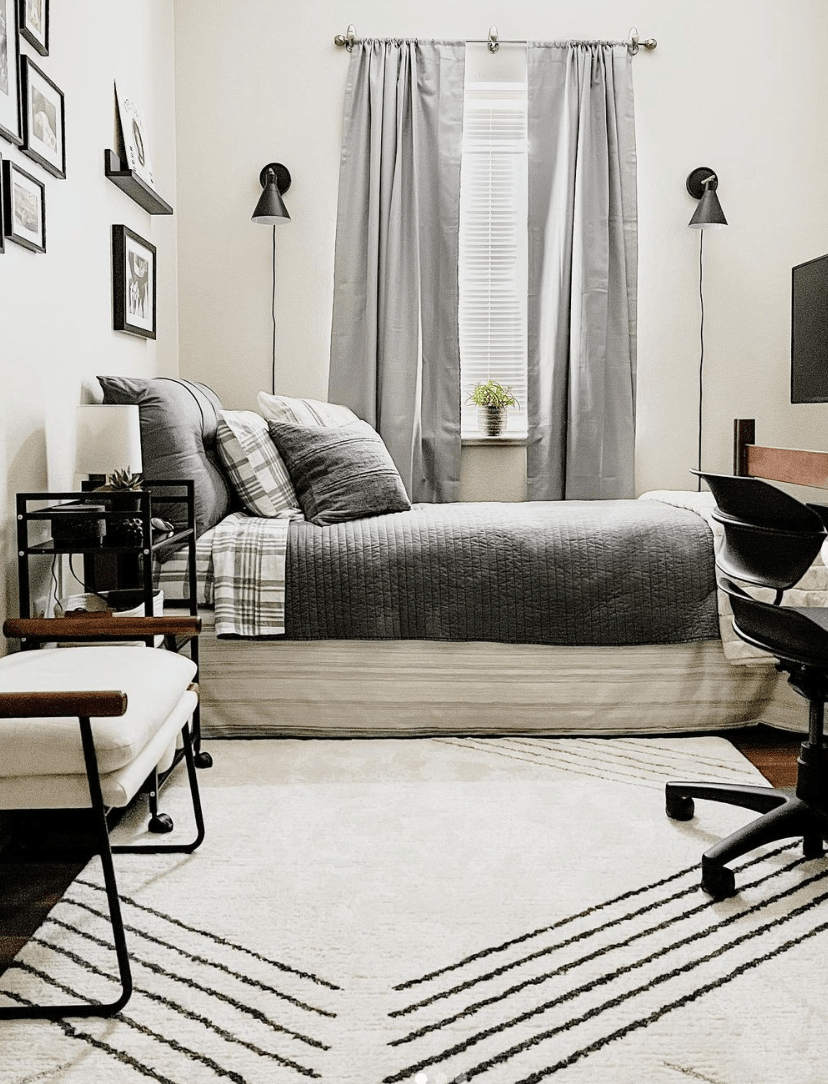
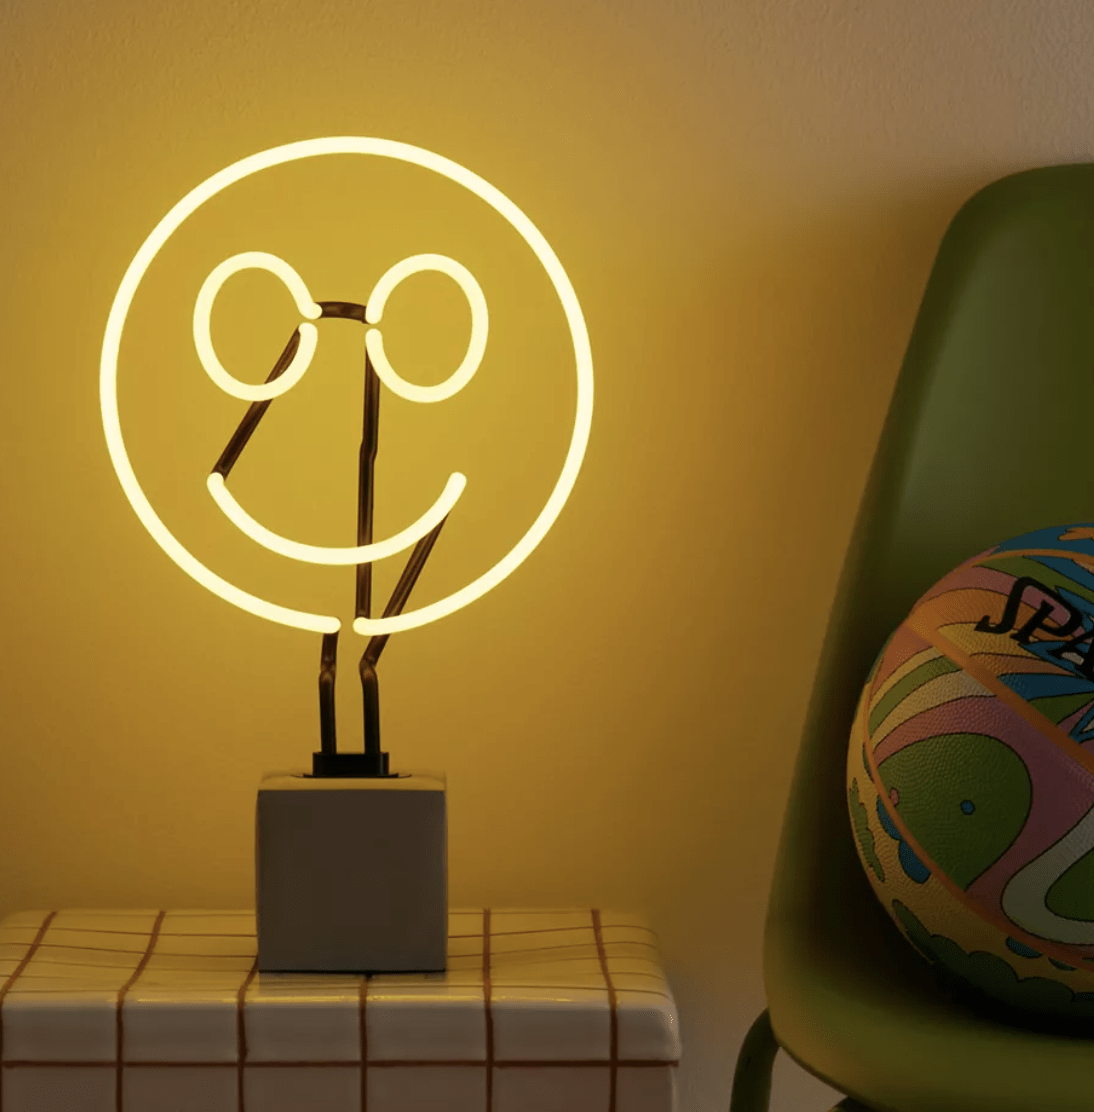
Add a lamp or two
Good lighting is key to brightening and making any space more cheery, so make sure you bring a pretty lamp or two along to college with you.
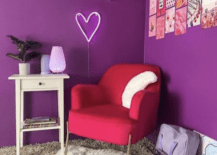
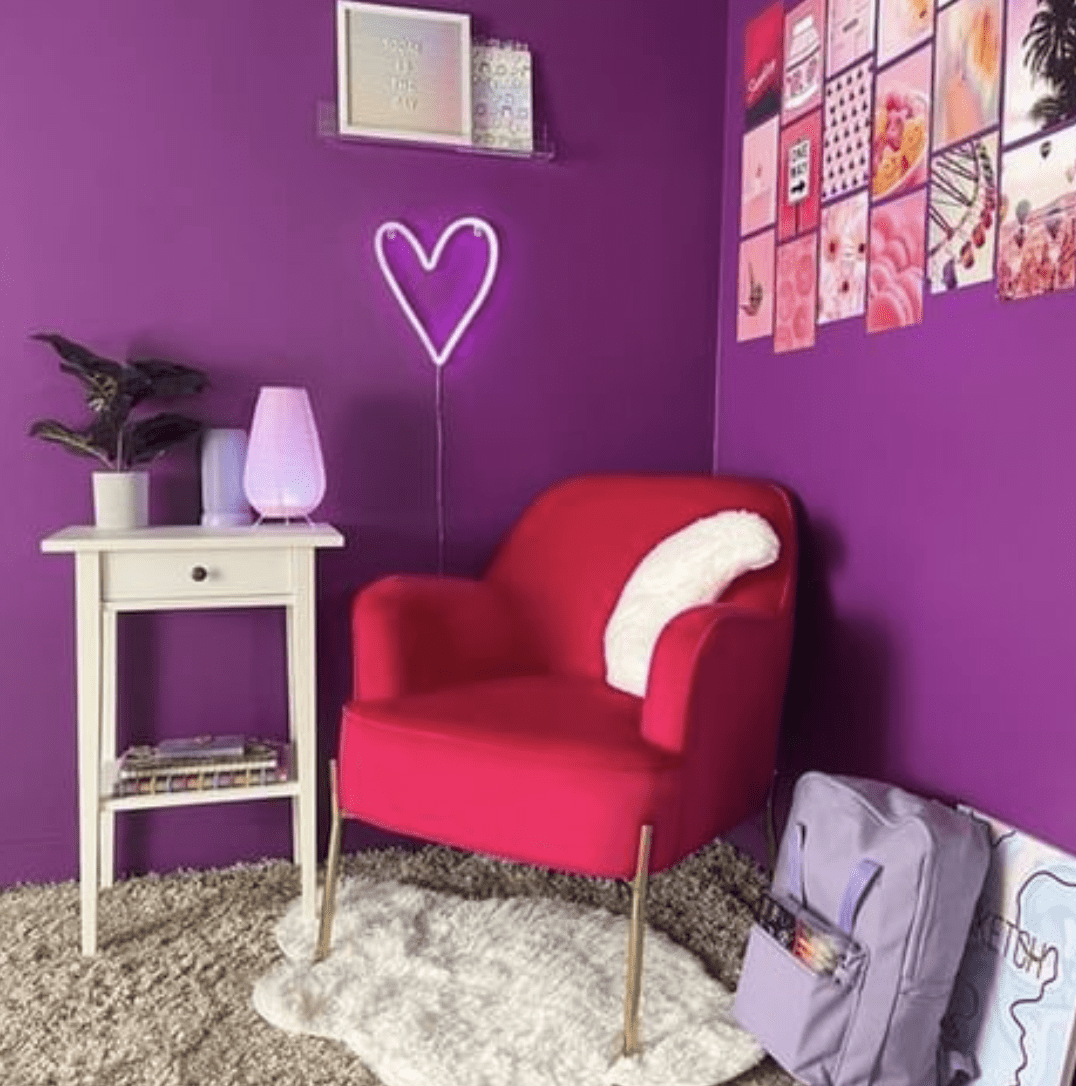
Set up a reading nook
If you have the room for it, get a stylish chair and set yourself up a little reading and relaxing area. This will give you a special spot away from the bed to do some homework and relaxing.
Get creative with storage
Try and maximize your storage by being creative with your furniture. Get nightstands that have drawers or doors to keep mess concealed. You can also get a headboard organizer with shelves that will give you more space to store items.
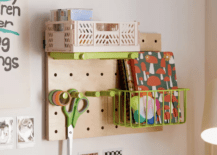
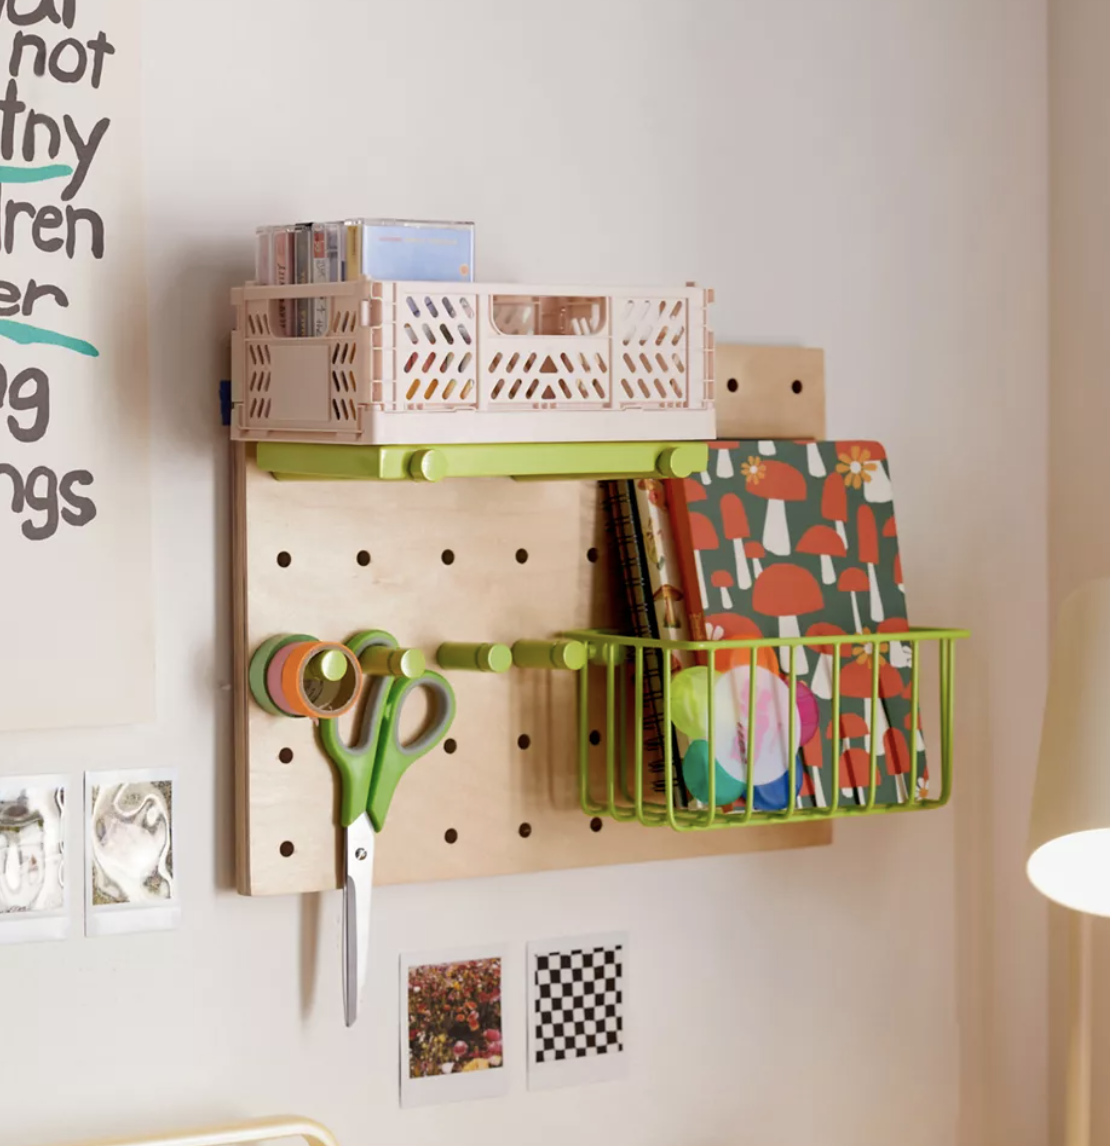
Mini pegboard wall
Creative and cute storage that also acts as decor, like this mini pegboard, are great additions to a college dorm room. Hang one of these above your desk and outfit it with all your must-have essentials.
We know that photos can be an amazing source of design inspiration, so this article may contain affiliate links that will direct you to a particular decor item. Clicking on a link may result in a portion of proceeds being paid to www.decoist.com.
You can free up space in your home by incorporating sliding doors into the design. Sliding doors can be tucked away in the walls or over a wall, leaving you with more free space when you’re deciding layouts and furniture options. You can open up the flow of your home and divide rooms without big bulky swinging doors. Sliding doors give you the flexibility to change between an open concept layout or sectioned-off spaces.
Sliding doors come in all different types and finishes — you can even make your own out of an old rustic door. Here are 14 sliding door examples that we hope will give you some inspiration and ideas.
Sliding doors in the kitchen
Sliding doors in the kitchen are great for separating pantries and closets. If you have a walk-in butler’s pantry and you don’t want to take up room with large doors, a wall-mounted sliding door will do just the trick.
Have a little fun and creativity with sliding doors. These homeowners decided to use chalkboard paint on their sliding doors so that they could add their own personalized messages.
When considering sliding doors, think about opting for some glass. This will make the room feel more open and airy and not so closed off. Why conceal a beautiful butler’s pantry when just a bit of glass adds a stylish little peep show?
Sliding doors in the bathroom
For a modern and elegant bathroom, sliding doors can make quite an impact. In this stylish bathroom, we have a set of pocket sliding doors that take up absolutely no room, allowing for a flawless space.
Sliding doors in the living room
If you don’t want a completely open concept, sliding doors are great to separate your living room from other areas in the home. You can leave them open when you want the room opened up, or if you need, you can close them for a more private space.
Sliding doors in the hallway
A sliding door is the perfect choice for tight hallways with closets and rooms where a traditional door would be impossible.
Sliding doors in the dining room
Installing sliding doors presents an opportunity to use antique or vintage doors. Because the door does not need to fit inside the door frame in a traditional way, you can really get creative with the doors you choose.
You can easily separate a home office with some stylish and modern sliding doors. An office is a great place to use sliding doors.
These industrial metal style sliding doors allow this homeowner to showcase a modern eclectic style and a bit of their personality.
Sliding doors in the entry
Keep your entryway open and avoid swinging doors in an already-tight space with a sliding door. You’ll find that you enjoy having more space in an entryway when you don’t have to trip over or move around open doors.
Sliding doors in the basement
A large open basement is a great place to install sliding doors. They’ll help separate game rooms and other areas and create defined spaces around the basement.
If you’re lucky enough to find yourself the owner of a century home, then count your blessings because they really don’t make houses like they used to. Many homes nowadays are slapped up quickly, cheaper materials are used in place of quality, and in most cases, there is a severe lack of character.
So you’ve purchased a quality older home, and now you are assigned the task of restoring it to its former glory. What do you keep, and what do you scrap? Where does the character lie within a century home? This article will share the elements and characteristics of an older home that should be preserved and restored if possible.
Woodwork and trim
Older homes are rich with high-quality craftsmanship and woodwork. Baseboards, trim, and molding were put in with the utmost care and attention. To add a bolder three-dimensional effect and shadow lines, baseboards and casings around the windows and doors were made of wide stock, and cornices were heavy and dramatic, especially in the 19th century.
You will want to save all that you can of the original woodwork, including any early paneling, built-in casework, spindle work, and other decorative wood treatments. Think of such wooden details as deserving of restoration but also as a source of inspiration — you’ll want to try to replicate these design details in other areas of the home. Using existing quality work as a source for new renovations will help keep the character and make the new parts blend nicely with the older parts of the home.
The layout
Logic and practicality were always considered when they were designing homes in the 19th century. Later additions changed the patterns of use in some homes and made the layouts more confusing. If it’s possible, retain the floor plan — you’ll be glad you did. In some homes, you may even want to undo what previous remodelers have done to take the home back to its original layout.
In the early seventies, it became popular to do away with dining rooms. No one wanted them, so it became the trend to open up the room to the kitchen to create large country kitchens or other spaces in an open plan, but dining rooms are back on trend, and most homeowners want one now.
Floors
There’s nothing like an original hardwood floor, and if your floors are in great shape and you want to preserve the character, let the floors stay. You can refinish old hardwood floors to make them look new again and give them a fresh face. If there are additions being done to the home, you should try to match the older flooring the best you can to make the transition more seamless from room to room.
Staircases
As the cost of quality craftsmanship has skyrocketed, the quality and character of the typical staircase have plunged. You should consider restoring if your stairway has original balusters, rails, and newel posts. You can strip them if they are hardwood because you may find in older homes that they have been painted and repainted several times. Find a way to stabilize them that doesn’t detract from their appearance if necessary. Staircases are key design elements in a house and it’s well worth some extra dollars to preserve and restore them.
Hardware and doors
When you look for a home’s character, it can often be found in the hardware. Vintage door knobs and hinges are among some of the most beautiful elements of an older home and should be preserved if they can be. If doors are too old but you have vintage hinges, keep the hinges and swap out the door.
You can also check at flea markets and antique stores for older doors that can be refinished and repurposed for additions that will keep with the style and design of the home.
After a long summer, you may be happy to put the weeding and pruning behind you, but your work isn’t quite finished yet! If you want to have a successful garden next summer, it’s important to prepare it for winter. It’s crucial to put your garden to ‘bed’ (pun intended) before the cold weather hits. Plus, it gives you an excuse to get outside and enjoy the late autumn breeze before the cold weather hits.
In this article, we will outline some useful steps to help you prepare your garden for winter. Trust us, you’ll be thanking us next summer!
1. Cover up garden beds
You’ll want to add compost in late autumn to let the soil absorb those nutrients over the winter, even though most people do it in the spring. Before the ground freezes, add a couple of inches of compost on top of your beds, and then add a light layer of straw or mulch to prevent soil decay, nutrient leaching, and weed growth.
Another option for vegetable gardens is to just cover your beds with black plastic or a layer of cardboard, leaving it in place through the winter until you’re ready to plant in spring. This will kill existing weeds and suppress sprouting seeds.
2. Prepare perennials for winter
Water your flowering shrubs in the fall; they will thank you for it over the winter. Many perennials can be cut back in the spring, but it can be better to prune some perennials earlier to avoid spreading diseases, such as powdery mildew. This is especially common in bee balm, phlox, and hostas.
When pruning, wait until the ground has frozen hard and the foliage has died. Leave about three inches of stem and mulch them with a thick layer of leaves or straw. Cover the area with mulch or heavy plastic to discourage emergent weed growth when the ground warms up.
3. Prepare trees and shrubs for winter
Do not prune trees and shrubs right before winter. You want to wait until next spring — even if they look overgrown. When you prune, you remove tissue and will open wounds that will not have time to heal before the cold weather arrives. Pruning also fosters a tree or shrub to attempt to grow, but any new growth created in the fall is likely to be killed because it has not had enough time to harden off or become woodier.
If you get heavy snowfalls, cover small trees and deciduous shrubs with a wooden structure to protect them. You could also drive stakes into the ground at four corners around the plant and wrap burlap or heavy plastic around the stakes, securing it at the top, center, and bottom with twine.
For immature fruit trees, it’s ideal to wrap the tree’s lower trunk with a pest-proof tree wrap, which will deter mice and voles from gnawing on the tree’s bark during the winter. Tree wrap will also help to stop winter injuries caused by sudden thawing. The combination of warm, sunny days and still-freezing nights in late winter can cause the thin bark of young trees to split. This is especially prevalent in trees with southern or southwestern exposure. Wrapping their trunks with tree wrap or otherwise shading them from the winter sun can stop bark injury.
4. Manage your compost
You’ll want to make sure you turn your compost pile or the contents of your compost bin one more time before hard frost. This introduces oxygen and speeds decomposition.
5. Feed your lawn
The most influential application of the year occurs in the fall. If you haven’t done it, it is not too late. Apply a lawn fertilizer in autumn. Come spring your lawn will thank you by greening up quickly with much greater resistance to snow mold and brown-out.
6. Hill up your roses
This is one of the later jobs around the garden before you batten down the hatches. Mound the garden soil to a height of 50 cm around the base of each hybrid tea, floribunda, grandiflora, and miniature rose bush. A plastic rose collar will help you do an even more satisfactory job. You may water roses regularly through the fall, but refrain from fertilizing starting six weeks before the usual date of your first fall frost. Remove any dead or diseased canes.
7. Add in leaves
Rake the last of the fallen leaves off your lawn and into your garden. Run over the leaves with your lawnmower before raking them onto the surface of the gardens. Worms will pull the leaves down into the soil come spring, nourishing it.
8. Wrap your cedars
You’ll want to wrap burlap around cedars and evergreens that are exposed to wind. Two layers of inexpensive burlap around all evergreens will help prevent snow damage. Snow can be quite heavy if it piles on top of your cedars. The burlap will protect against salt spray from the melted snow on a nearby road, especially on the east side of the road, and will also help against sun scald in late winter when the sun reflects off a clean, white layer of snow onto evergreen foliage.
The front porch is the entrance to the home. The spot where you get to make a statement and a first impression to the world passing by your door. If modern is the look you’re after, then you have come to the right place. It’s not hard to add a modern vibe to your home; all you need is a little bit of creativity and some inspiration.
In this article, we have compiled some of our favorite modern front porches and provided some helpful tips to get you off to the right start. To create a modern front porch, you don’t have to have an overly modern home. These ideas will help you bring a modern front porch to life and inspire you to do something different with the front of your home.
Lighting Ideas
When it comes to the front porch, lighting is critical. You don’t want to overlook this vital part of the decor. If you want to add a modern vibe to your porch, your lighting must reflect that. You also don’t need to back yourself into the “standard outdoor light fixture corner” either. Outdoor lighting has come a long way in the last decade, and if you have a covered porch, you can really play up the lighting game.
A stunning chandelier hanging in the middle of your front porch makes an elegant modern display. Keep your light fixtures modern and trendy — this will set the whole tone for your front porch.
Gold and black look great together and really play into a modern feel and look.
Front Doors
The front door is the entrance to the home. The first impression is where you get to make your point, so when it comes to your front door, don’t waste any opportunity to make it a stunning modern display of yourself. Everything from bright colors to moody blacks, virtually nothing is off limits when it comes to a modern front porch.
A boho pop of mustard on this front door blends in with the cedar shakes but keeps everything modern and streamlined.
Contrasting Colors
Nothing says modern like a set of contrasting colors. If you really want to make a modern splash, try painting your door a color that contrasts against your siding or brick. Not only will your front door stand out, but it will become visual eye-candy for those passing by.
Open it Up
Make your space clean and visually appealing. Modern and minimalistic is the feeling here on this porch. A laid back and trendy vibe complete this modern front porch.
Modern Concrete Tile
Make a statement with modern concrete tile, and if a new concrete tile is not in the budget, you can always paint and stencil your existing concrete in a fun and bold pattern. Also, can we just take a moment to stare at those front doors!? Absolute beauties!
Everything about this front porch screams modern — from the tile work to the planters and right down to the front door.
Furniture
Furniture choice is vital when creating a modern front porch. Choose furniture that has clean, simple lines. If you want an ultra-modern porch, stick with white and black outdoor patio furniture, this is the most straightforward way to achieve a modern front porch.
Be sure to pair your modern front porch furniture with complementary lighting. The clear glass orb hanging pendants on this front porch add nicely to the aura without taking over the space.
This furniture below has a modern Scandinavian feel and keeps this front porch light and airy.
Symmetry is Key
A perfectly symmetrical front porch is modern and elegant. Creating a beautiful balanced display with lighting, this modern front porch might just be our favorite.
Simple and symmetrical is a great way to master a classic modern look.
Front Porch Dining
Dining sets aren’t just for the backyard anymore! In fact, placing a modern dining set on a large front porch is becoming increasingly popular. If you have a large front porch, why not use it!?
Modern Planters
If going modern, you want to make sure that the plants also speak to your modern vibe. Opt for large planters with tropicals or even moody colors. Large succulents are also a great idea if you live in a warmer climate. Stay away from planters that have more ornate designs, as this will distract from a sleek modern look.
Modern doesn’t have to mean uncomfortable. By keeping your front porch simple and cozy, you can achieve a modern look and have some comfort at the same time. A row of all-white rockers is a great example.
An elegant modern porch swing is also a cozy touch that you can add to your front porch as well. Do some looking around and find a comfy porch swing that will fit your modern look. There are so many different styles out there.
Keep it Simple
If you want to pull off a modern look easily, the best thing to do is keep it simple. Modern and sleek is the way to go, and you can quickly achieve this with simple lines and clean decor.
Don’t Forget the Ceiling
Adding a finished touch to the ceiling on a covered porch is a new and modern element, but it totally completes the space. Just because your front porch is outside doesn’t mean it doesn’t need a lovely ceiling.
Dark and Moody
There’s no written rule that states that front porches have to be bright and colorful, so if it’s a modern porch you’re after, try something dark and moody — it might just set a tone that you love!
Paint it Black
Nothing says modern like black trim, and while we hope that black trim windows and doors are not a passing fade, we hope it will stick around for some time yet to come. We love the black trim look; nothing is more modern and sleek than it!
Dutch doors aren’t commonly considered for a front entrance, but we can’t deny that they look so pretty and modern in the below styles and varieties. When you think of a Dutch door, you typically think of something country and rustic, but this door style can be modern with the right coat of paint and finish.
Modern House Numbers
If you want to make your front porch more modern, a quick and easy fix is your house number. Switching outdated house numbers for a new, modern, contemporary design can make such a huge impact and is so easy to do.
When it comes to making a modern front porch, you should really start with your door. The front door’s color will set the whole tone for your front porch. Here are some quick do’s and don’t’s for choosing a color for your front door.
Stick with the Classics Use a neutral hue such as brown, black, or gray for a look that will withstand the test of time. Even deep reds and navy blues are classic front door colors that act as neutrals. If your style changes or you alter your home’s exterior later, neutral hues will adapt with you.
Be Afraid of Color Some people are nervous about using bold and bright colors for their doors, but why not experiment? A yellow or lime green makes a bold statement on your front door. If brights are too daunting, try a dark version of a color, such as dark green, burgundy, or wine red.
Purchase the Right Paint
It’s essential to use the proper paint to prevent peeling and fading since your door will be exposed to outside elements. Latex exterior paints provide weather-resistant coverage. If your door is metal, look for one with built-in rust protection.
Neglect Your Screen Door
If your front door features a storm door or screen door, you can paint its frame a contrasting hue for another punch of color.
Make it Monochrome
If you have a smaller house, this tip is for you. Visually expand your home by painting the door, trim, window frames, and exterior the same color. A monochromatic color scheme also provides a neutral backdrop for accessories to stand out, such as the planters and sconces.
Ignore the Trim
Your front door trim is also ideal for painting. White is classic, but another option is to make the door pop with contrasting trim. Rich brown tones, for example, can warm up a cool-colored door. Dark trim stops a white or neutral door from fading into the surrounding color of a house.
If you need more inspiration for the front porch, check out these related articles:
0 comments: