If you’re in the midst of a bedroom makeover and looking for a big statement to anchor the space, today’s post is for you. If you aren’t pla...

Headboard Alternatives for Design Lovers

If you’re in the midst of a bedroom makeover and looking for a big statement to anchor the space, today’s post is for you. If you aren’t planning to purchase a new bed, and the idea of upholstering plywood for a DIY headboard isn’t quite what you had in mind, don’t fret! A range of creative solutions awaits you. Keep reading as we round up our favorite DIY projects and helpful purchases that prove headboard alternatives can be more fun than the real thing!

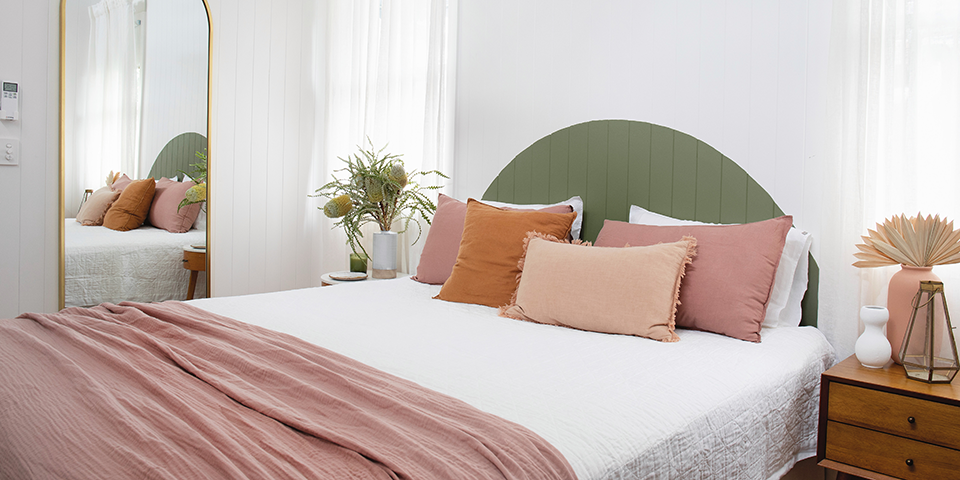
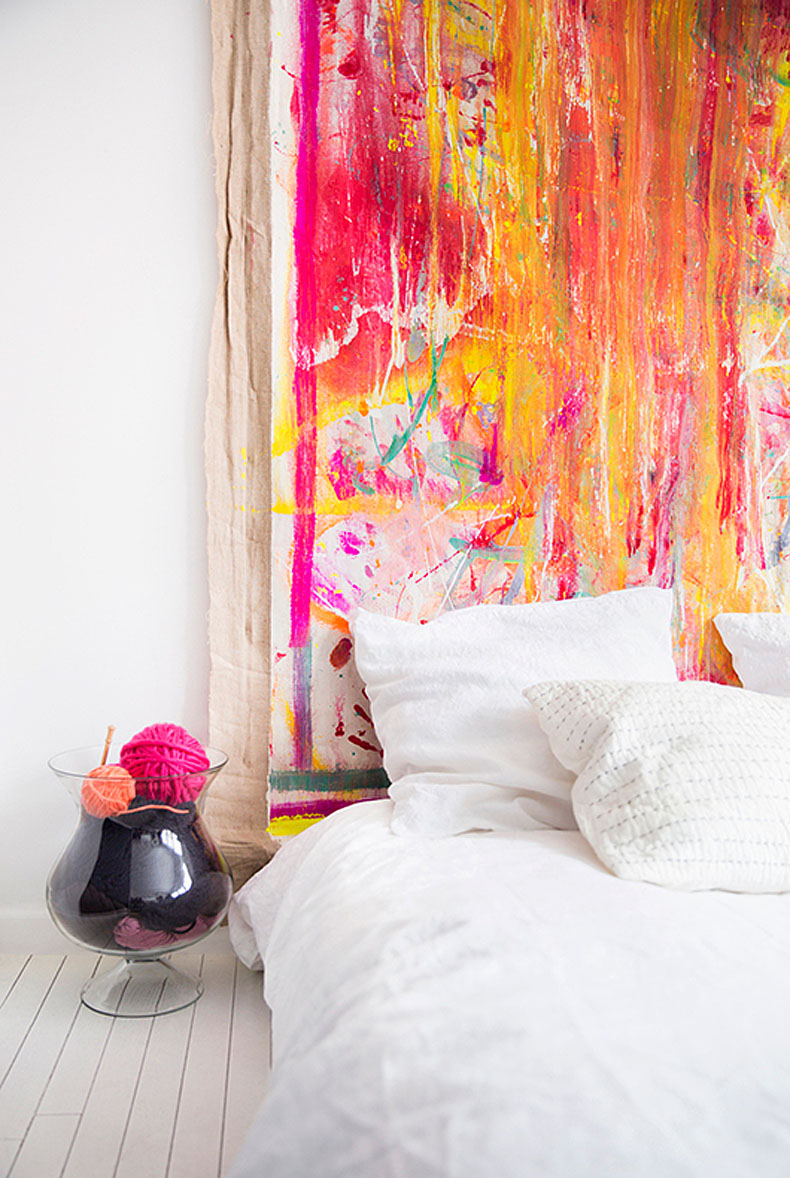
As you scroll through the ideas below, you may find exactly what you’re looking for. Or perhaps an image will inspire your own unique take on the project at hand. Get creative and have fun beautifying your sleeping space! [painted headboard below by Geneva Vanderzeil, featured at Bunnings Warehouse]

Embellish the Wall

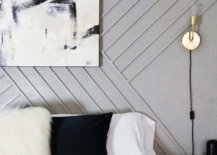
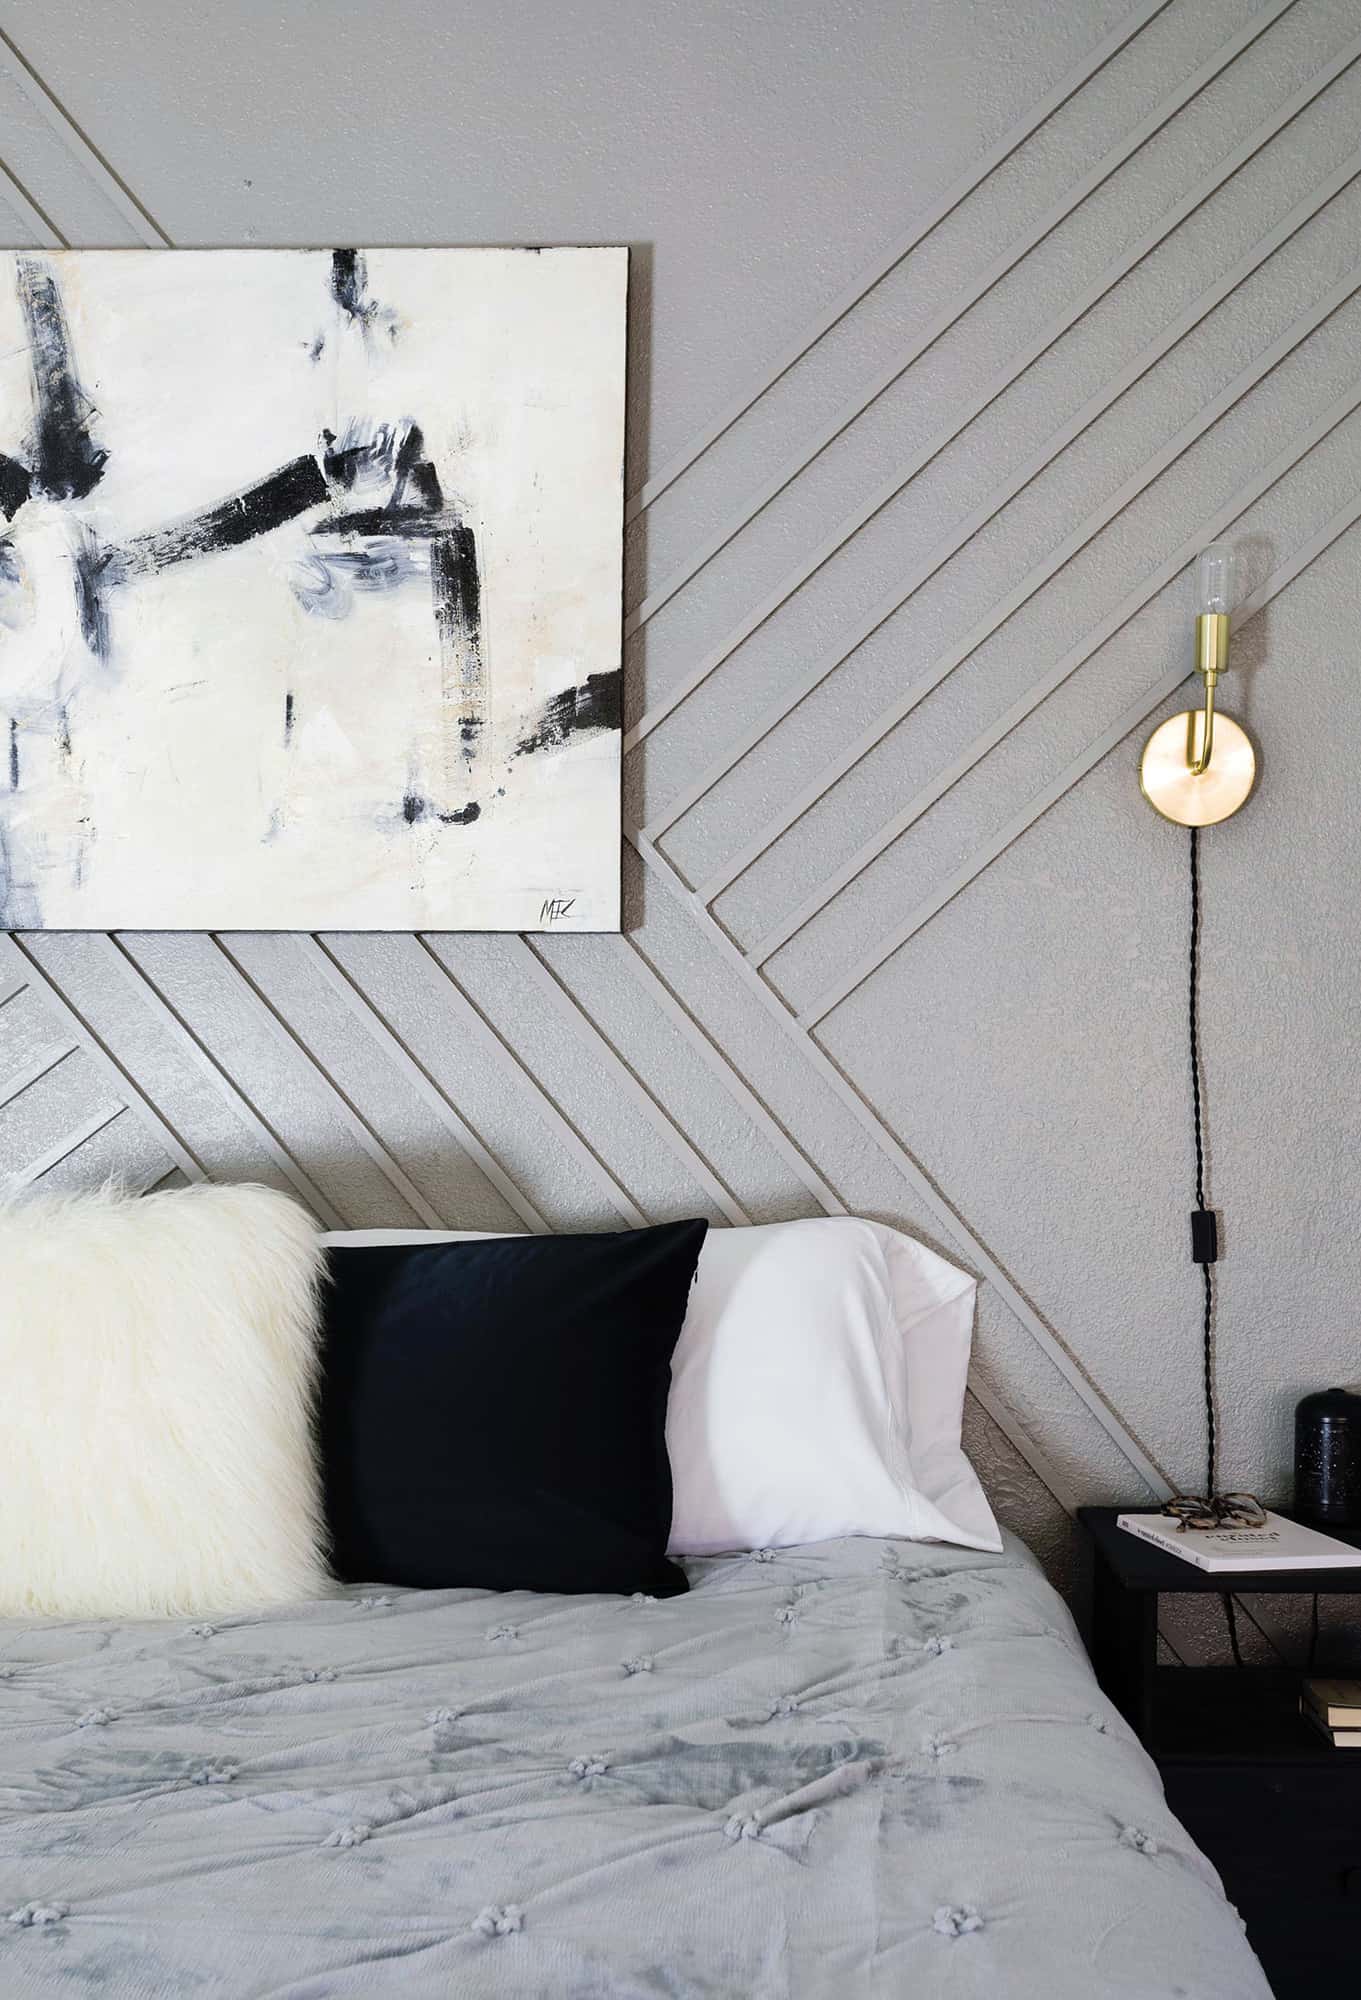
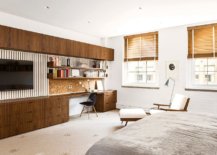
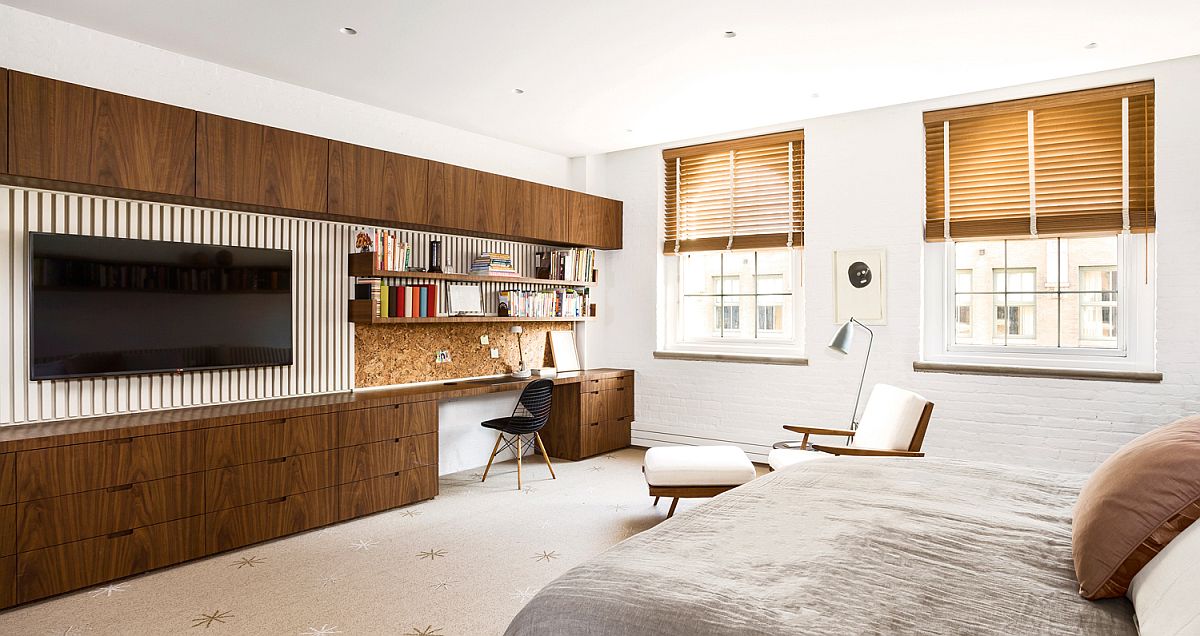
Sometimes the answer to your headboard project is not about the bed at all. By beautifying the wall that serves as a backdrop, you have everything you need to set the stage. While the DIY trim accent wall featured below isn’t a super-quick solution, it’s easier than it looks. Not to mention, it definitely packs a powerful punch with its retro-modern aesthetic, and any bed that backs up to it will get the spotlight it truly deserves. Check out A Beautiful Mess for all of the details.

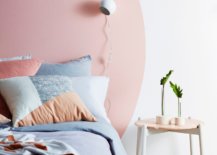
As we’ve seen above, sometimes it’s all about the wall. And sometimes the exact embellishment you’ve been searching for is paint! Painted headboards are some of today’s most popular headboard alternatives, especially in modern spaces. Creating simple geometric forms such as rectangles and arches can be the perfect strategy for framing your bed. Featured at Apartment Therapy, this painted headboard proves that a little color goes a long way:

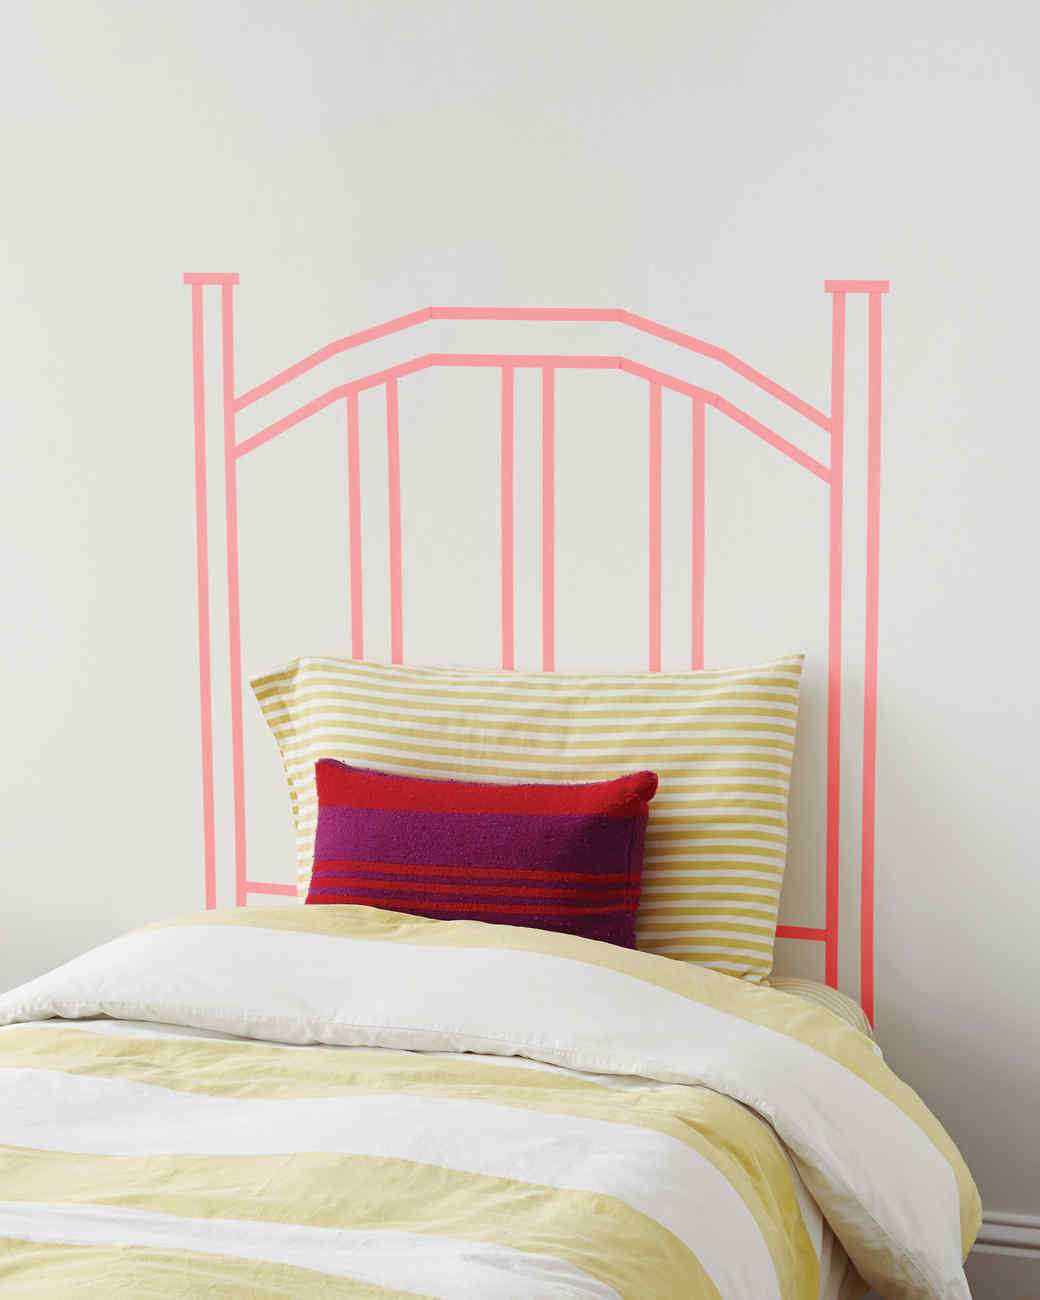
For a wall solution that’s less permanent than paint, consider washi tape. Featured at Martha Stewart, this washi tape headboard is a commitment-free, faux headboard that’s as easy to remove as it is to create. [photo by Angie Cao]

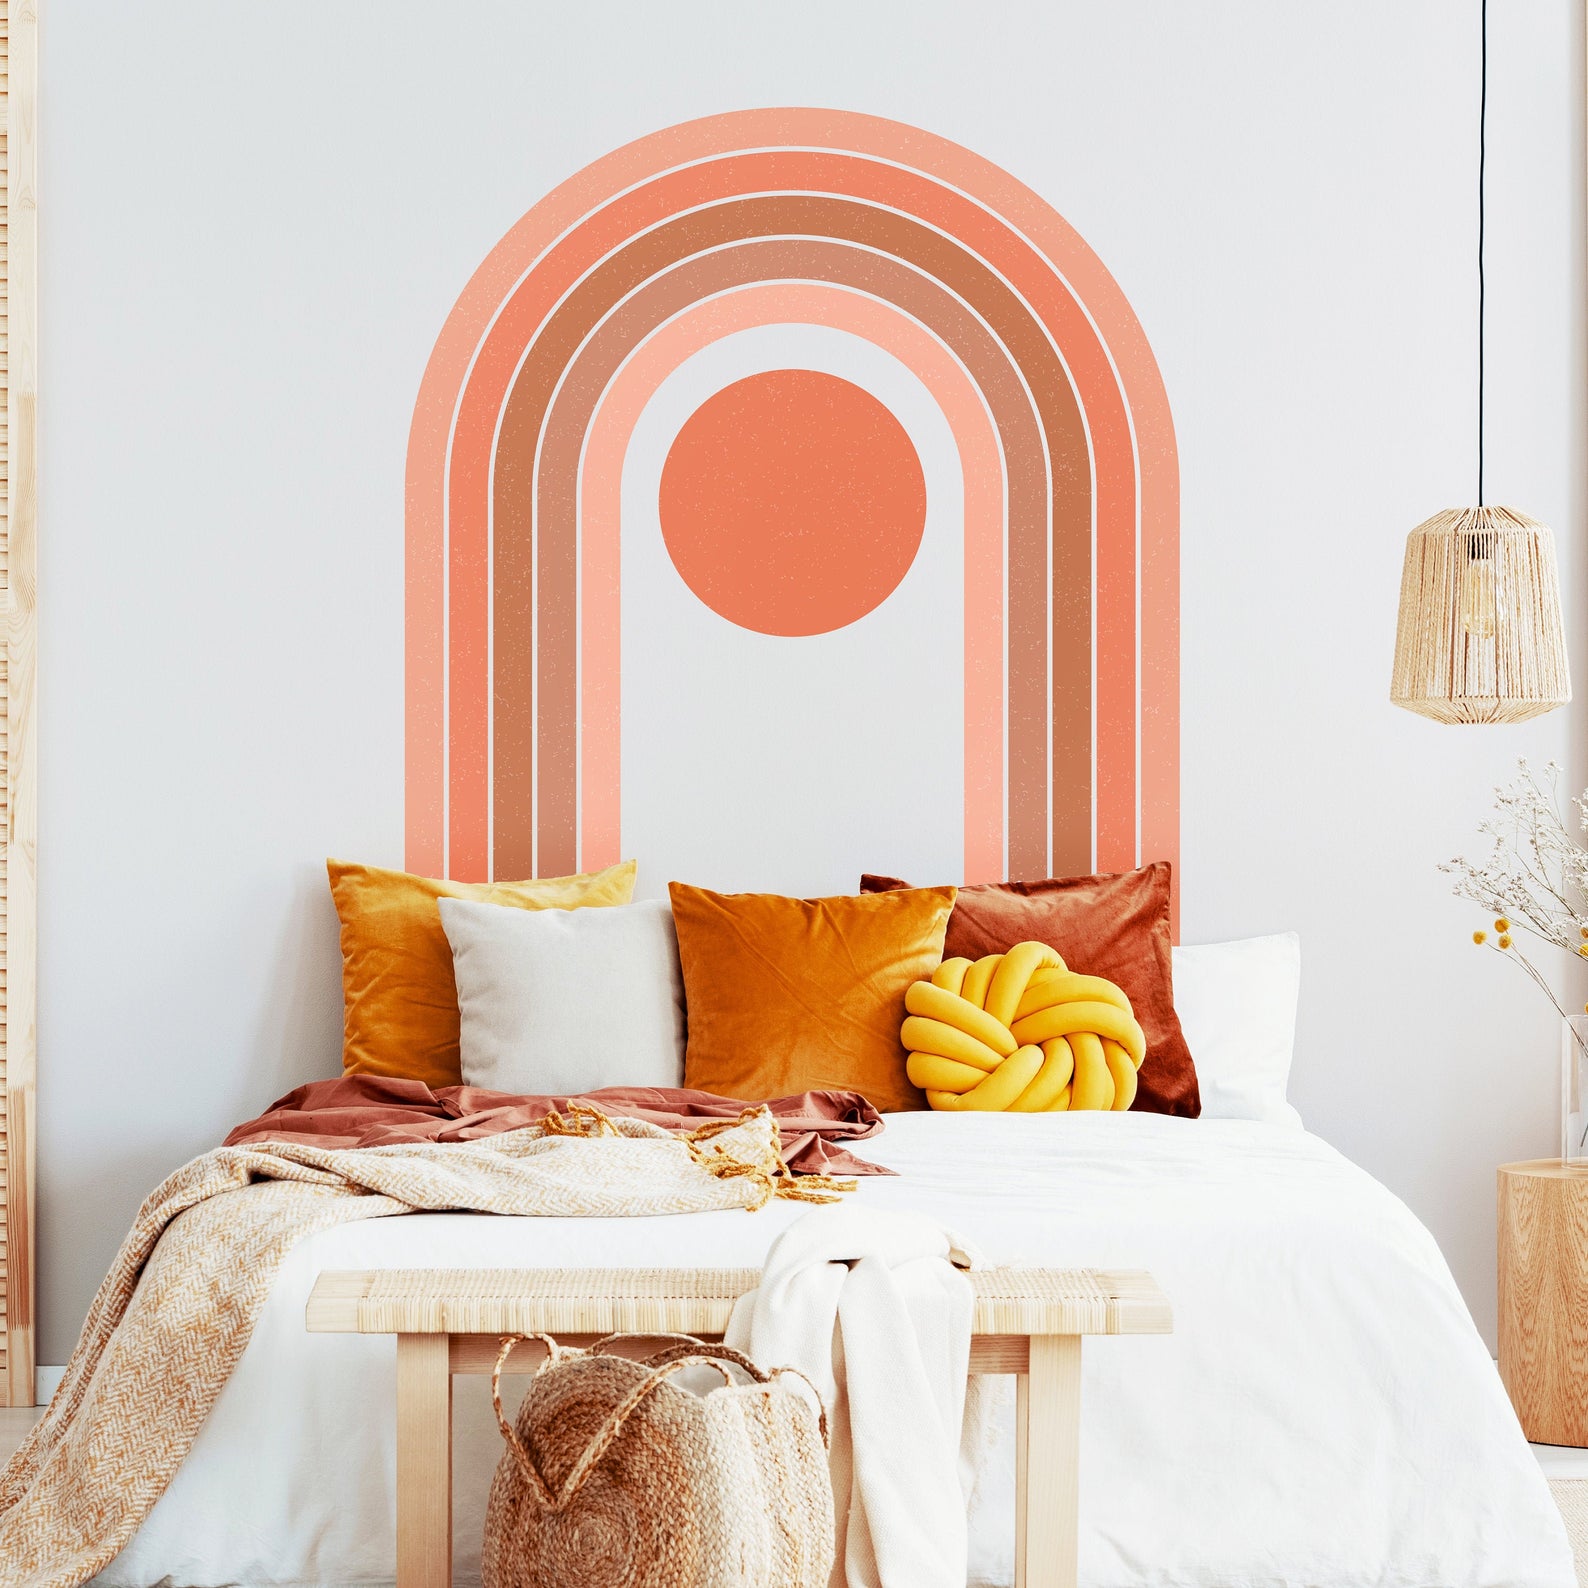
Last but not least, don’t forget about headboard decals that can easily be affixed to the wall. This large rainbow wall sticker from Etsy shop Lilin Momo Designs is perfectly on trend with its rainbow motif and terracotta gradient of color:

Display Something Interesting

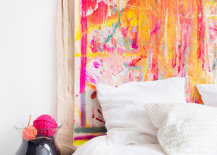
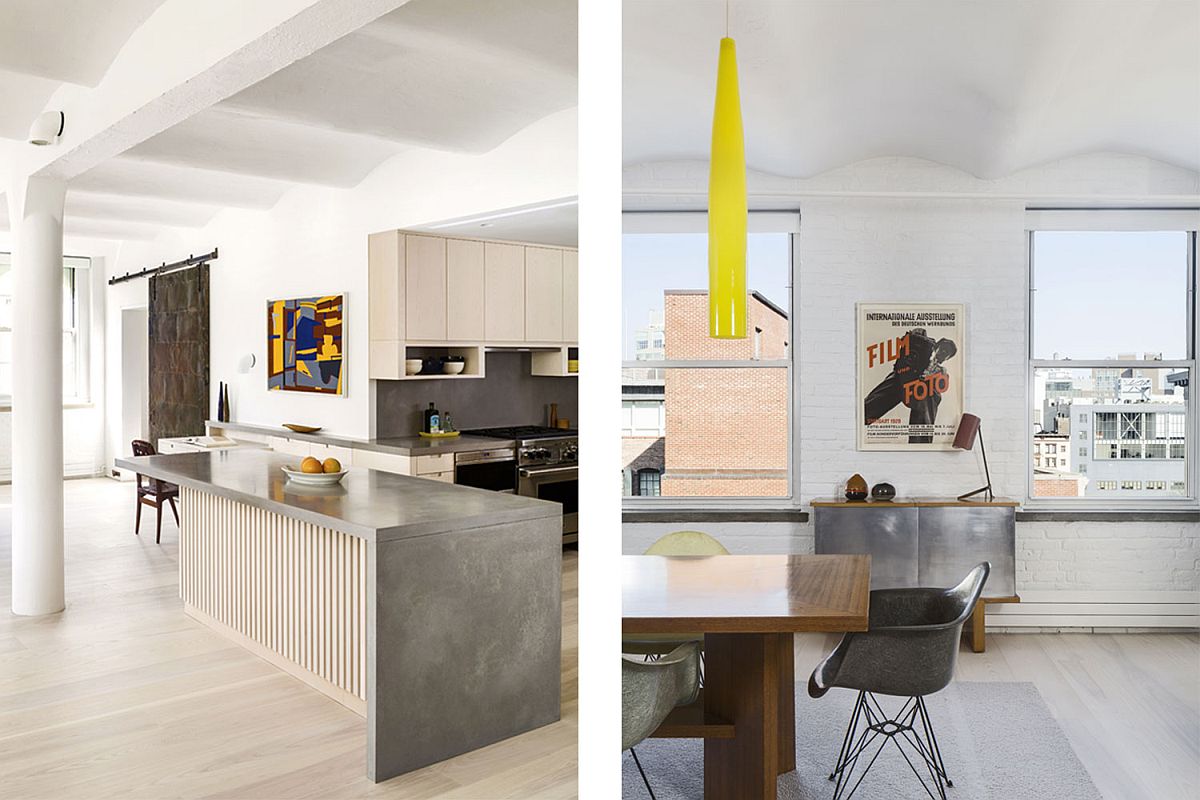
How’s it hanging?! As you’ll see with the featured headboard ideas below, hanging an eye-catching item (or collection of items) can serve as a creative solution to your headboard conundrum. Let’s start with the power of abstract art. When painted on a piece of canvas in vivid colors, the look is substantial, dramatic and fun! [photo by Brittany Ambridge, featured at SF Girl by Bay]

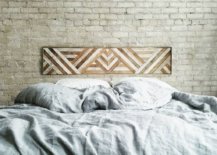
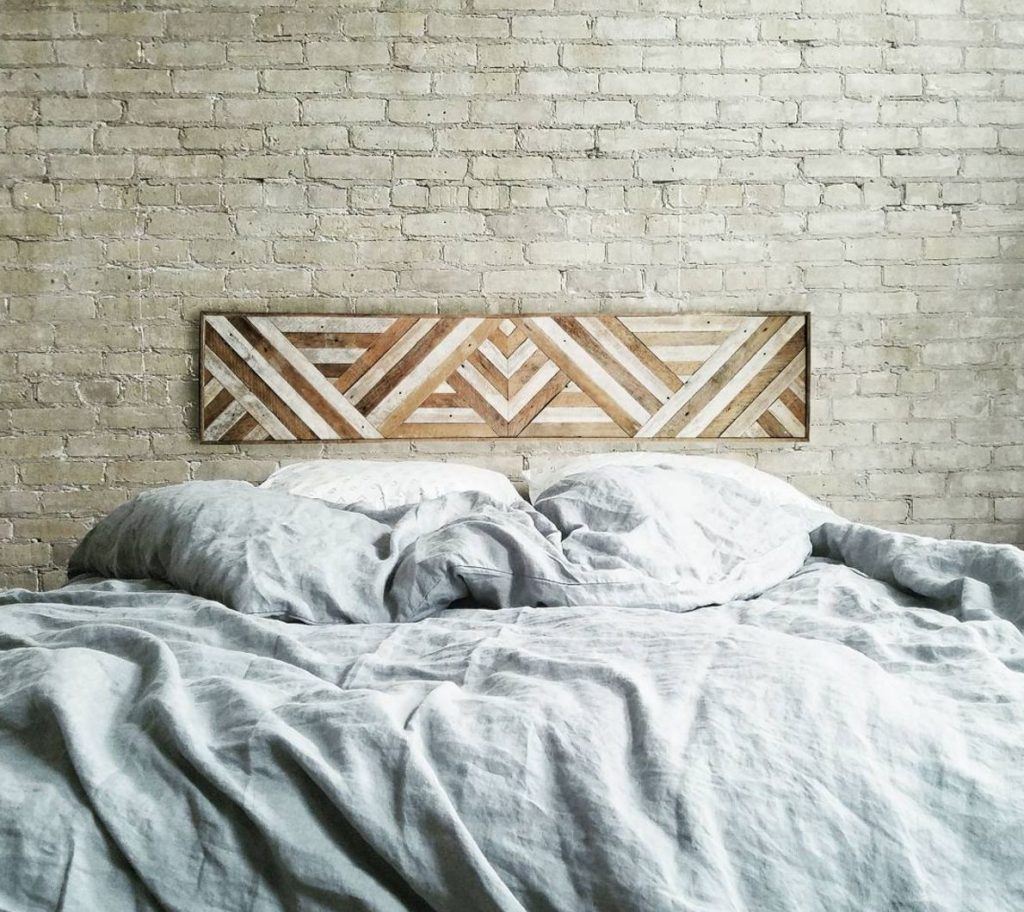
A wood wall art project is a great way to craft a special headboard that showcases your creativity. If you’re not in a DIY mood, you can even purchase a piece of wooden art to get the job done. In the next featured image, we see the work of Etsy shop Eleventy One Studio. Stay tuned for more on headboard alternative purchases later in the post!

How clever is the wooden rod/throw pillow approach, shown below?! The key is making sure the pillows are secure. In this case, durable loops made of a sturdy material get the job done. [photo by Whitney Leigh Morris, featured at Domino]

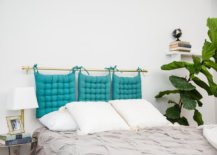
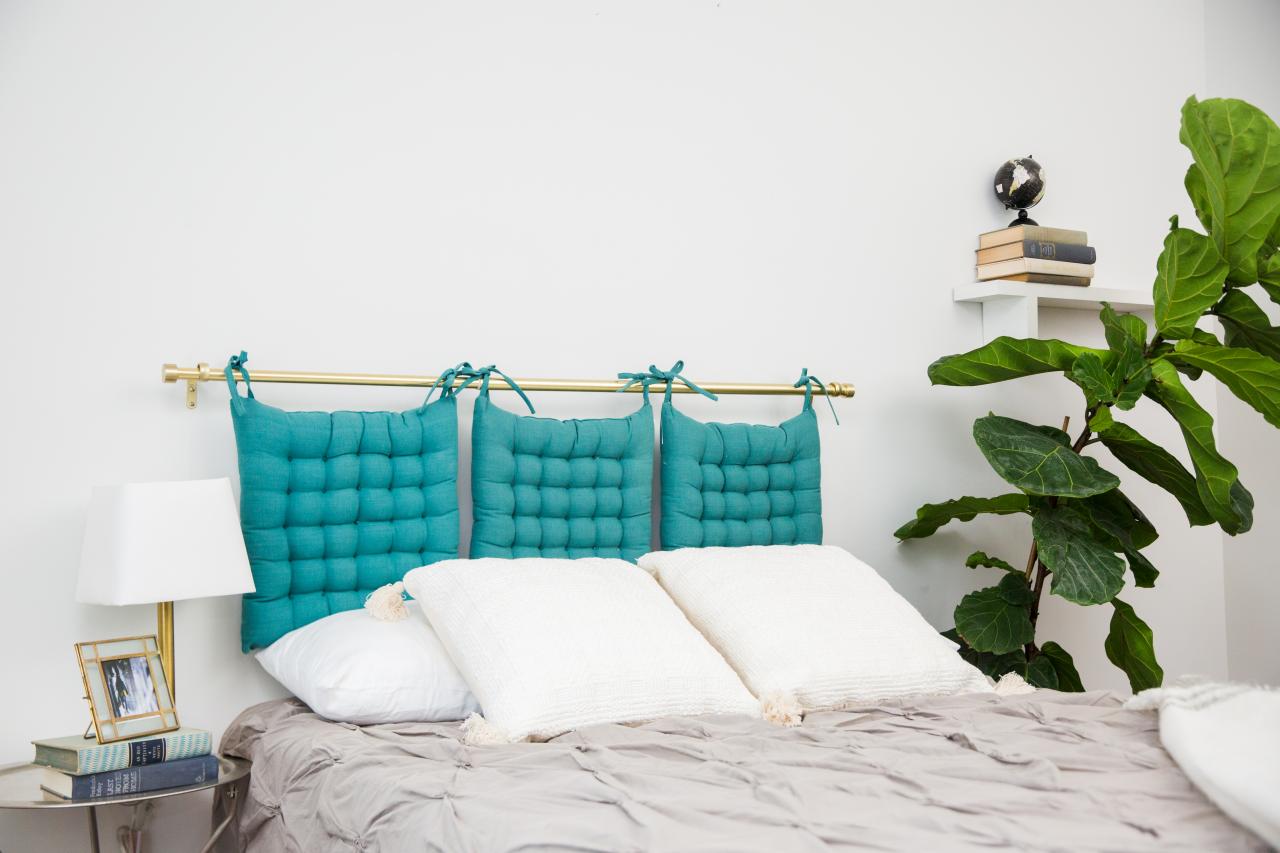
Here’s another take on the project, this time featuring a gold-toned rod and a series of chair pillows that can easily be tied in place. Vivid teal serves as the perfect pop of color in this all-white space. Check out the DIY details at HGTV:

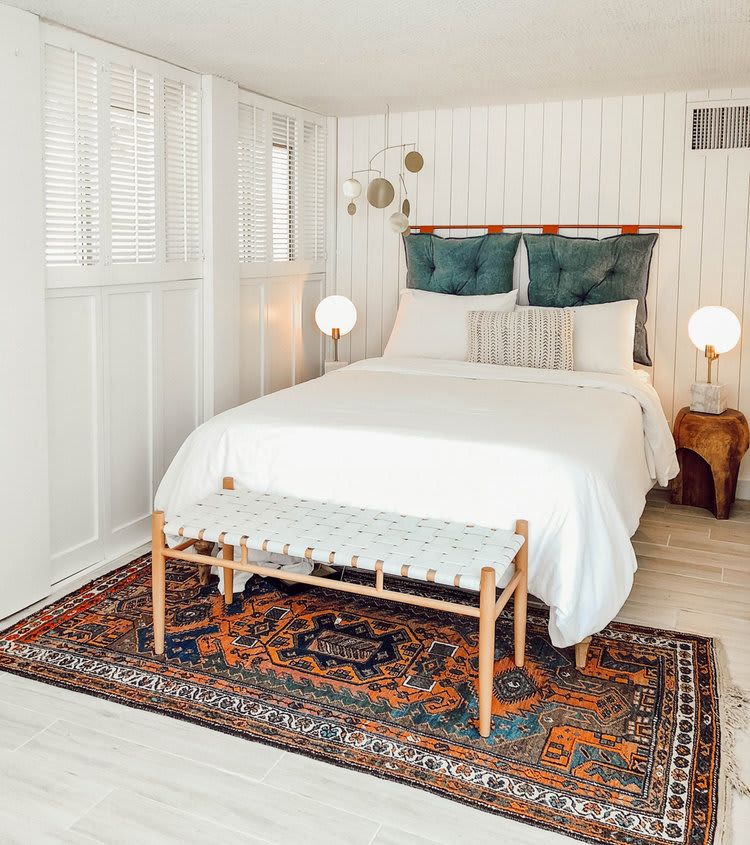
This DIY woven headboard created by Sarah Sherman Samuel involves an easy arrangement of jute placemats and petite rugs. Small nails get the job done, and the result is earthy modern style at its finest:

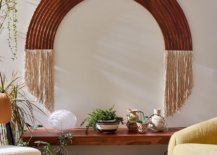
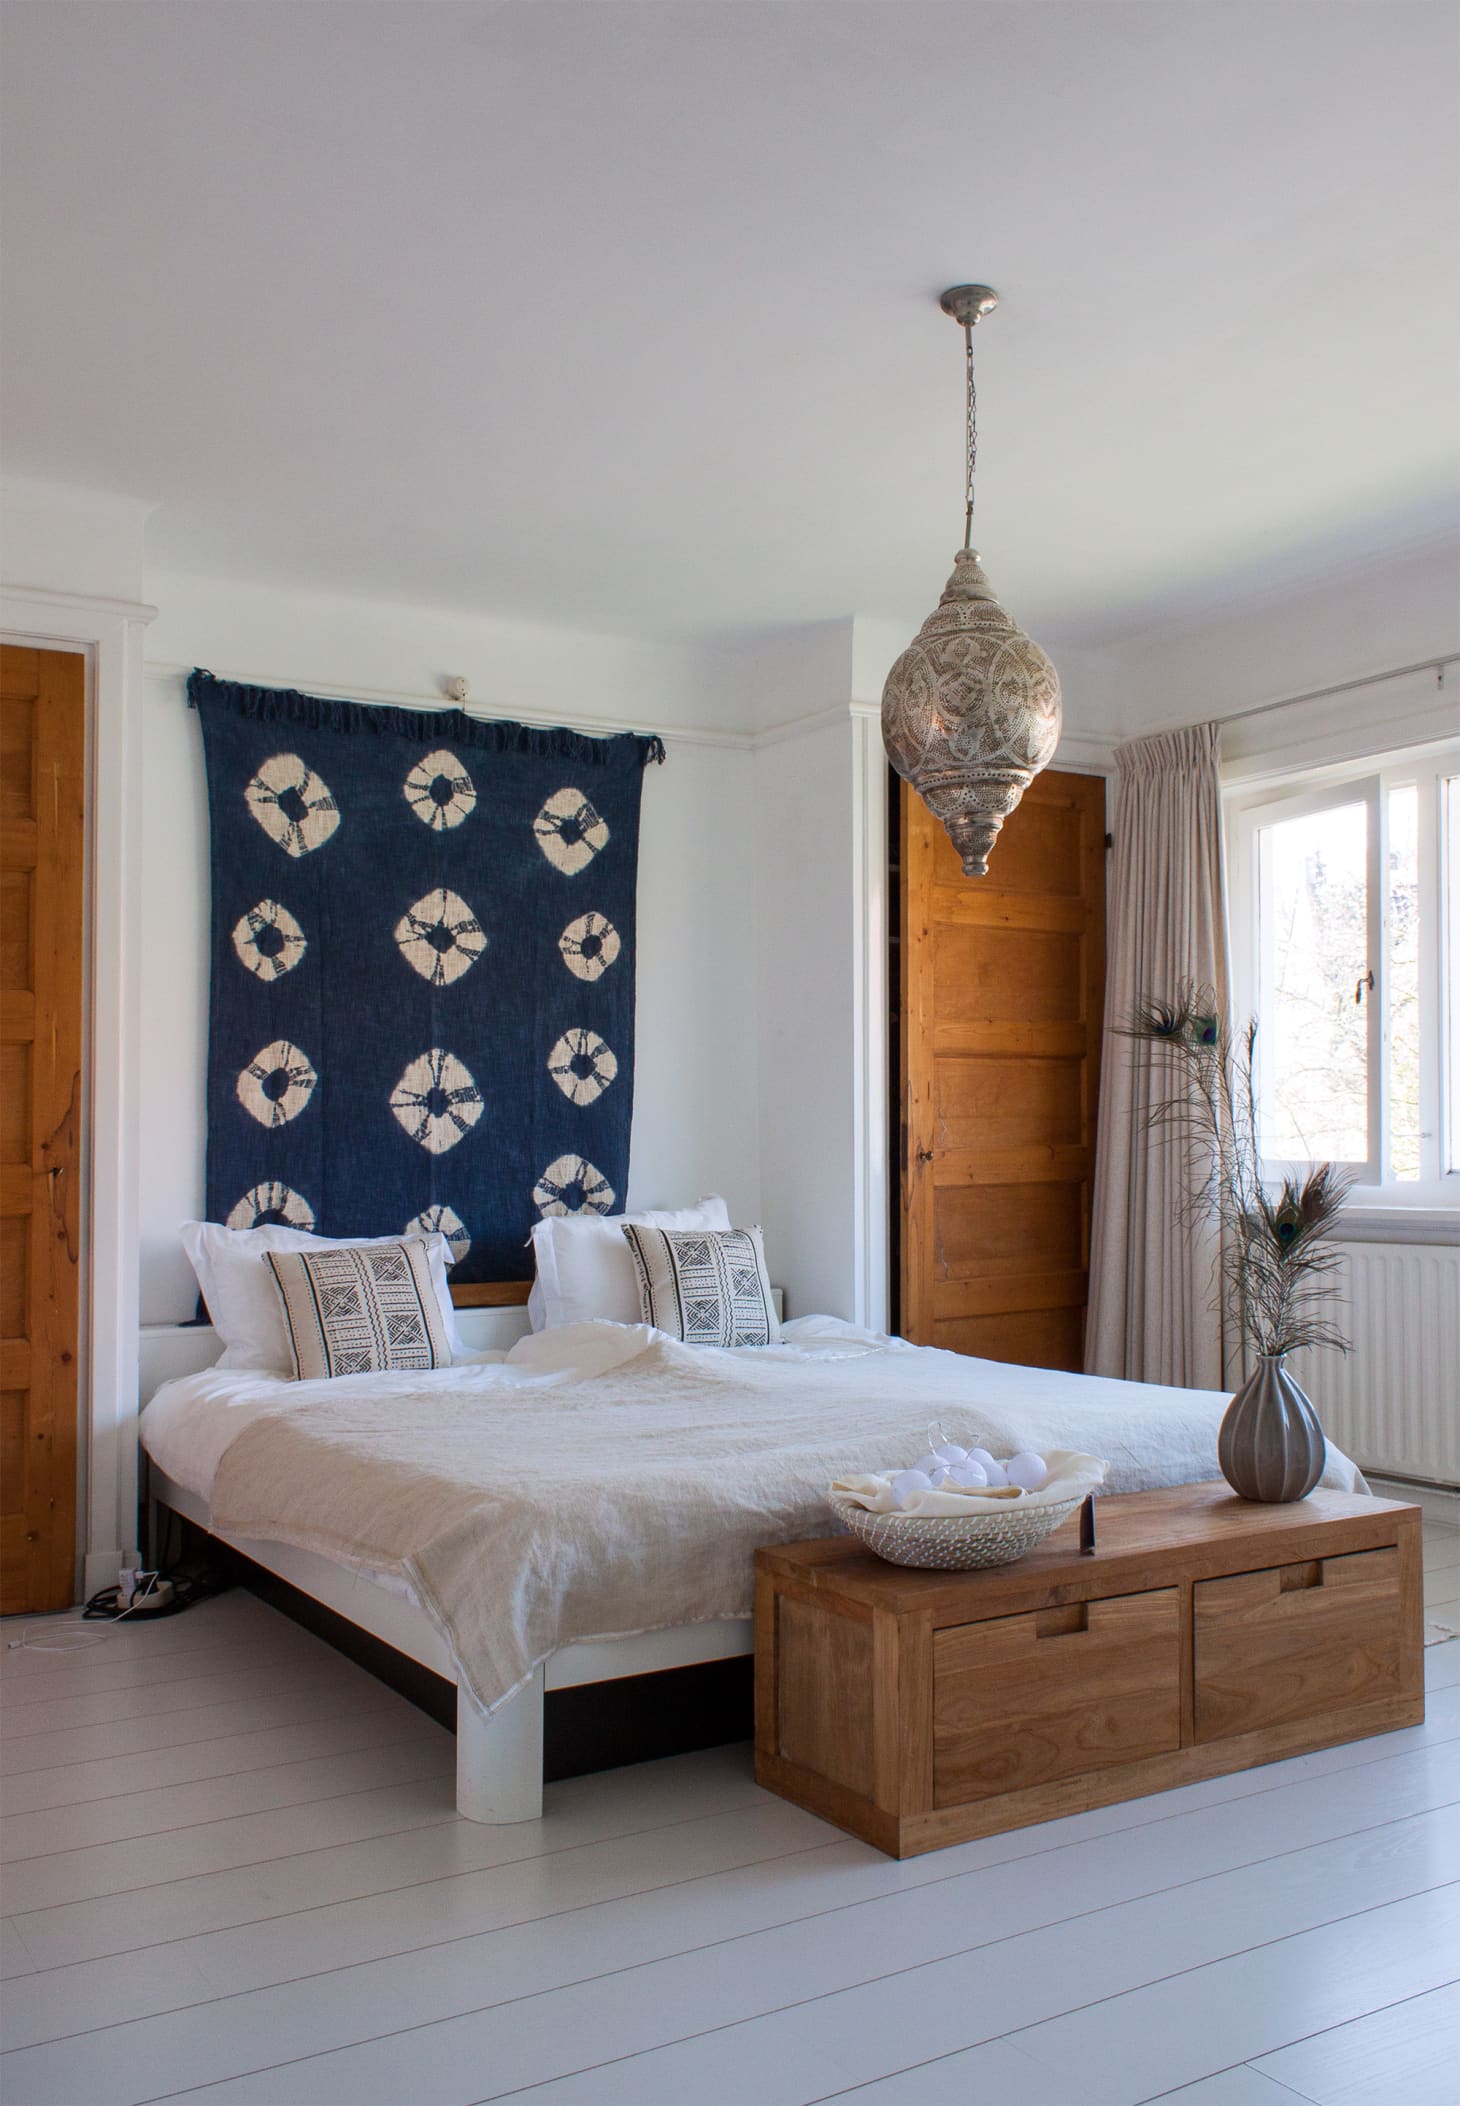
Last but not least, consider hanging a tapestry above the bed for an instant dose of color and pattern. Whether you tack it to the wall or enlist the help of a curtain rod, be prepared for a grand finish that serves as a bold statement. In this particular project, the length of the tapestry creates a sense of height by drawing the eye upward. [photo by Winkie Visser, featured at Apartment Therapy]

Make a Strategic Purchase

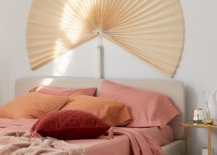
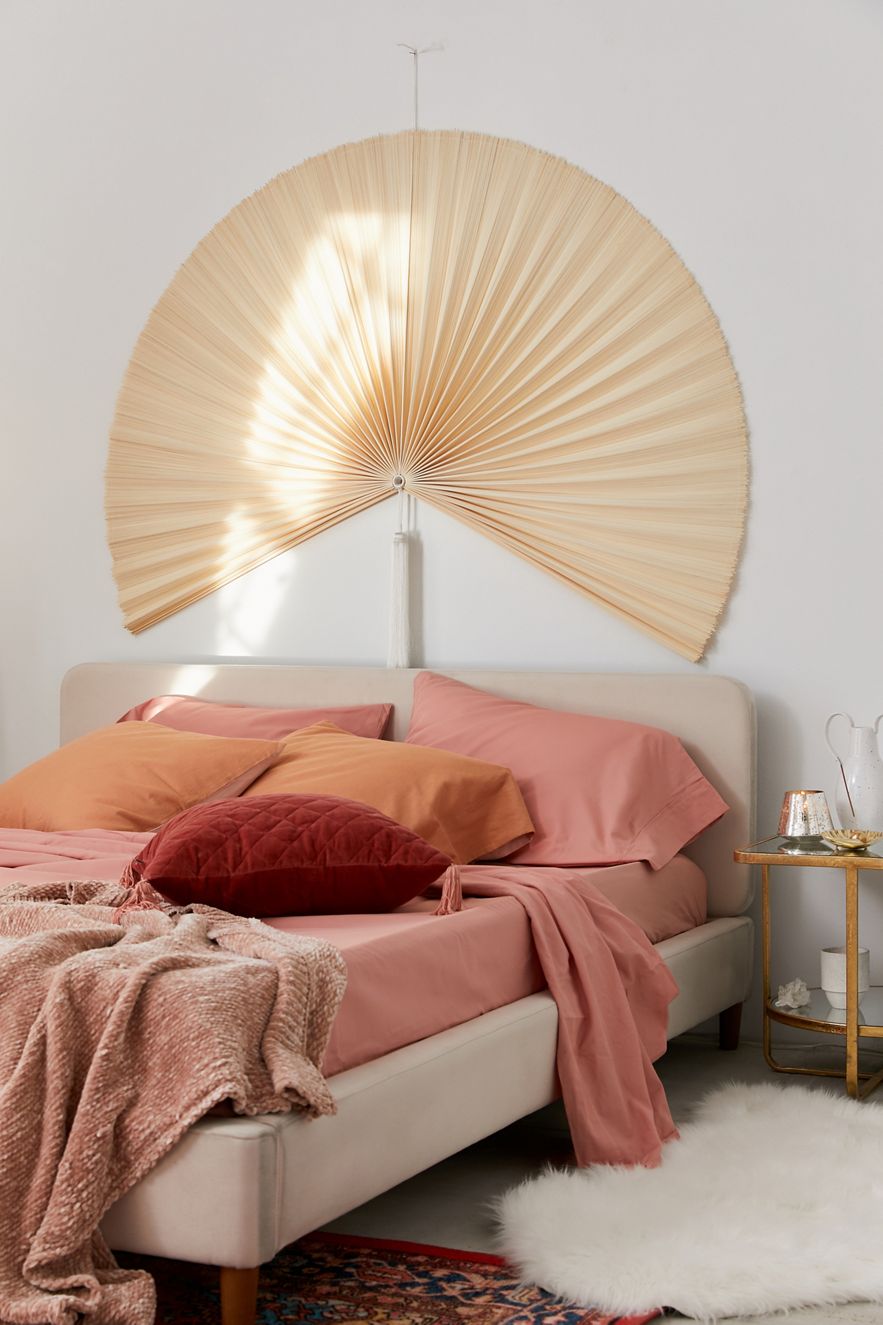
For time-saving headboard alternatives that create a finished look, check out this collection of interesting finds that can be purchased with the click of a keyboard. All are wonderfully unexpected, beautifully designed, and from Urban Outfitters. First up: a giant fan that channels a retro tropical feel. Say hello to the bamboo Palmera Fan Headboard, which has received stellar reviews as an exquisite statement piece:

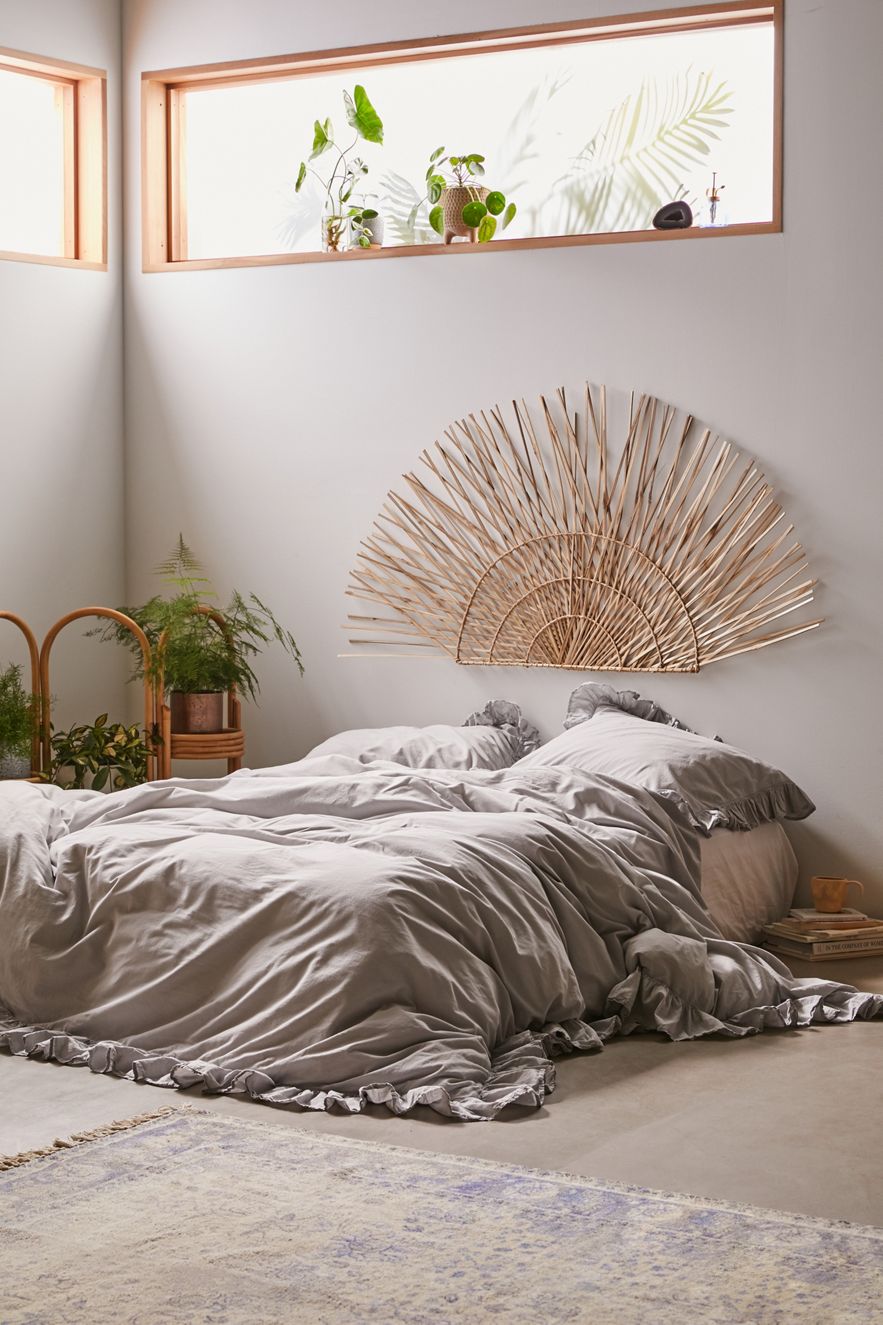
For an earthier take on the item above, check out the Woven Fan Headboard, which is also crafted from bamboo, yet embellished with iron framing.

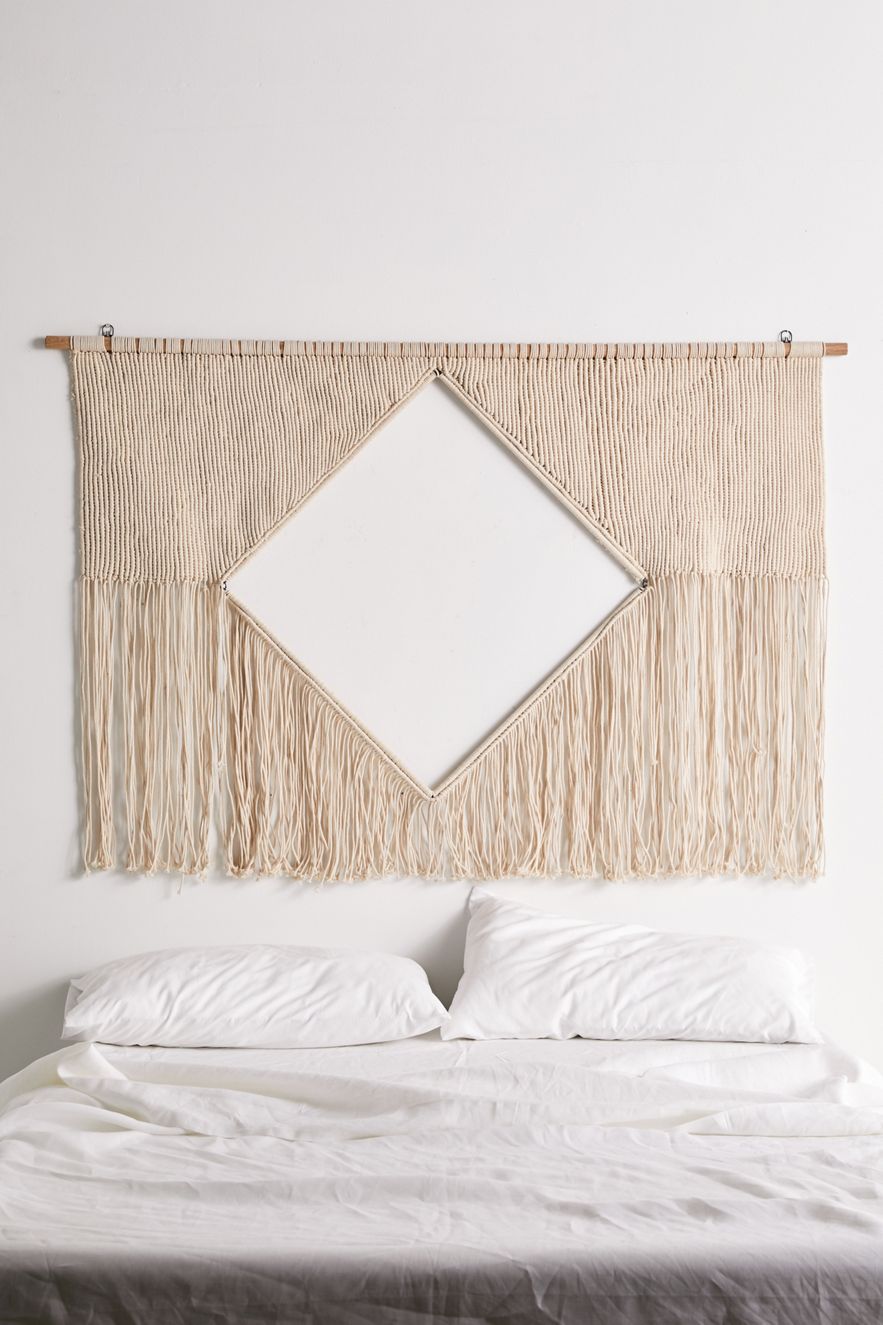
Wall hanging, anyone?! The Semara Macramé Headboard serves up a big dose of geo style, which makes it a fabulous focal point to hang right above the bed:

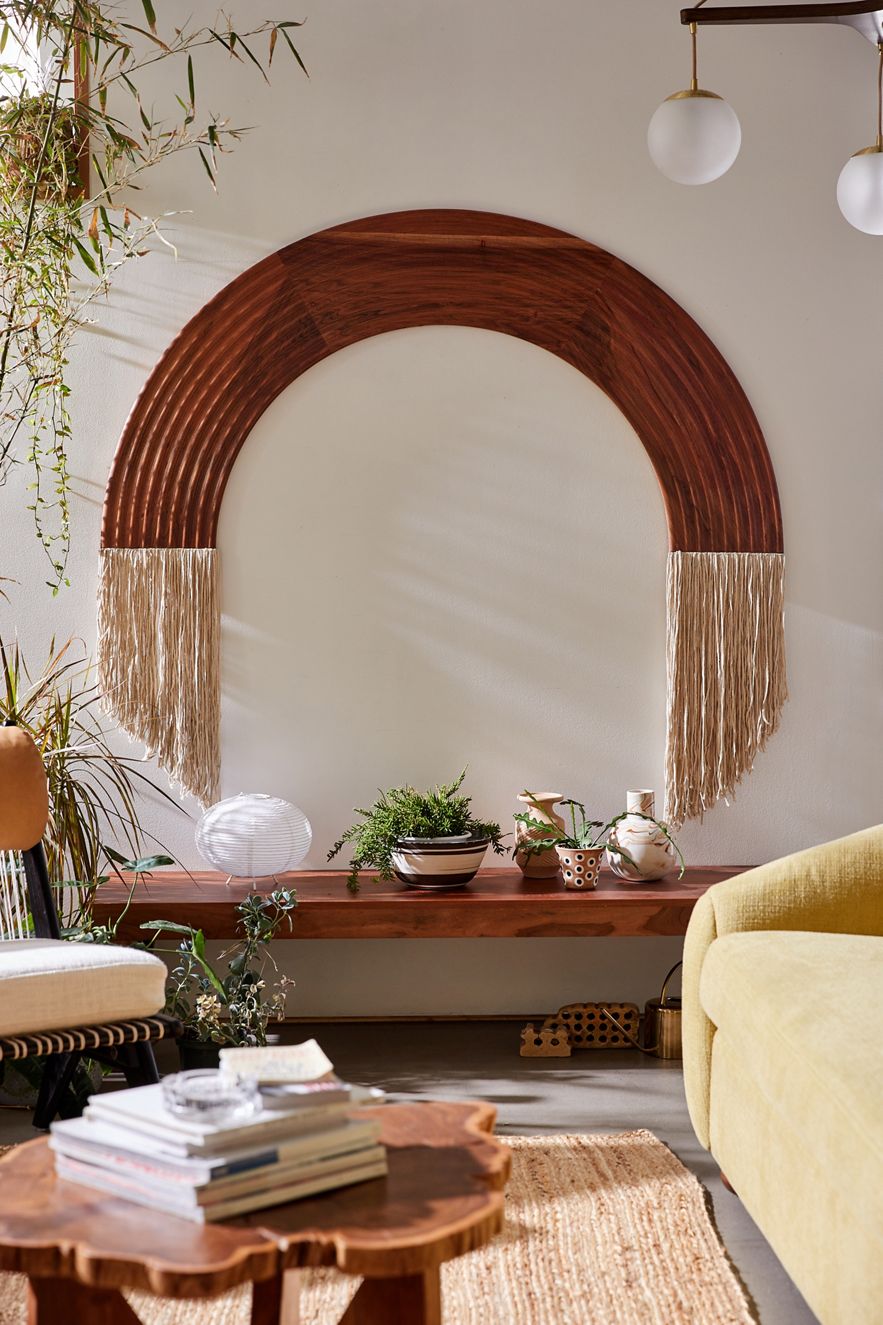
Last but not least, the Yoji Arc Headboard is so fabulous, it can be used in any room of the house. As you might guess, we’re drawn to its modern headboard possibilities. Crafted from ridged acacia wood, this piece is also embellished with fringe, creating a “mixed materials” feel that’s very on trend.

If any of the headboard purchases above are no longer available, they can still serve as helpful reminders that wall art options such as a large fan or a striking wall hanging are effective headboard alternatives. Opt for finds that match the scale of your bed. In other words, don’t be afraid to go big.

As you get ready to embellish your sleeping space, make sure to choose high-quality materials that you can truly live with. After all, they’ll be hanging right above your bed! Go for non-toxic supplies that help you breathe easier at night. On that note, cheers to a good night’s sleep in your newly decorated space. Whether you make your own headboard or buy it, the (night) sky’s the limit. Happy decorating, and thanks for reading!

You're reading Headboard Alternatives for Design Lovers, originally posted on Decoist. If you enjoyed this post, be sure to follow Decoist on Twitter, Facebook and Pinterest.


from decoist https://ift.tt/34WERQe

0 comments:

There are few cities in the world where space is as much of a premium as in New York City where there is more vertical space to explore tha...

White, Light and Modern-Industrial: Chic Renovated Lower Manhattan Loft

There are few cities in the world where space is as much of a premium as in New York City where there is more vertical space to explore than actual square footage. It is in such congested environment that this beautiful renovated loft in Lower Manhattan sits as its new interior combines its industrial past with modern ergonomics. The transition from the old to the new is seamless even as the original vaulted concrete ceiling, wooden beams, steel-clad fire door and other features have been carefully preserved and enhanced. Revamped and given a brighter, new lease of life by Specht Architects, the loft now feels more cheerful as it embraces a bone-white ash wood paneling and white color palette.

Renovated Greenwich Street Loft with vaulted concrete ceiling and a new design plan

The entry hall of the apartment acquires a unique look with custom vertical battens that line the walls and add textural contrast to the space. Despite its industrial backdrop and modern functionality that came in thanks to the makeover, it is the homeowner’s love for mid-century modern decor and art work that defines the small living area, dining space and kitchen. This is also expressed in the gorgeous, custom wooden cabinetry in the expansive master bedroom. Large windows, a long hallway and smart ventilation systems ensure that there are no dull corners inside this modernized NYC loft. [Photographer: Andrea Calo]

Brilliant use of colorful pendant lights in the modern industrial Manhattan loft
Large niche inside the apartment contains the space-savvy and stylish modern kitchen
Niche next to the fireplace and the window is used to store firewood
Old industrial heritage of the NYC apartment has been delightfully combined with modern touches
Original vaulted concrete ceiling and a steel-clad fire door of the revamped New York City apartment

Light was a primary issue with this renovation of an industrial loft space in Lower Manhattan. We maintained much of the open “workshop floor” character of the space, while creating a bright and comfortable kitchen, entry hall, and bedroom adjacent to the large living and dining areas.

Plaster walls and a white and ash color scheme give the interior a modern makeover
Vertical battens shape the entry of the Manhattan loft
Beautiful and space-conscious way to decorate the long hallway without hampering flow of light
Fabulous custom wooden cabinets and wardrobe along with entertainment unit for the modern bedroom

You're reading White, Light and Modern-Industrial: Chic Renovated Lower Manhattan Loft, originally posted on Decoist. If you enjoyed this post, be sure to follow Decoist on Twitter, Facebook and Pinterest.


from decoist https://ift.tt/3lzGJEu

0 comments:

A balance between the old and the new often veers towards one of the sides more prominently. Classic, stylish and filled with neutral hues t...

Traditional Home in White Given a Modern Twist with Restrained Color Palette

A balance between the old and the new often veers towards one of the sides more prominently. Classic, stylish and filled with neutral hues that are cleverly intertwined with pops of bod color, this fabulous home feels as traditional as it does modern. Even from the outside one can easily sense the timeless appeal of the residence and a roof with terracotta tiles adds to this sense of uniqueness draped in history. Window shutters in bluish-gray bring the outdoors inside while large windows bring ample natural light into every room of the house. Fabulous drapes in every room of the house add color and print to the white spaces and add contrast to an otherwise muted setting.

Traditional home given a modern update with a picture-perfect facade that is a showstopper

Designed by Lissa Lee Hickman, the home makeover subtly adds an air of luxury to an otherwise traditional home where everything is restrained and polished. The kitchen and dining area become the new heart of the house and the color scheme remains largely unaltered from the living space to the kitchen. Exquisite blue accents make the biggest impact in the living room while shades of gray usher contrast into the kitchen. A picture-perfect home renovation!

Terracotta tiles and classic features preserve the traditional appeal of this home
Traditional kitchen and dining area of the remodeled home in white with gray accents and drapes
Traditional outdoor sitting space and poolside deck with a lovely pool house next to it
Transitional bedroom in white with mirrors above the nightstand that bring symmetry to the interior
Blue accent bar chairs for the modern kitchen in white with plenty of storage space

A well-designed home should be equal parts beauty, functionality, and comfort. In achieving this result, my first and most important aspect of the creative process begins with actively listening to the client’s needs. My goal is to design timeless spaces that respect not only the architectural character of the home but also the client’s taste…

Classic bathroom in white with a beautiful black chandelier and a standalone white bathtub
Design that picture-perfect dining room in white with drapes that feature light blue print and plenty of natural light
Gorgeous sitting room in white with ample natural light and a window that shapes the backdrop
Modern traditional living room of the revamped home in white with gorgeous blue accents

You're reading Traditional Home in White Given a Modern Twist with Restrained Color Palette, originally posted on Decoist. If you enjoyed this post, be sure to follow Decoist on Twitter, Facebook and Pinterest.


from decoist https://ift.tt/32DNHQg

0 comments:

We know that photos can be an amazing source of design inspiration, so this article may contain affiliate links that will direct you to a pa...

DIY Fairy Light Lanterns That Perfectly Blend Rustic and Chic

We know that photos can be an amazing source of design inspiration, so this article may contain affiliate links that will direct you to a particular decor item. Clicking on a link may result in a portion of proceeds being paid to www.decoist.com

The peaceful summer nights may be coming to an end but that doesn’t mean you can’t have warm fairy light lanterns in your home year-round. While fairy string lights can be a cheap and simple accessory, the hard part is finding the perfect lantern to show them off in. Don’t worry though, we at Decoist have created a DIY lantern that is simple, chic, and easy to customize to whatever your decor style is!

Take a look at how to craft your own DIY fairy light lanterns and read below for step-by-step instructions, quick product links, and pro-tips.

Supply List:

  1. 1/4 cup water
  2. 1/2 cup cornstarch
  3. Large bottle of Elmer’s Clear Glue
  4. Roll of yarn — You can choose whatever color you want! We chose coral color yarn for one lantern, a crisp white yarn for our second lantern, and jute twine rope for our third lantern
  5. Balloon
  6. Fairy string lights — This six-pack is battery-operated, comes in multiple color options, and has a 7ft or 10ft option depending on the size of your lantern and how bright you want it to be! We chose the warm white in the 7ft length.
  7. Large bowl and fork
  8. Pencil

Step #1:

Start by preparing your glue mixture. Use a fork to mix 1/4 cup of water, 1/2 cup cornstarch, and the entire bottle of glue in the large bowl. Make sure it ends up with a smooth texture. You want the cornstarch the be completely dissolved and for the mixture to have no white lumps.

Pro Tip: We used Clear Elmer’s Glue to ensure that the color of our yarn didn’t change

Step #2:

Take your balloon and blow it to the desired size. Once it’s the size you’re comfortable with for the lantern, spray the balloon with PAM cooking oil or cover with vaseline. This will ensure that the string doesn’t stick to the balloon. When the balloon is covered, place it on top of a plastic cup with the tied-end facing up.

Step #3:

Unwrap your ball of yarn and submerge it entirely in the glue mixture for a few minutes—we used a coral color yarn, a crisp white yarn, and jute twine rope for our three lanterns. Once all the yarn is covered in the glue mixture, tie one end of the string tight around the top of the balloon.

Step #4:

Begin to pull lengths of the string out of the glue mixture while wiping off any excess glue. Start by wrapping the yarn 5-6 times vertically around the balloon. Once you’ve finished your vertical wrapping, place the balloon back on the cup and spin the balloon as you wrap horizontally, diagonally, or any whichever way you please!

Pro Tip: You might be tempted to switch between vertical and horizontal wrapping at first, but a few vertical wraps to start will give your lantern extra stability. You can also circle the balloon mouthpiece a few times for extra support.

Step #5:

Let the yarn and balloon dry for 24-48 hours.

Step #6:

Once dry, gently poke the balloon through the lantern holes using the rubber eraser end of your pencil. This will help to separate the yarn from the balloon. Once you’ve separated the yarn and balloon enough, then go ahead and POP! the balloon.

Step #7:

Pull out the pieces of broken balloon and then, using an Exacto knife, shave off any pieces of dried glue hanging from the lantern.

Step #8:

Insert your fairy string lights through the lantern and enjoy! These can even be made into pendant light shades. Simply make sure to leave a hole large enough for a pendant kit like this set or four matching ones from Amazon to go through. An Edison bulb will add an extra vintage feel. Then you can hang it over your kitchen table, island, or any room in the house!

Pro Tip: Create a circle with one end of your fairy lights. That will stop them from poking out the other side as you feed the lights through.

These round lanterns can be hung inside or outside, laid on the ground to illuminate a path, or placed on a bookshelf or fire mantle. For extra protection outside, spray the entire lantern with a clear Rustoleum lacquer spray. Share where you decided to place them in your home by connecting with us on Facebook, Instagram, or Pinterest!

three different sized rope lanterns sitting on table

You're reading DIY Fairy Light Lanterns That Perfectly Blend Rustic and Chic, originally posted on Decoist. If you enjoyed this post, be sure to follow Decoist on Twitter, Facebook and Pinterest.


from decoist https://ift.tt/31zdgmd

0 comments:

There are many different routes one can take when it comes to home renovation. Many in recent times prefer he idea of just adding a rear ext...

Timeless Chic: Sensible Renovation of Historic Spanish Revival Home in Santa Monica

There are many different routes one can take when it comes to home renovation. Many in recent times prefer he idea of just adding a rear extension to the existing home while keeping much of the original home as unaltered on the outside as possible. On other occasions a home simply demands an extensive makeover that completely alters its interiors and gives it a whole new, modern vibe. But this gorgeous home in Santa Monica finds the perfect balance between the old and the new as the creative folk from Studio Allen Architects brought restrained modernity to a timeless Spanish Revival style home. The fusion veers more towards the classic than modern and feels just picture-perfect!

Front facade of the Spanish Revival home in Santa Monica that was sensibly renovated by Studio Allen

Many of the original features of the home that give it the Spanish Revival style have been improved while modern ergonomics and shelving has been woven into the mix. Beautiful patterned tiles in the kitchen and around the fireplace bring color to the neutral interior while dark ceiling beams make an impact in almost every room of the house. Classic lighting fixtures elevate the unique style of the home further and a flood of natural light ensures that there are absolutely n dull corners anywhere.

Colorful use of tiles and pattern for the classic staircase inside the Spanish Revival home
Decorating the hallway beautifully with Mediterranean style windows and gallery wall
Mediterranean style living room of the Spanish Revival home in Santa Monica that has sensibly renovated
Living room of the home with open shelves, closed cabinets and exposed wooden beams
Dark ceiling beams, custom built-in bench with storage and large windows give this dining space a modern Mediterranean vibe

The renovation has been carried out to carefully preserve the original flavor of the house and the floor plan was altered to meet the demands of a more modern lifestyle. Balanced, charming and filled with brilliant yet curated pops of color, this is a renovation that is one-of-a-kind. [Photography: Joe Schmelzer]

Pattern-filled tiled backsplash and a gorgeous blue island bring color into this kitchen with modern and Spanish influences
Closer look at the colorful tiled backsplash of the renovated kitchen
Master bathroom with modern touches of the Spanish Revival home in Santa Monica
Lovely private deck of the house with fabulous sitting space that combines casual with comfortable

You're reading Timeless Chic: Sensible Renovation of Historic Spanish Revival Home in Santa Monica, originally posted on Decoist. If you enjoyed this post, be sure to follow Decoist on Twitter, Facebook and Pinterest.


from decoist https://ift.tt/2EFCIgS

0 comments: