Brilliant Sunshine Beach House Embraces Sun, Sand and Surf with Coastal Charisma
Magical Nights in the Bamboo House Take You into Jungles of Bali!
Curved Mirrors and Timber Magic Unleashed at Spectacular Shearwater House
25 DIY Water Features for Your Garden
Space-Savvy Tiny Apartment in Poland with Mezzanine Level in Black and White
Contemporary Guesthouse in Wood and Glass Flows into the Garden
Low Carbon Footprint Countryside House Built at Just 3 Percent of Initial Budget
How to Make a Headboard: 35 Great Ideas
Cozy Modern Cottage on Norwegian Island Wraps You in Wood and Green
Colorful Fiesta Full of Spanish Flavor Unleashed Inside this Chic Melbourne Home
Tips for Planting a Succulent Garden
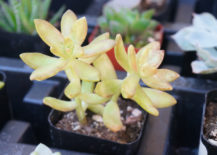
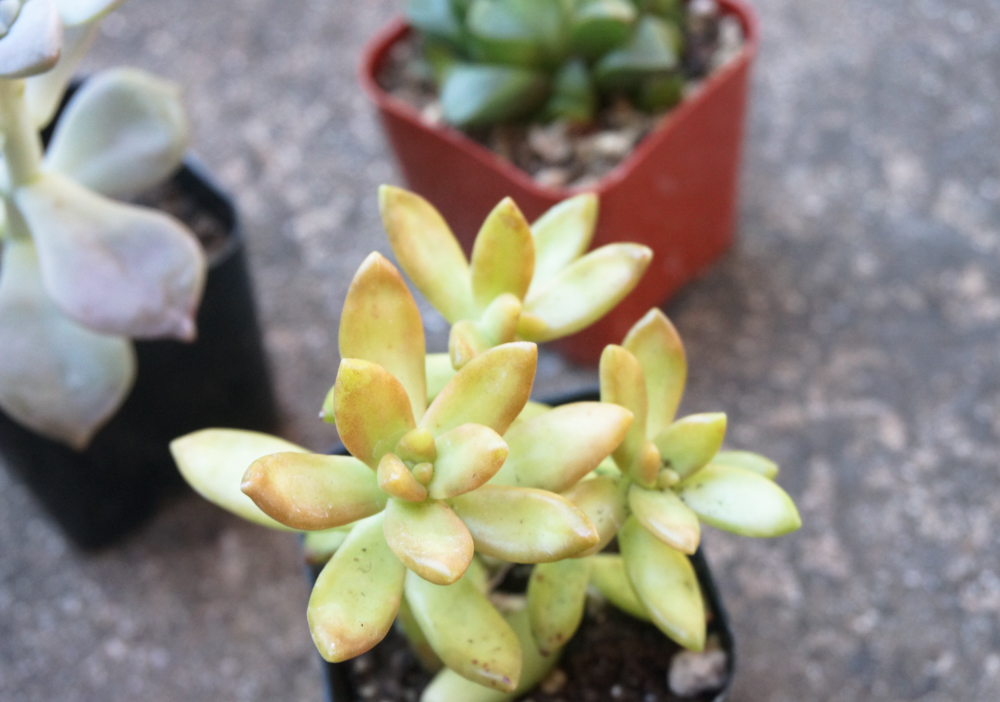
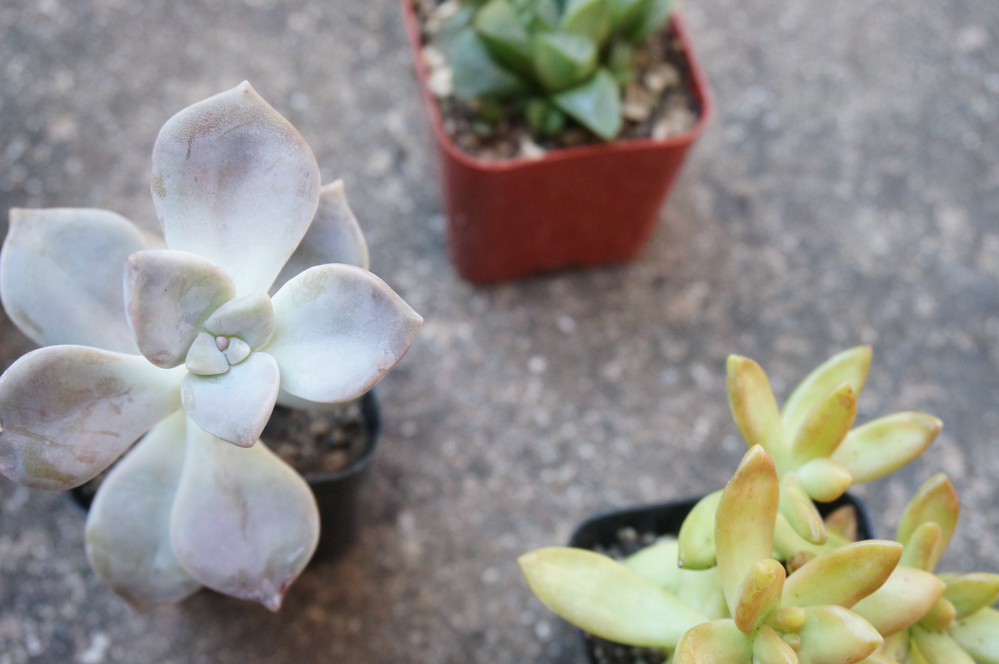
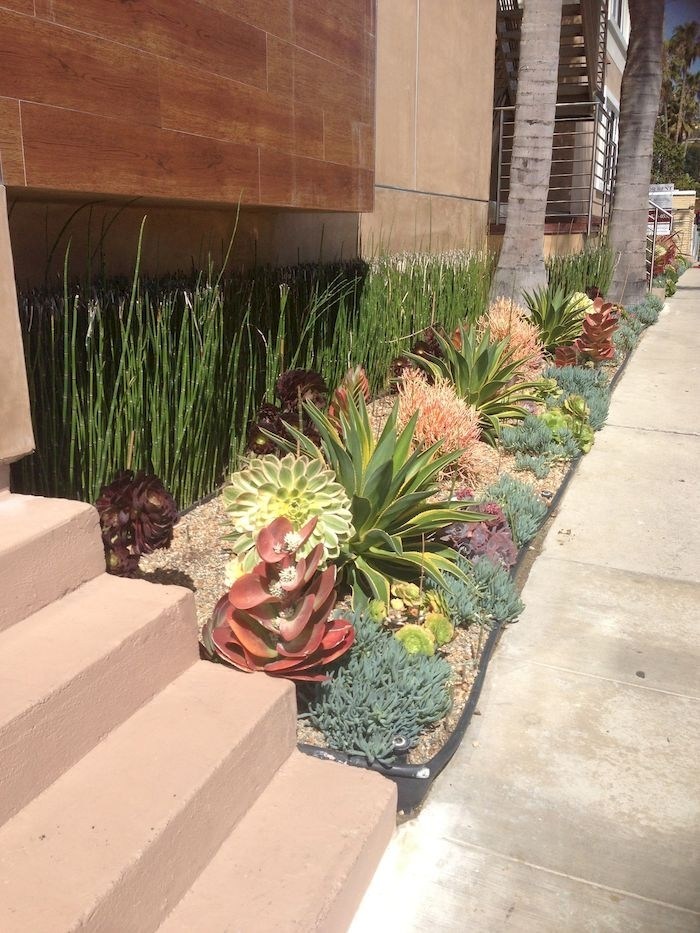
Succulent gardens range from large planters filled with selections such as echeveria, to an area of the yard that showcases your favorite succulent varieties. In fact, there are so many different varieties to browse, the possibilities seem endless. Their thick, shiny, water-filled leaves give them an almost unreal appearance, making them popular with design lovers who are drawn to color and form. [photo from Southwest Boulder & Stone]
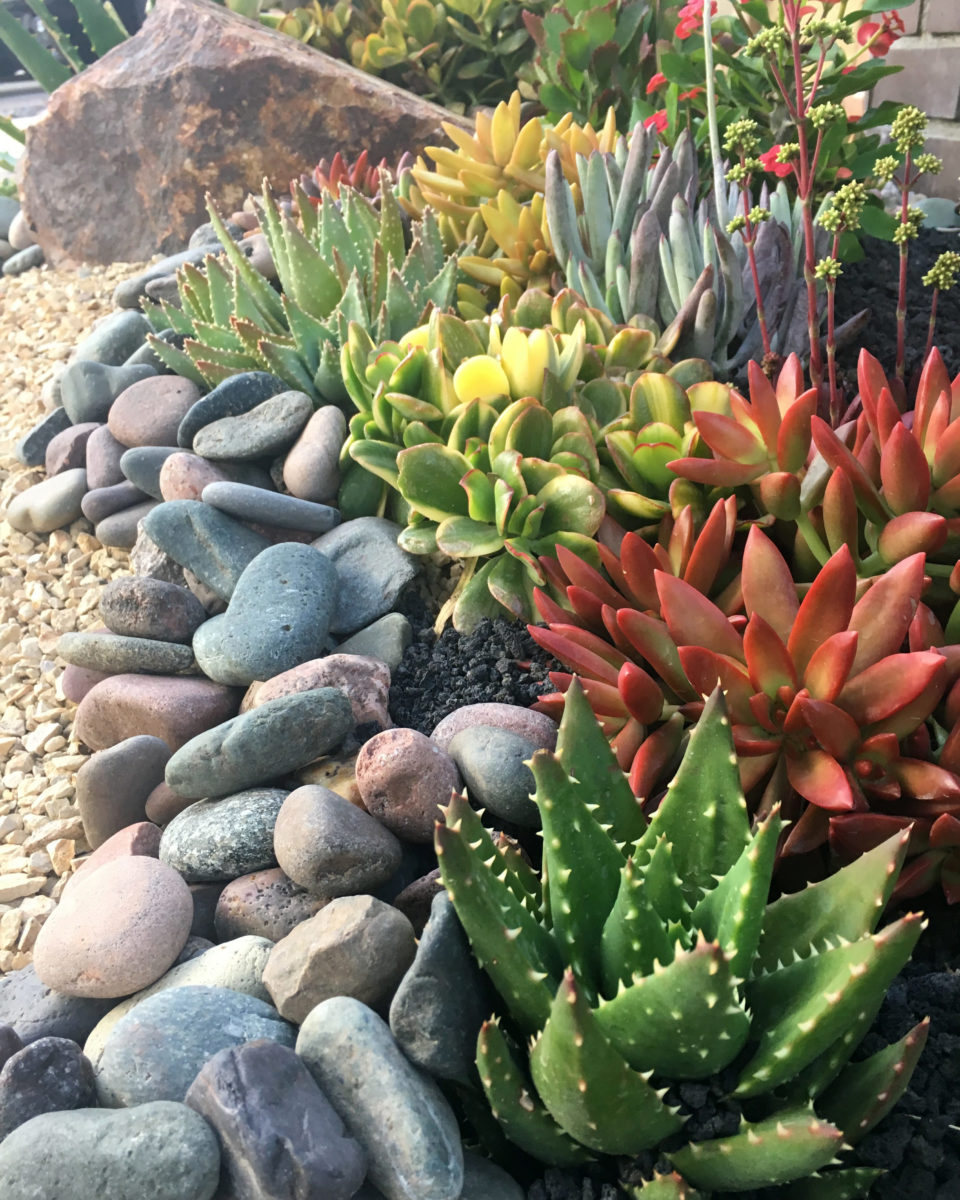
Not to mention, succulents don’t mind sharing the space with others in planters or the soil, so you can curate a beautiful garden featuring many colors and textures, even if your “garden” is nothing more than a large pot. Keep reading for tips as you plan and plant your very own succulent garden. [unless otherwise indicated, original photos are by Kate Simmons for Decoist]


Choosing Your Succulents
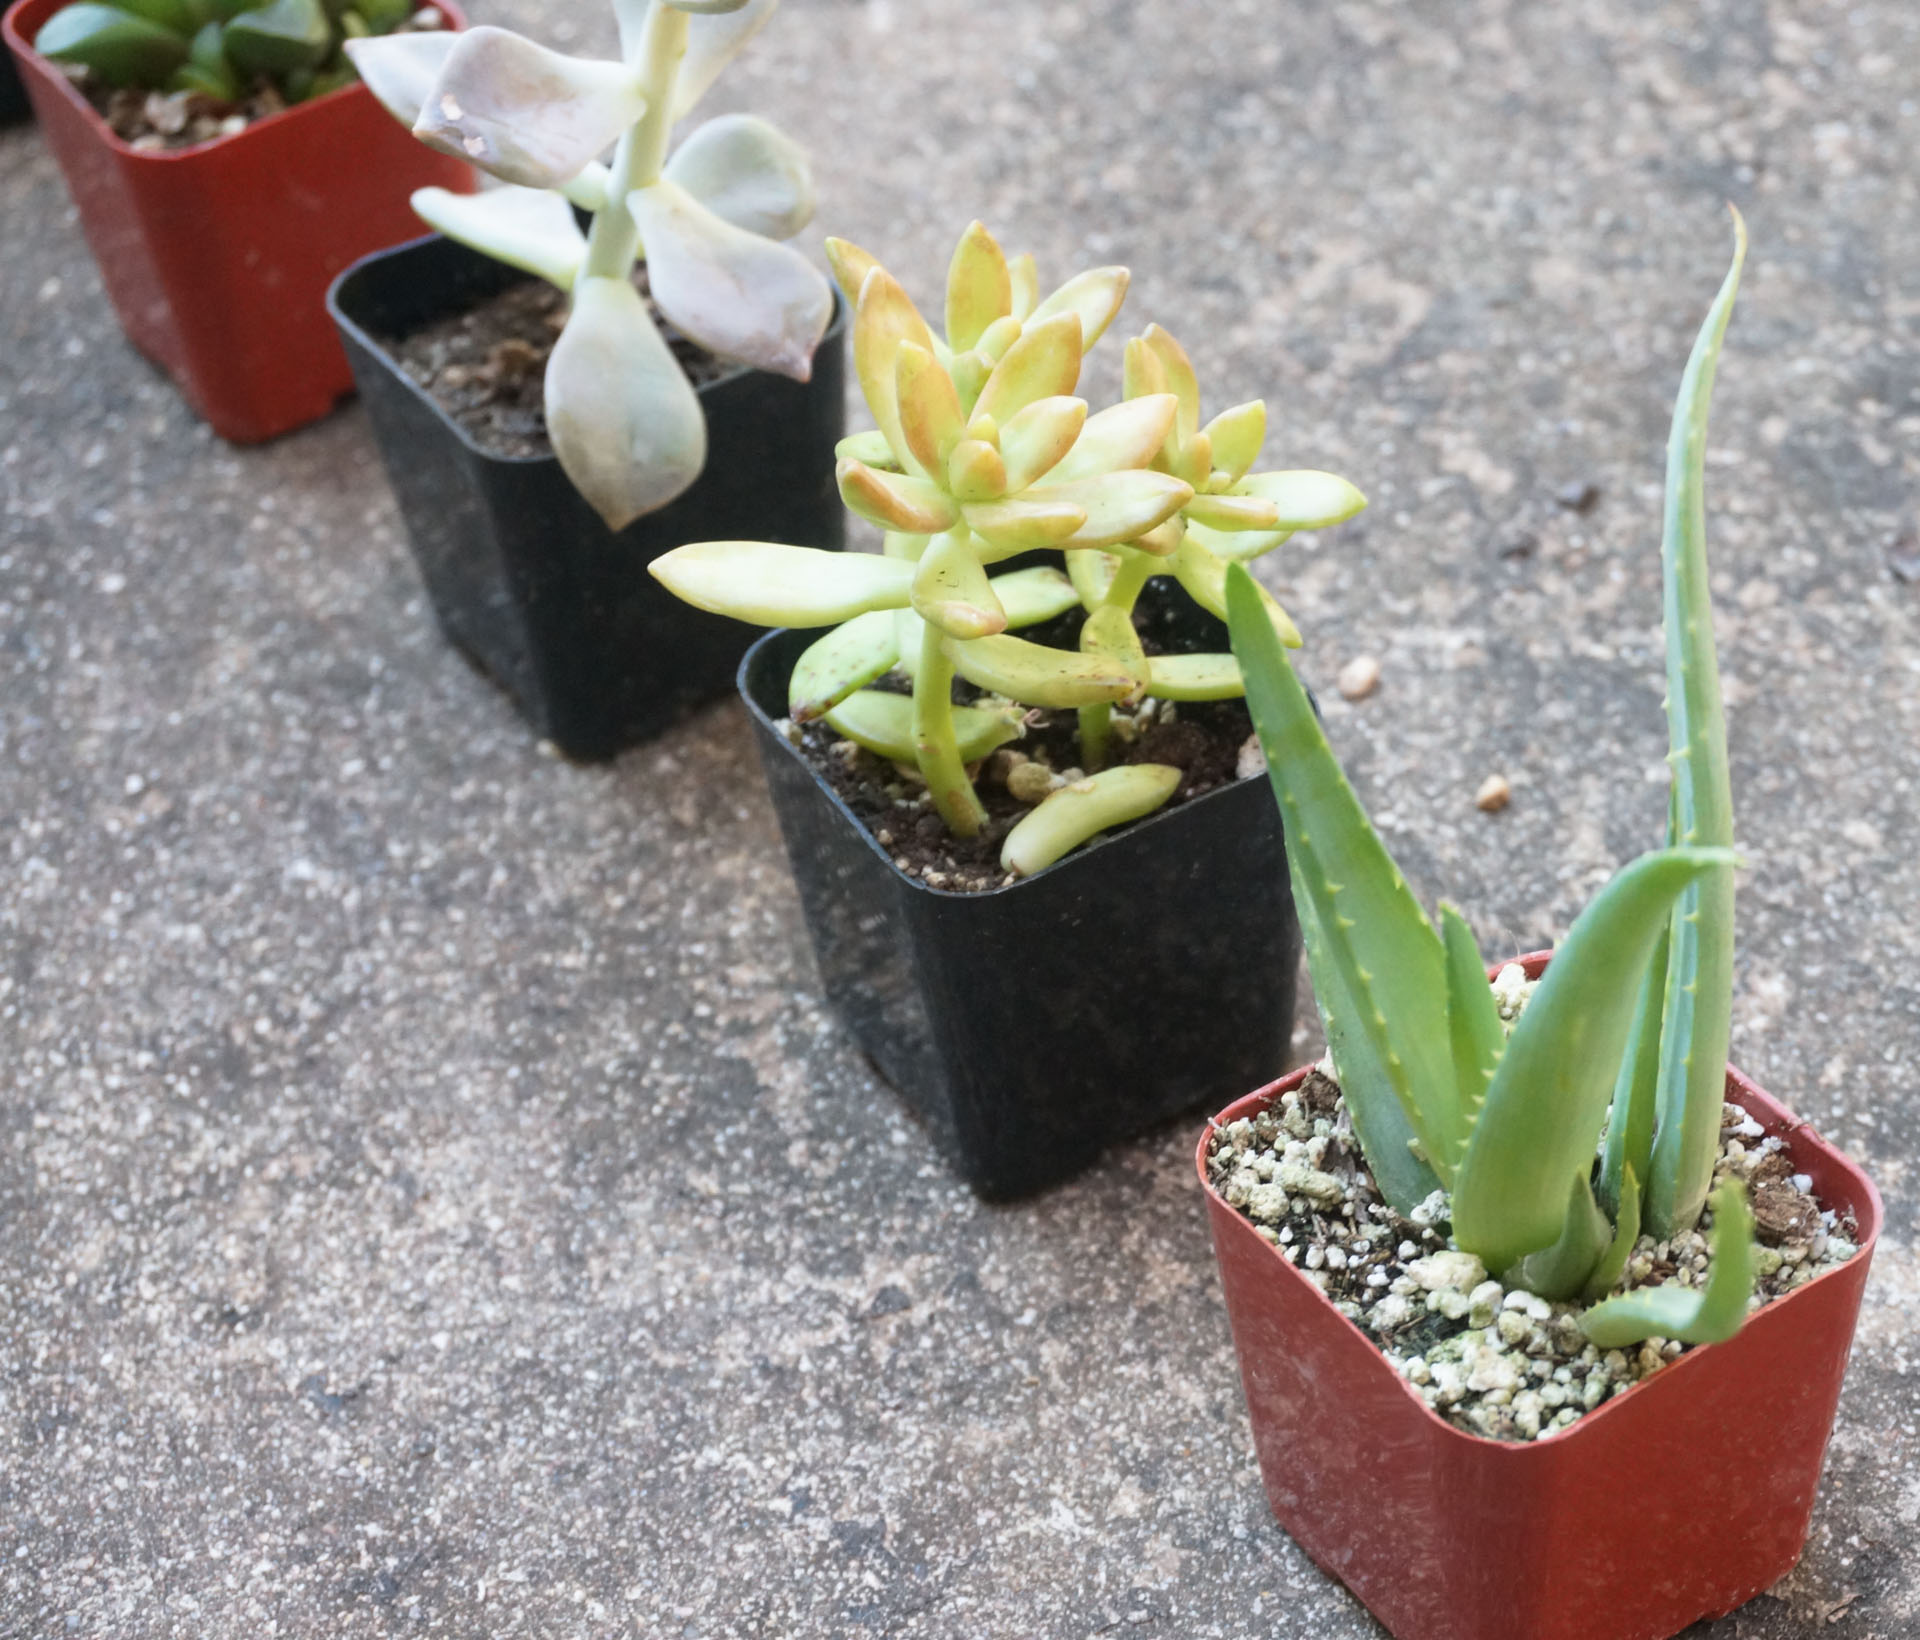
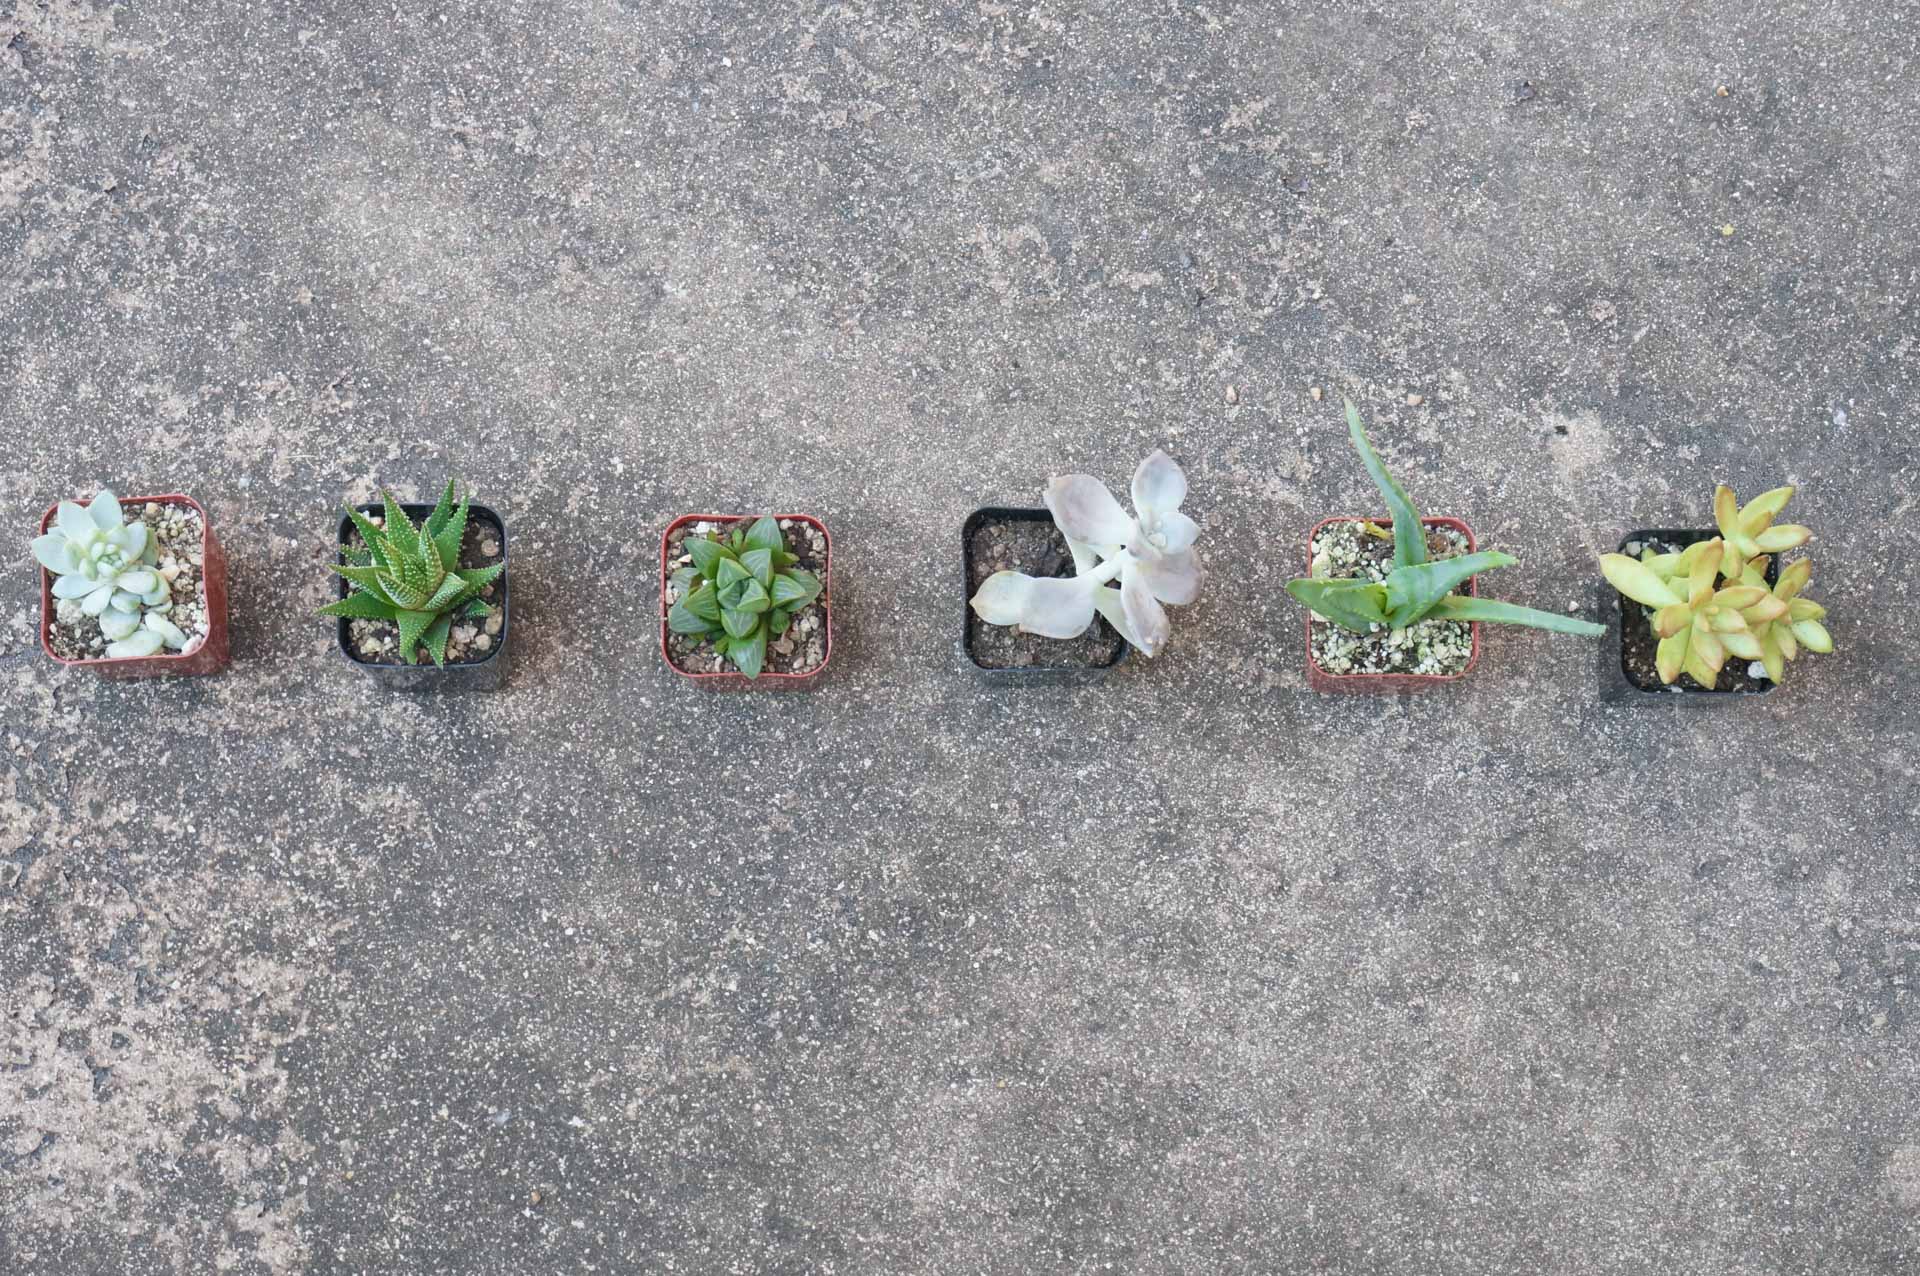
Let’s face it: shopping for succulents is fun, fun, fun! It’s easy to rack up a pretty large bill from a cart filled with “little plants”, so choose wisely. While there are no hard-and-fast rules for combining succulents into beautiful arrangements, it’s important to pay attention to a few key factors.
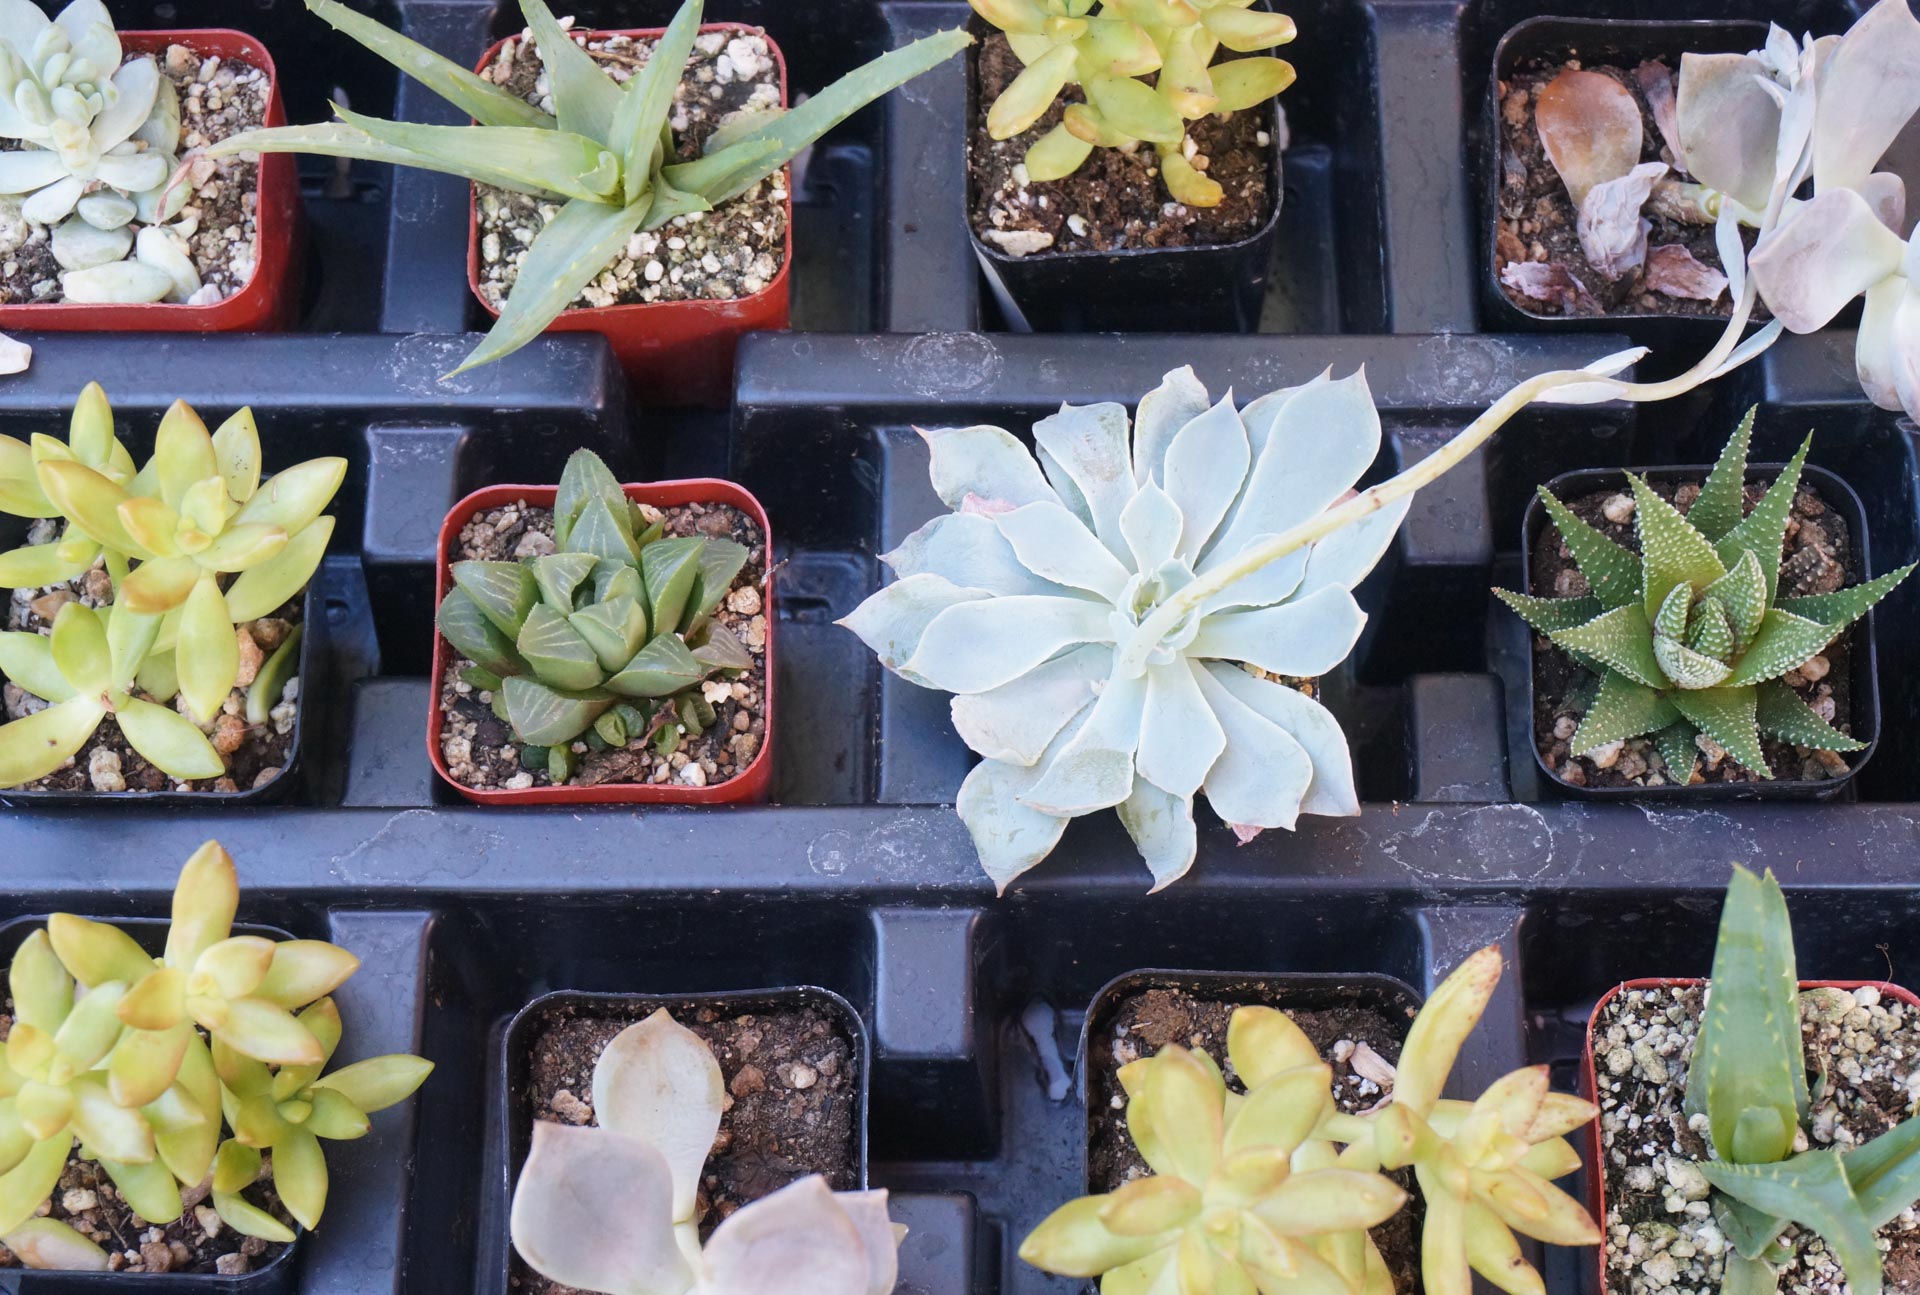
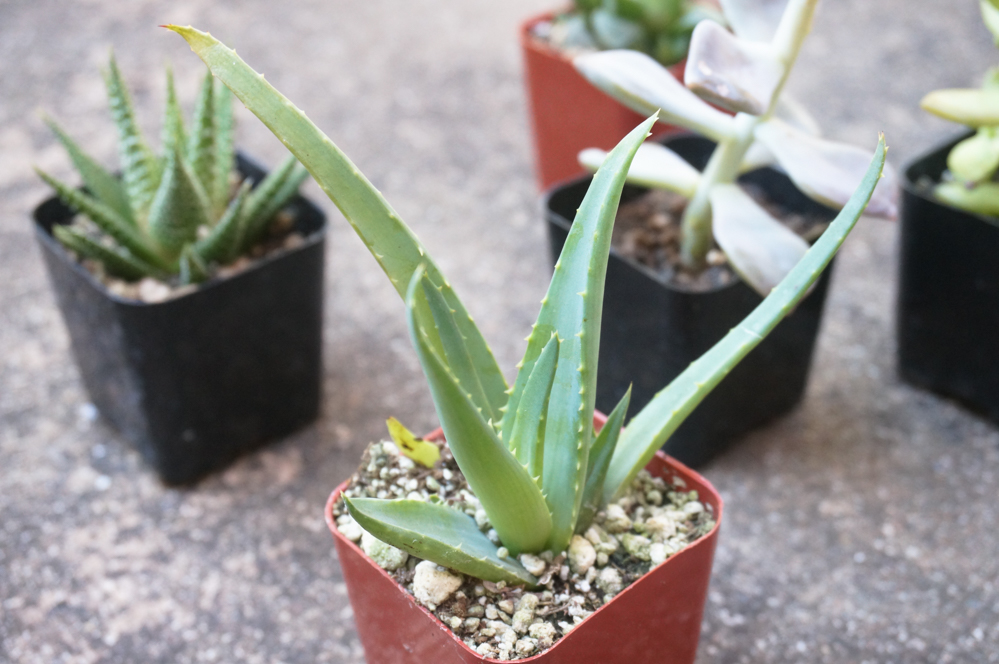
For starters, you will want to note the temperature and level of sun in your garden location. Many succulents do well with a few or more hours of sun per day, but if the temps get very hot, shade will be important (for at least part of the day). Some succulents can get burned from the sun, especially in the heat of summer. In other words, do your research. This can be as simple as speaking with a knowledgeable employee at the nursery when shopping for your succulents.
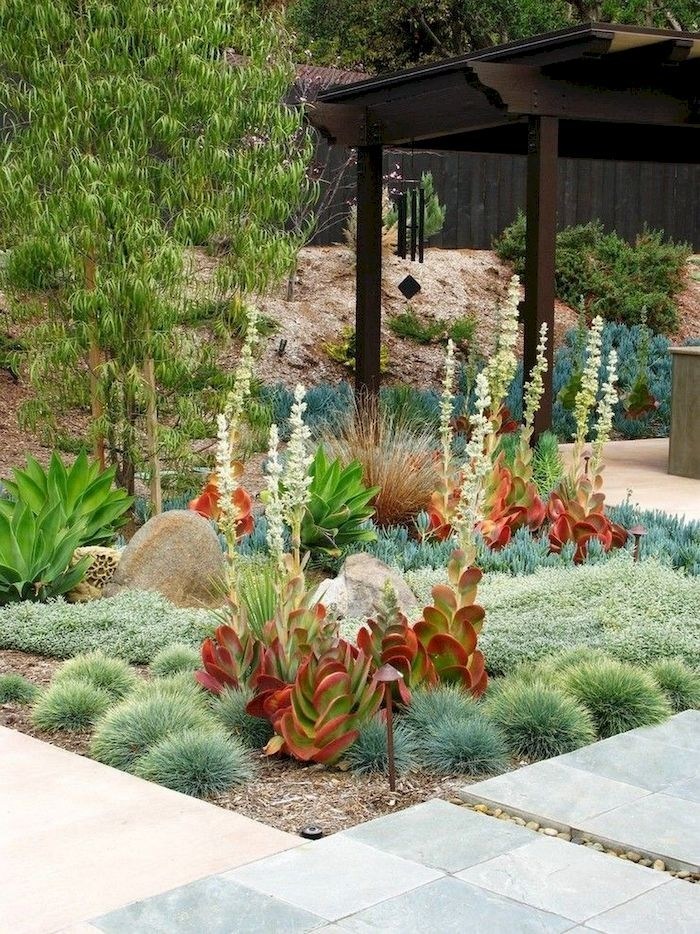
To create interest in your garden, opt for variety. This means choosing an array of colors, textures and heights. While color and texture will be obvious as you shop, you will want to find out if your succulent choices grow upward, outward (ground cover-style), or over the tops of containers. This will help you plan the design of your garden.
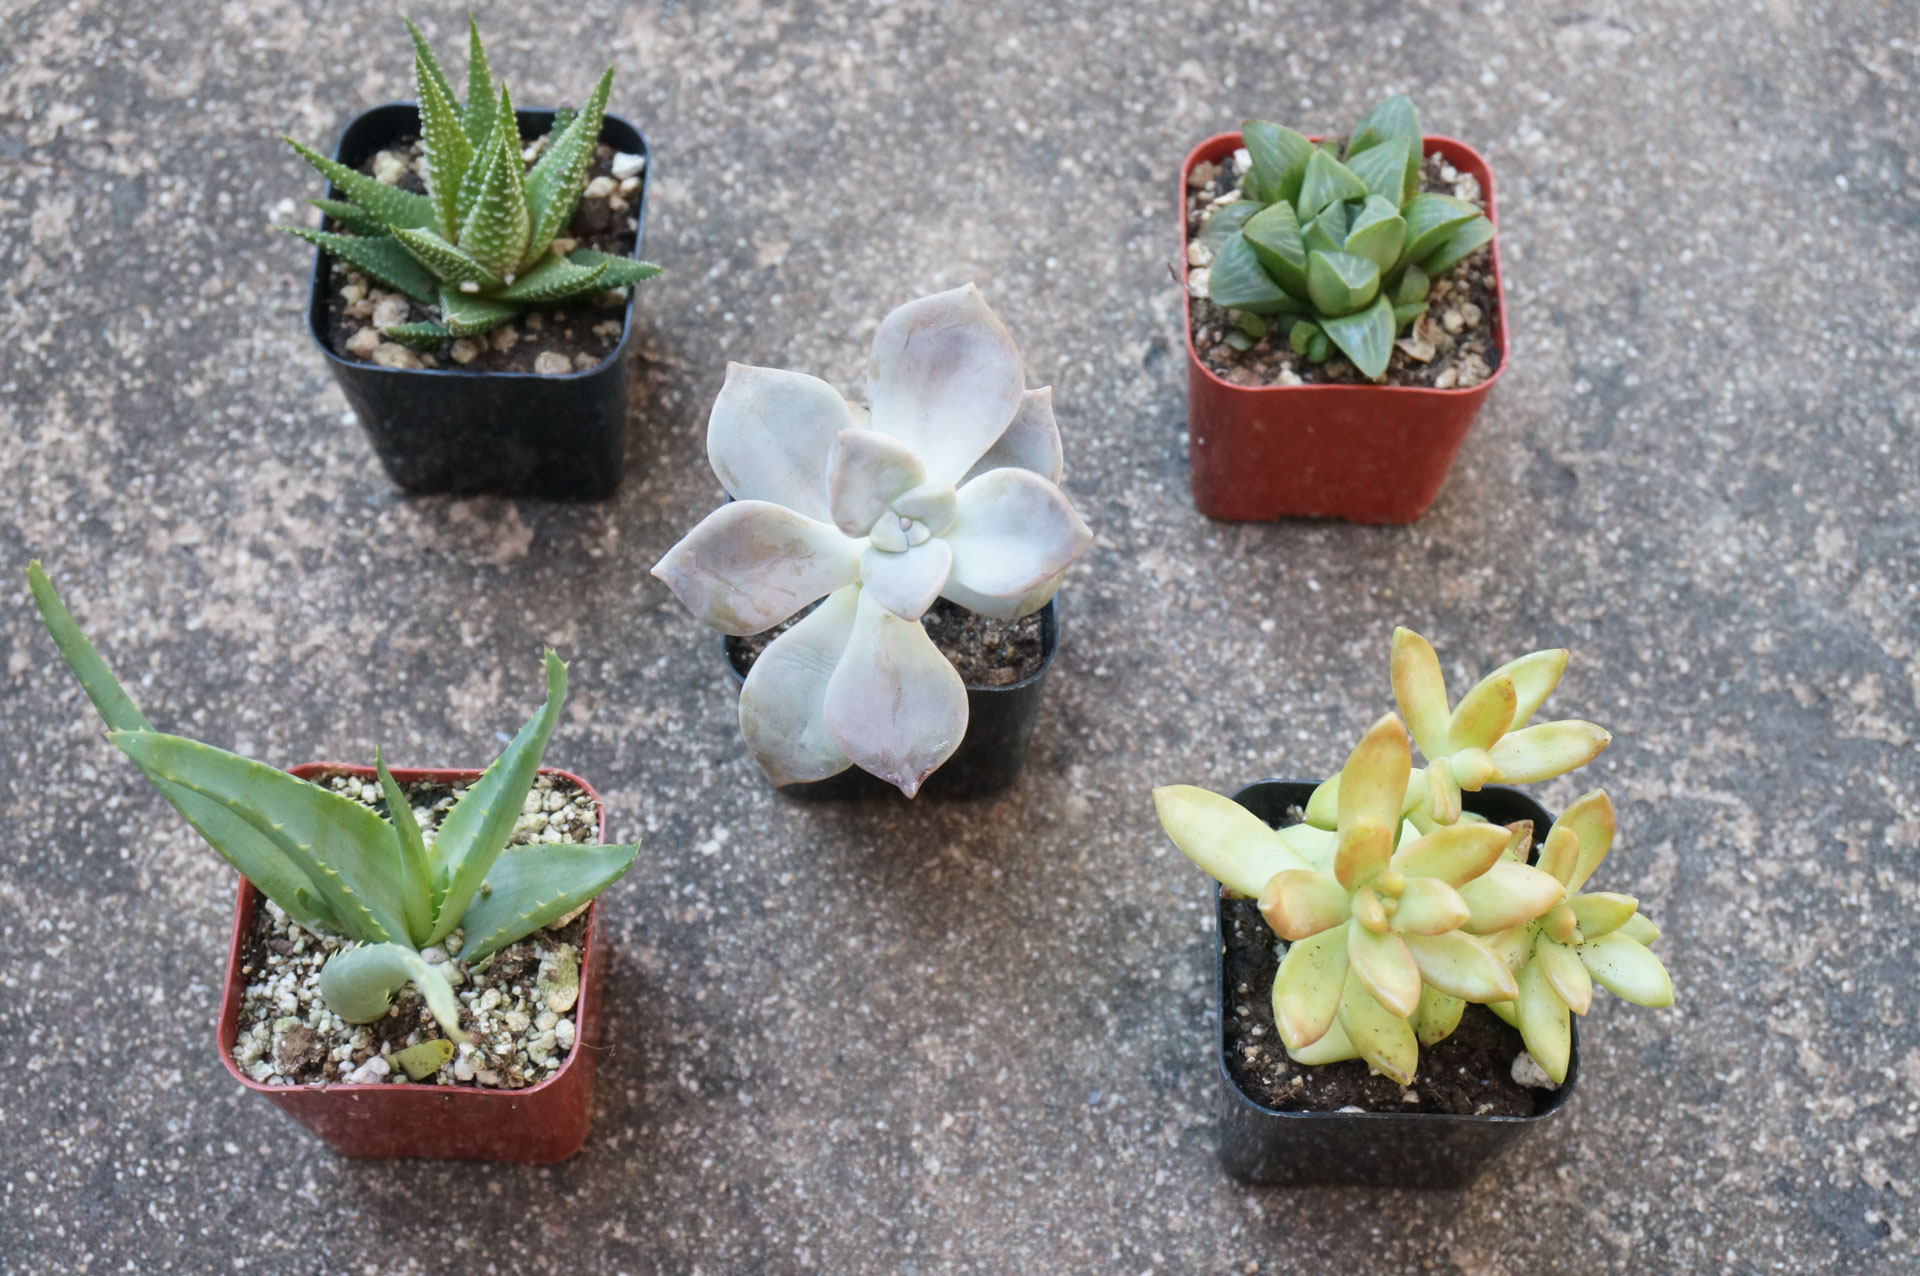
Take a few extra minutes to inspect each plant before you purchase, choosing healthy specimens with good leaf growth.
You may also want to pick up some succulent soil, or talk with a nursery employee about ways to make your own soil by adding materials such as coarse sand and pumice to the mix.
Putting It All Together
Now it’s time to get planting! How satisfying will it be to go from this…

to this… (with a few more cacti at the ready, of course!) [photo from HOMEBNC]
It’s important to remember that good drainage is key, so use porous soil (such as a special soil just for succulents), and make sure that there is good drainage if you plant your succulents in a pot. A drainage hole is extremely helpful in this case.
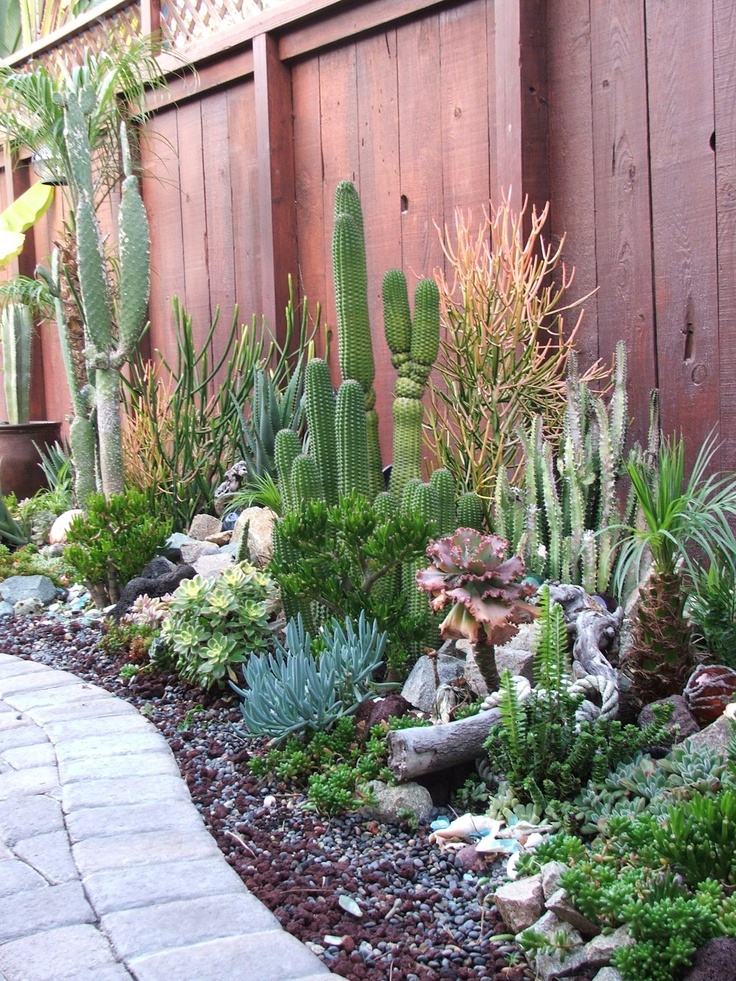
As you create the design of your garden, one strategy is to start with the main focal point, then fill in the rest of the space with your other succulent selections. As mentioned above, a range of colors, textures and heights makes a succulent garden all the more interesting. In addition to choosing succulents that grow upright, consider succulents that spill over the edge of the container (or cascade over the wall/rocks of your garden). [photo from CRUNCHHOME]
Also consider a “top dressing” such as crushed rock (shown above) for tying everything together. Last but not least don’t over-water your succulent garden. Also pay attention to signs such as shriveled leaves, which can indicate an under-watered plant. How often you water will depend on factors such as the location of your plants and the climate. Do some research, and don’t be afraid of some vigilant trial-and-error watering at first to get it just right. A little bit of time and care will help you get from this…
…to this!… [photo from CRUNCHHOME]
Happy planting!
You're reading Tips for Planting a Succulent Garden, originally posted on Decoist. If you enjoyed this post, be sure to follow Decoist on Twitter, Facebook and Pinterest.
from Decoist http://bit.ly/2IQ9JVX
Light Floating Roofs Blend with Heavy Limestone Walls at this Vibrant Austin Home
Wine House in Rugged Mexican Outback Where Metal Meets Concrete
20 DIY Desk Organizer Ideas and Projects to Try
Spectacular House in Wales with Amazing Estuary and Sea Views Enthralls!
Poorly Planned Home in Brisbane Gets a Facelift with a New Pod in the Backyard
What Kills Ants Instantly: Natural, Pet Safe Home Remedies
Tiny Second Home for a Family of Five Showcases Innovative Use of Space
20 Homemade Hot Tubs that Are Budget-Friendly
Glassy Rear Extension of Red Brick Victorian Terrace House in Dublin
Small Summer House in Sweden Paints a Picture of Minimal Contrasts
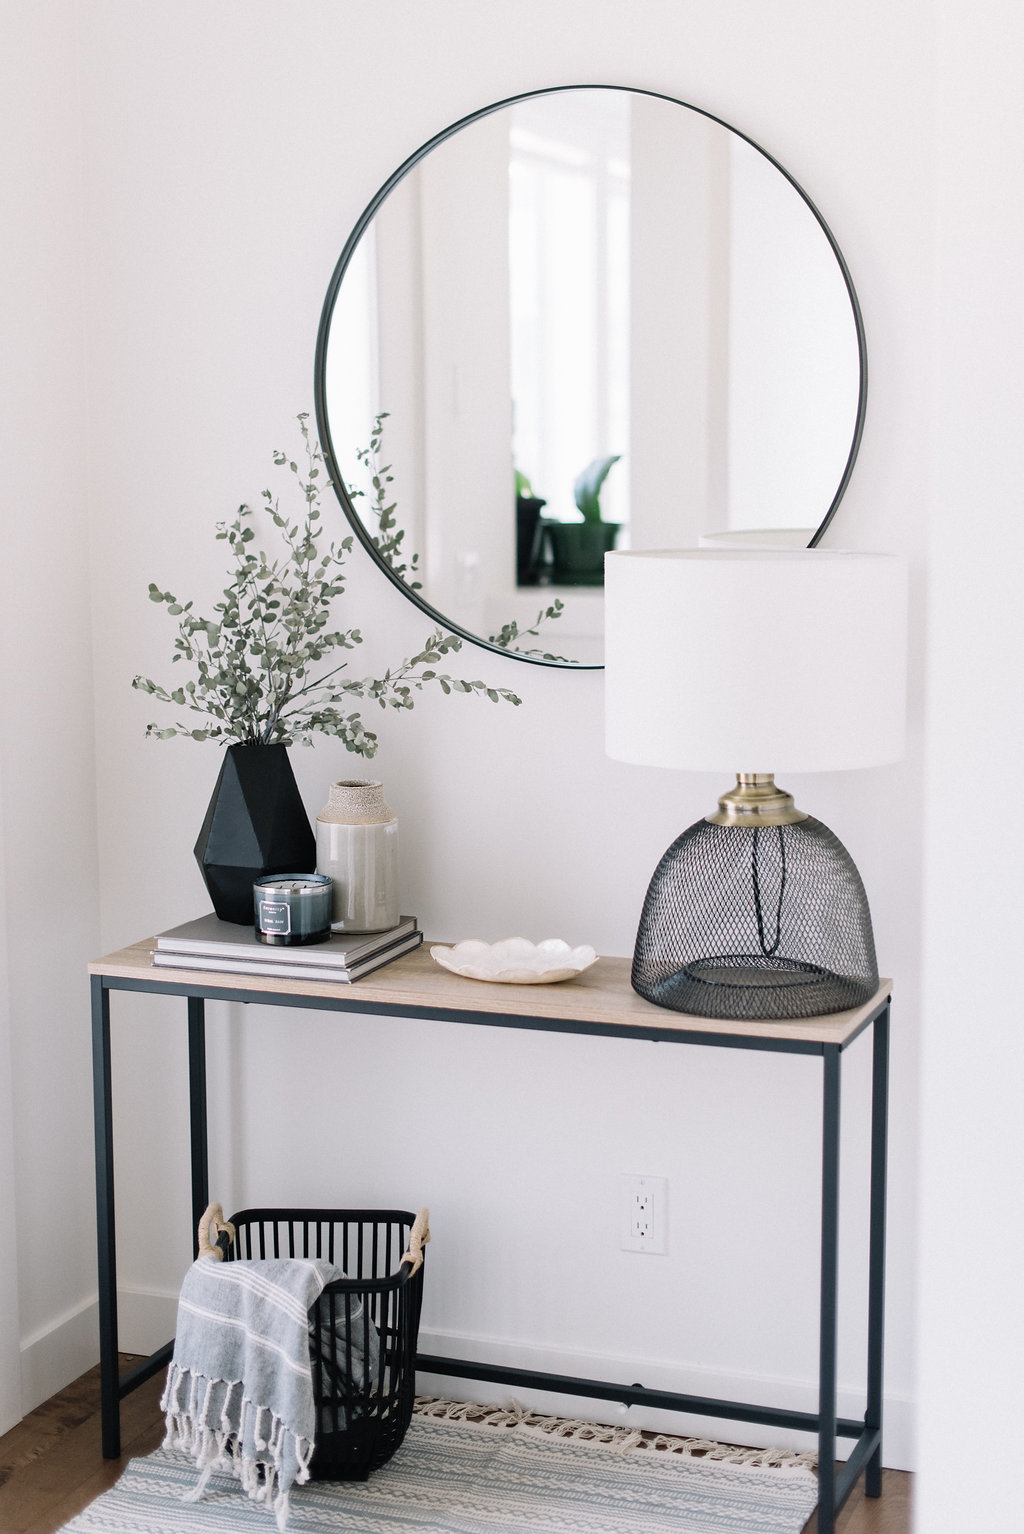
Tips for Decorating a Console Table in an Entryway
Decorating a console table in an entryway can be a truly fun design endeavor, especially if you let your creativity take hold. While you may be tempted to agonize over the details, don’t feel pressure to make everything perfect. Keep the following two simple rules in mind. First, choose decor that truly works for your space. If you need this table to serve a purpose (such as holding keys and mail by the front door), make that your priority and put the focus on containers rather than objets d’art.
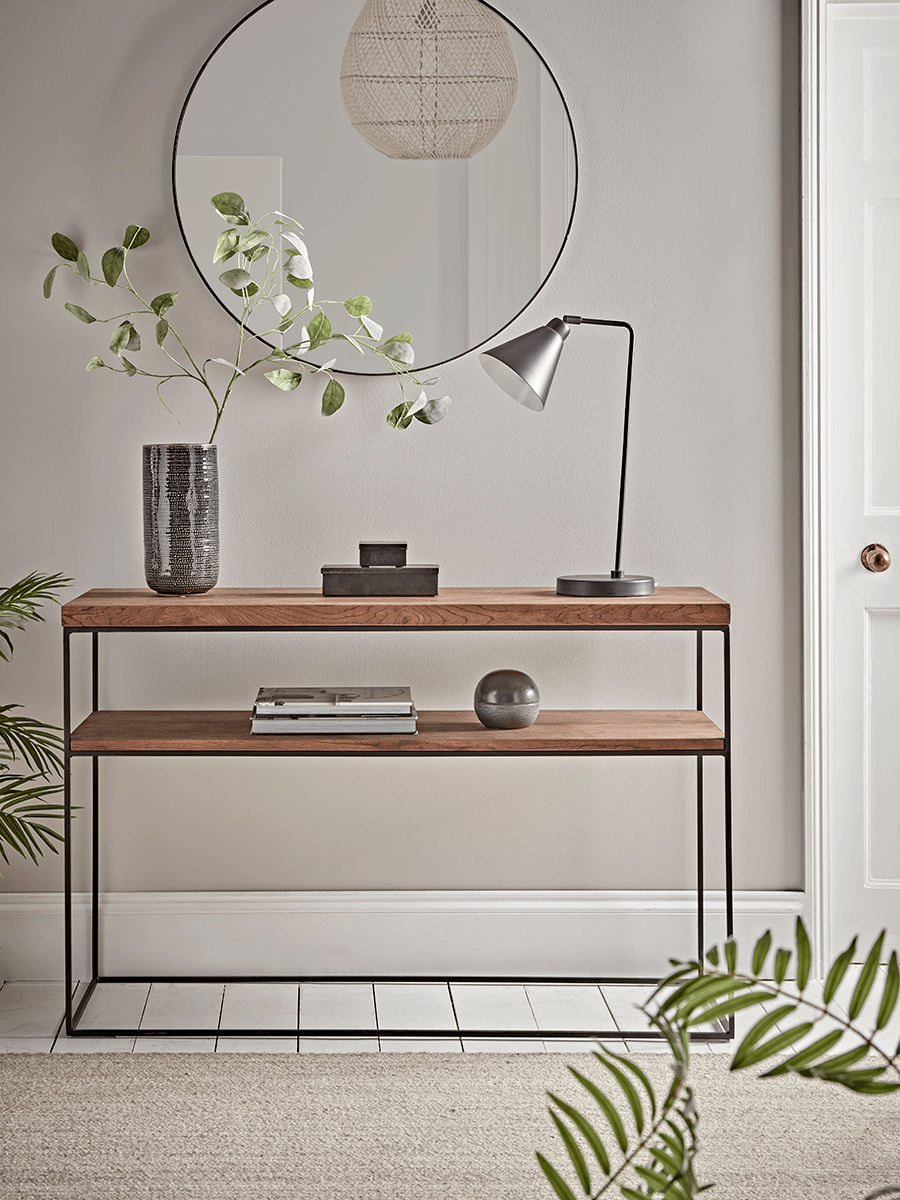
Second, give yourself the freedom to let your style constantly evolve! If you view the table decor as an interesting statement that isn’t set in stone, you can really enjoy the process of decorating it! Plus, you can make changes over time as you see fit. For specifics and a slew of amazing design ideas, keep reading… [Frame Slim Console Table from Cox & Cox]

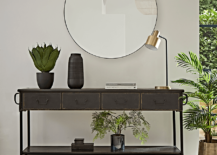


Console Table Styling Basics
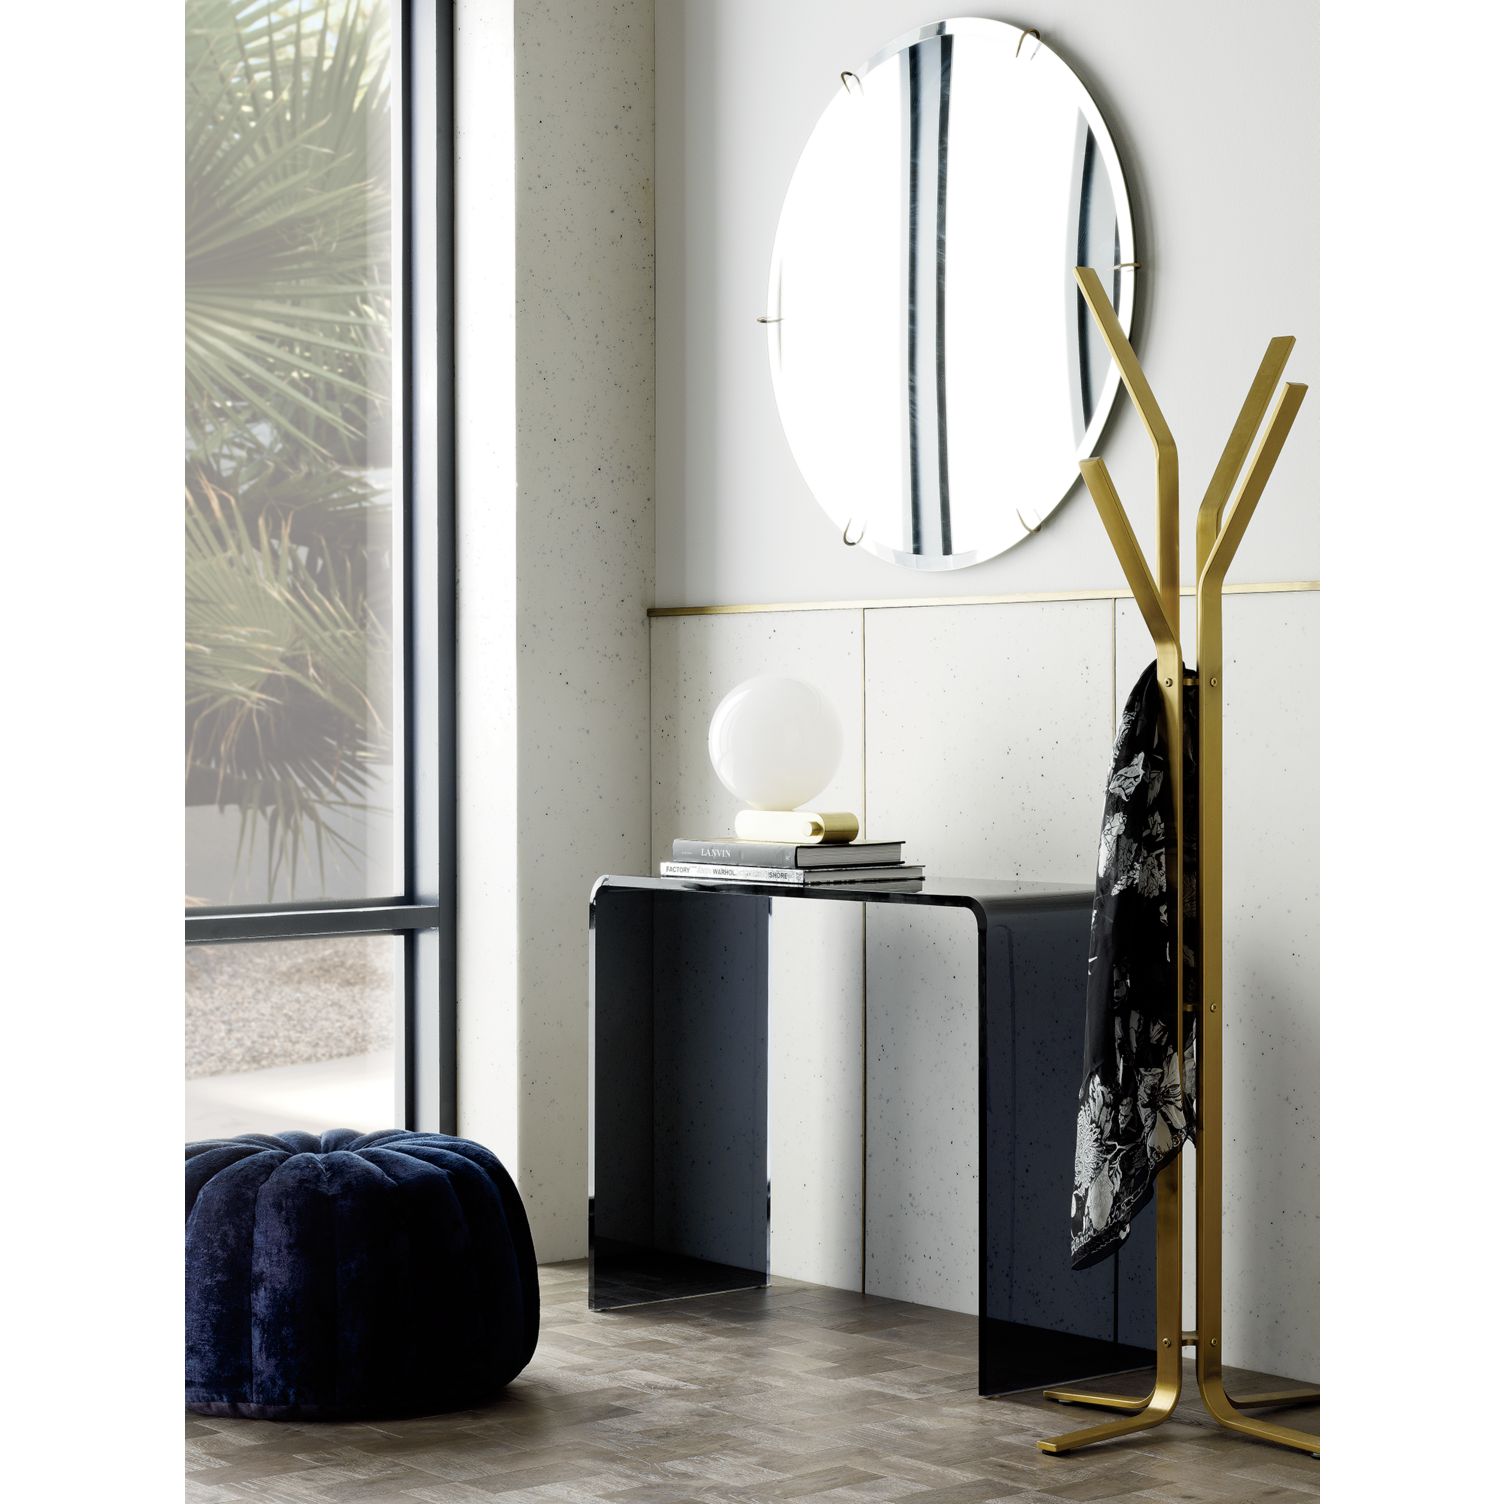
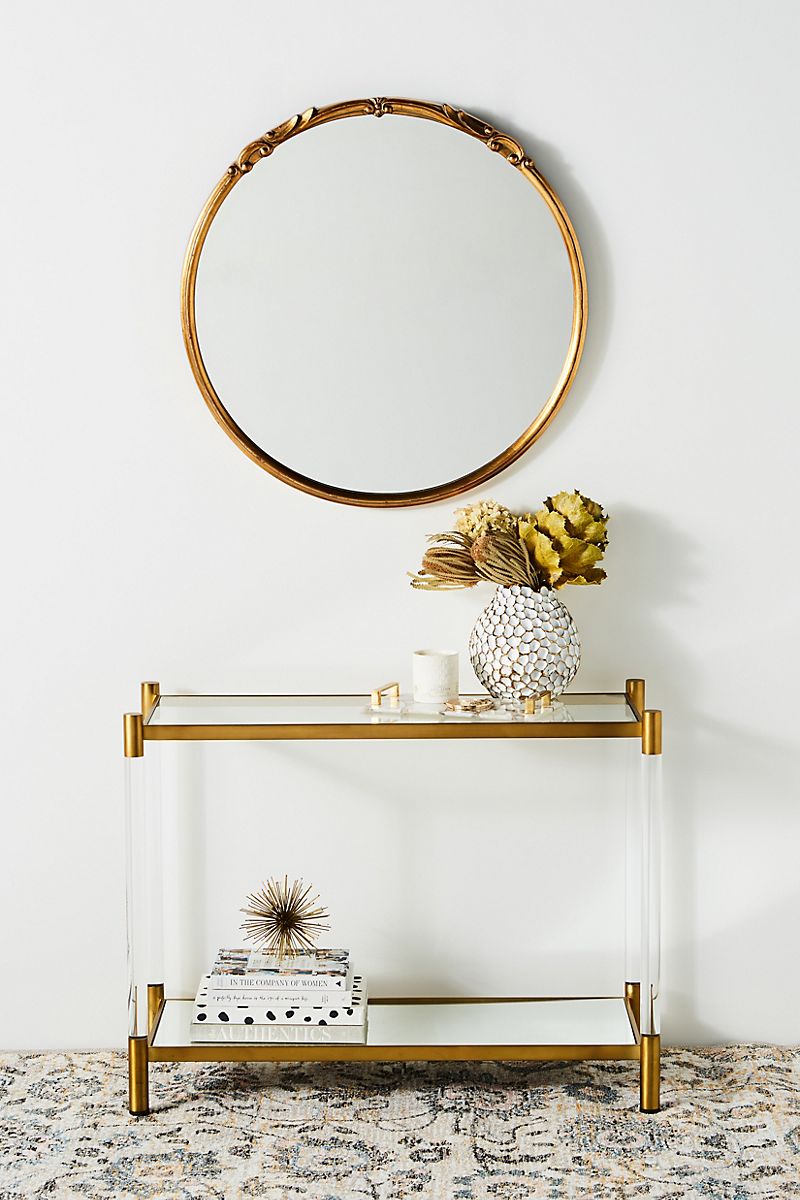
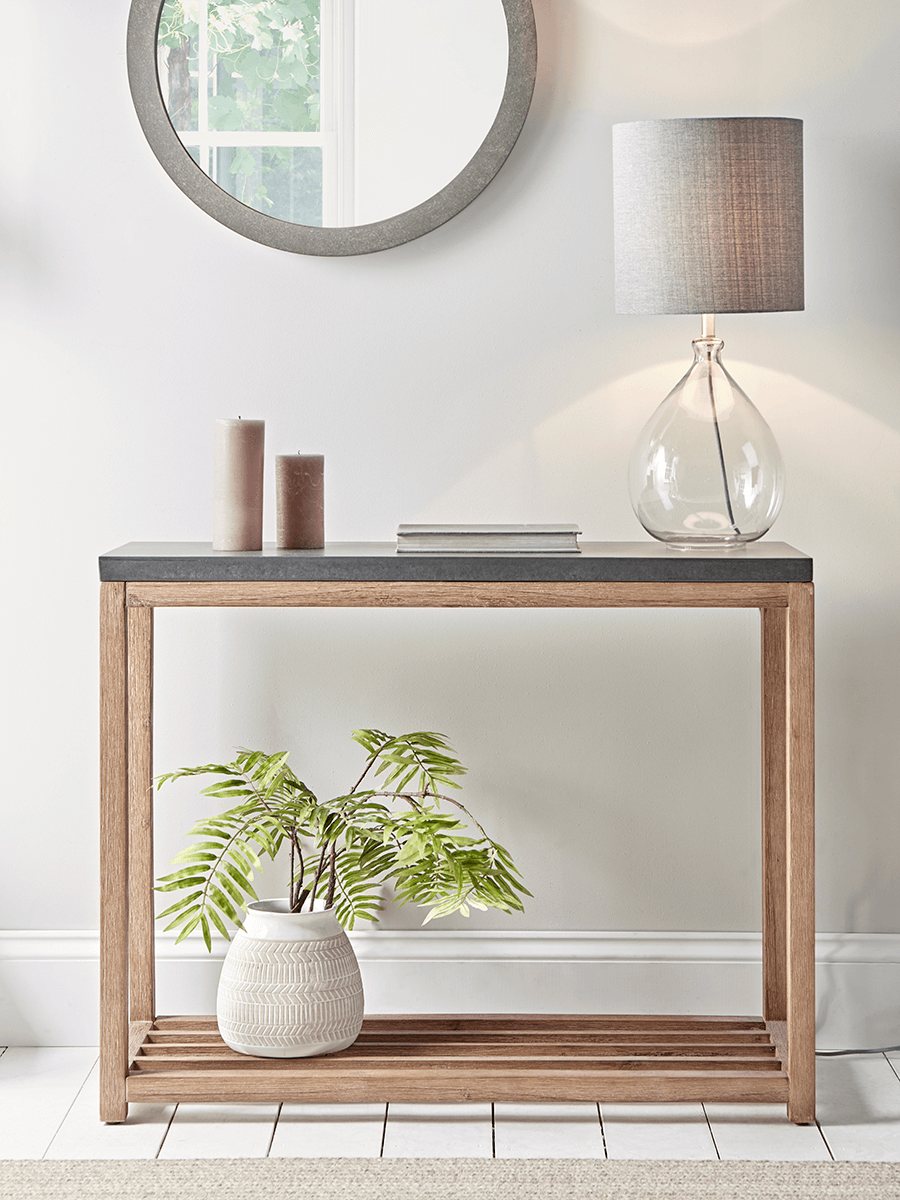
Let’s start with some design basics, shall we?! Don’t hesitate to use a mirror or artwork as a focal point. Below we see a beautifully designed vignette centered around a circular mirror. [photo below from 204 Park]
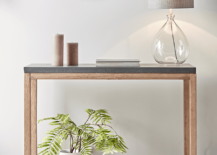
It goes without saying that you should choose a console table that works with your interior. For example, if you need to avoid a cluttered look, consider opting for an acrylic piece. It’s see-through, giving the illusion of more space. Below we see the sleek Peekaboo Acrylic Console Table from CB2:
![]()
Make a statement with greenery. There’s nothing like a simple vase filled with tropical leaves, or a modern pot featuring your favorite plant to create a welcoming statement in your entryway. In the next image, we see the Elke Marble Console Table with Brass Base from Crate & Barrel:
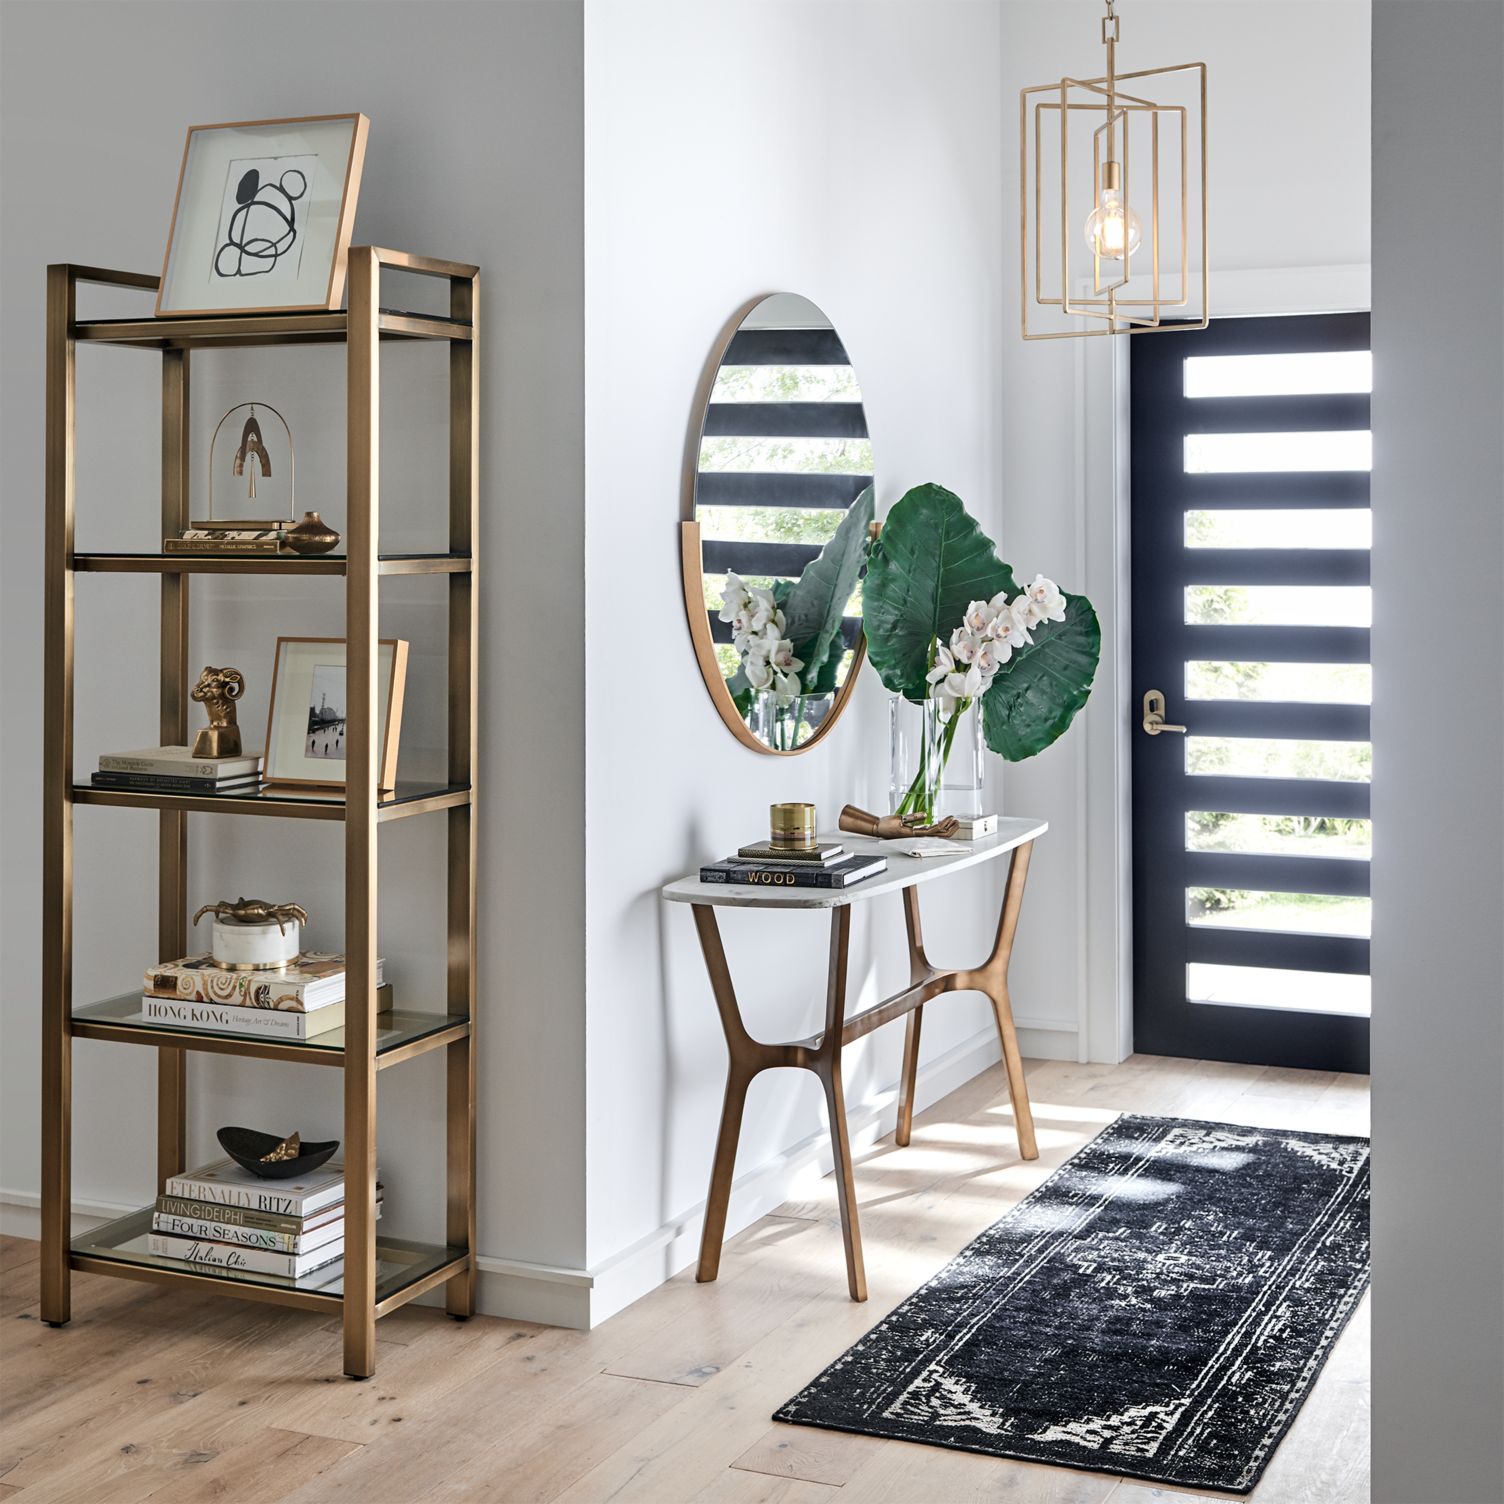
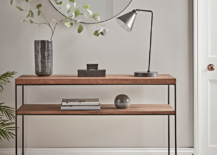
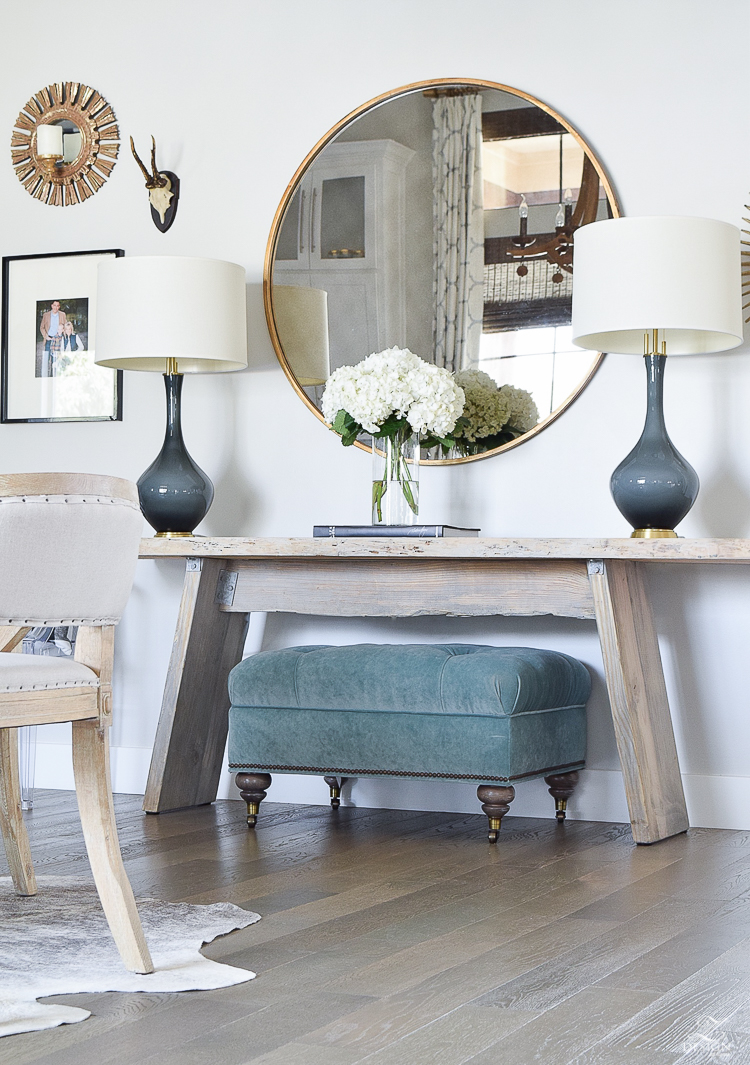
Create interest by featuring decor with a range of heights. Lamps are a great way to use the vertical space, while also illuminating your space. Stacking boxes and books can help create the height you need as well. Lower elements, such as trays to hold the mail, can also be helpful. [photo below from Nate Berkus, featured at Beautiful Habitat]
Less Is More
For many of us, a “less is more” look is most helpful for the entryway, especially if your entry is small (or basically nonexistent). Leaving room to appreciate a few key pieces will set a calm tone and establish a roomy vibe, even in the most compact of living quarters. Here’s a great strategy for a small console table: create one stack of decorative items. We love the stack of books topped with a lamp below in an image featuring CB2’s Peekaboo Smoke Acrylic Console Table:
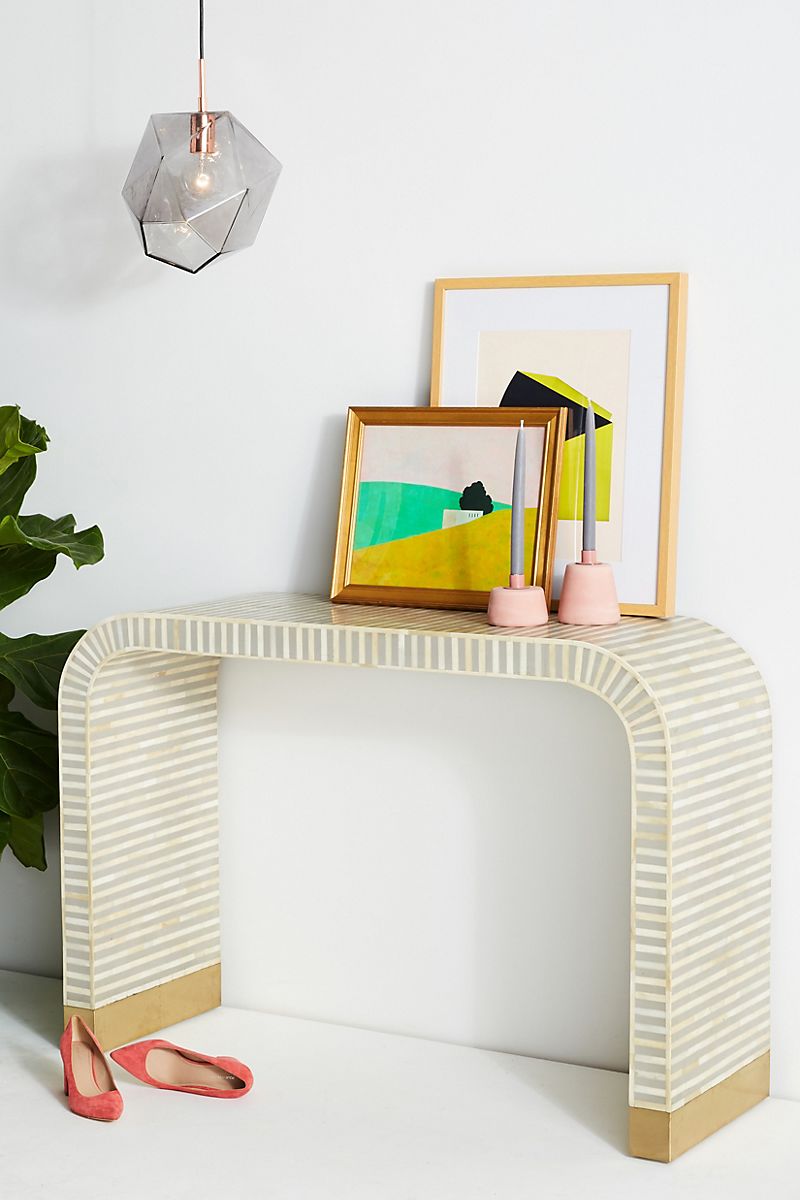
If you don’t need your table to hold essentials such as mail, try layering a couple of framed art pieces and adding one or two more decorative items. The result: a dimensional display that takes up little space. [below: the Waterfall Inlay Console Table from Anthropologie]
Create an asymmetrical look by grouping a few items off to one side. You get a big impact, even if the items are small. Plus, much of the surface remains free of decor, creating a minimalist, uncluttered look. [below: the Oscarine Lucite Mirrored Coffee Table from Anthropologie]
Try tucking a bench under your table to save space. Now you have a place to sit when you put your shoes on before you head out the door, but it all neatly fits into one compact area. In this case, more looks like less! [photo from Z Design at Home]
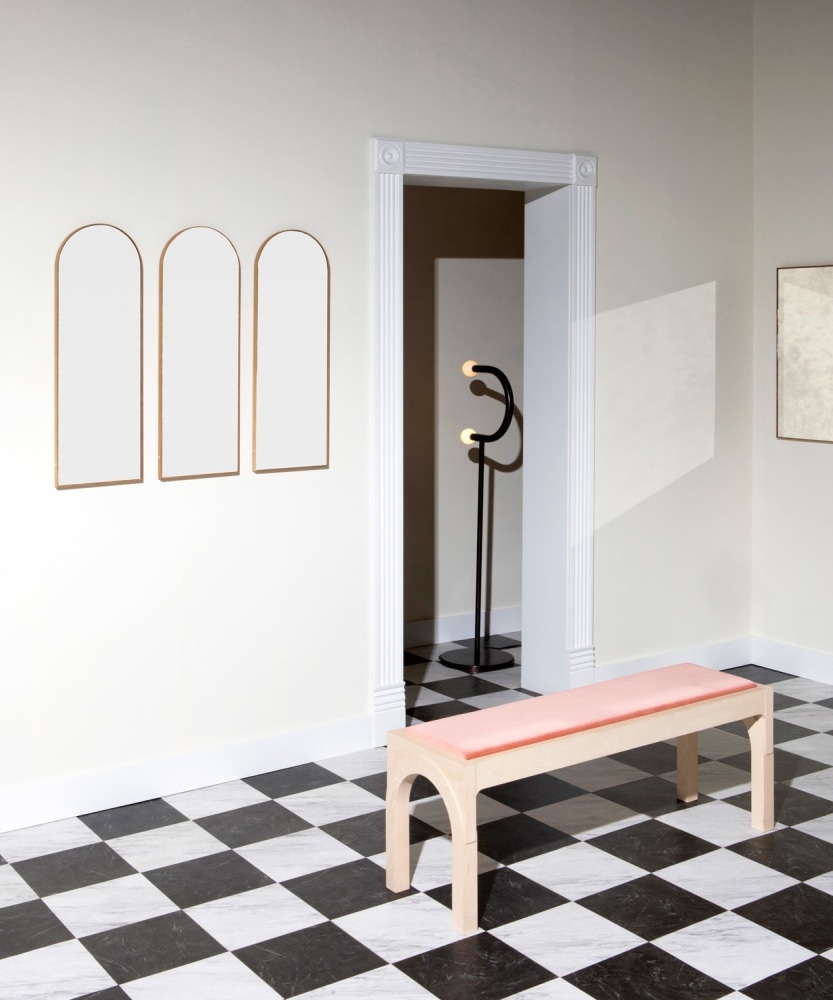
Not to take away from the console table focus of today’s article, but if you’re really into a “less is more” look, you can always opt for a bench in your entryway. It’s lower to the ground, which saves wall space, and you can even display an item or two on the seat if you need the bench to play a minor table role! We’re completely in love with this Arch Bench from Bower, featured at Domino:
Tiers of Fun
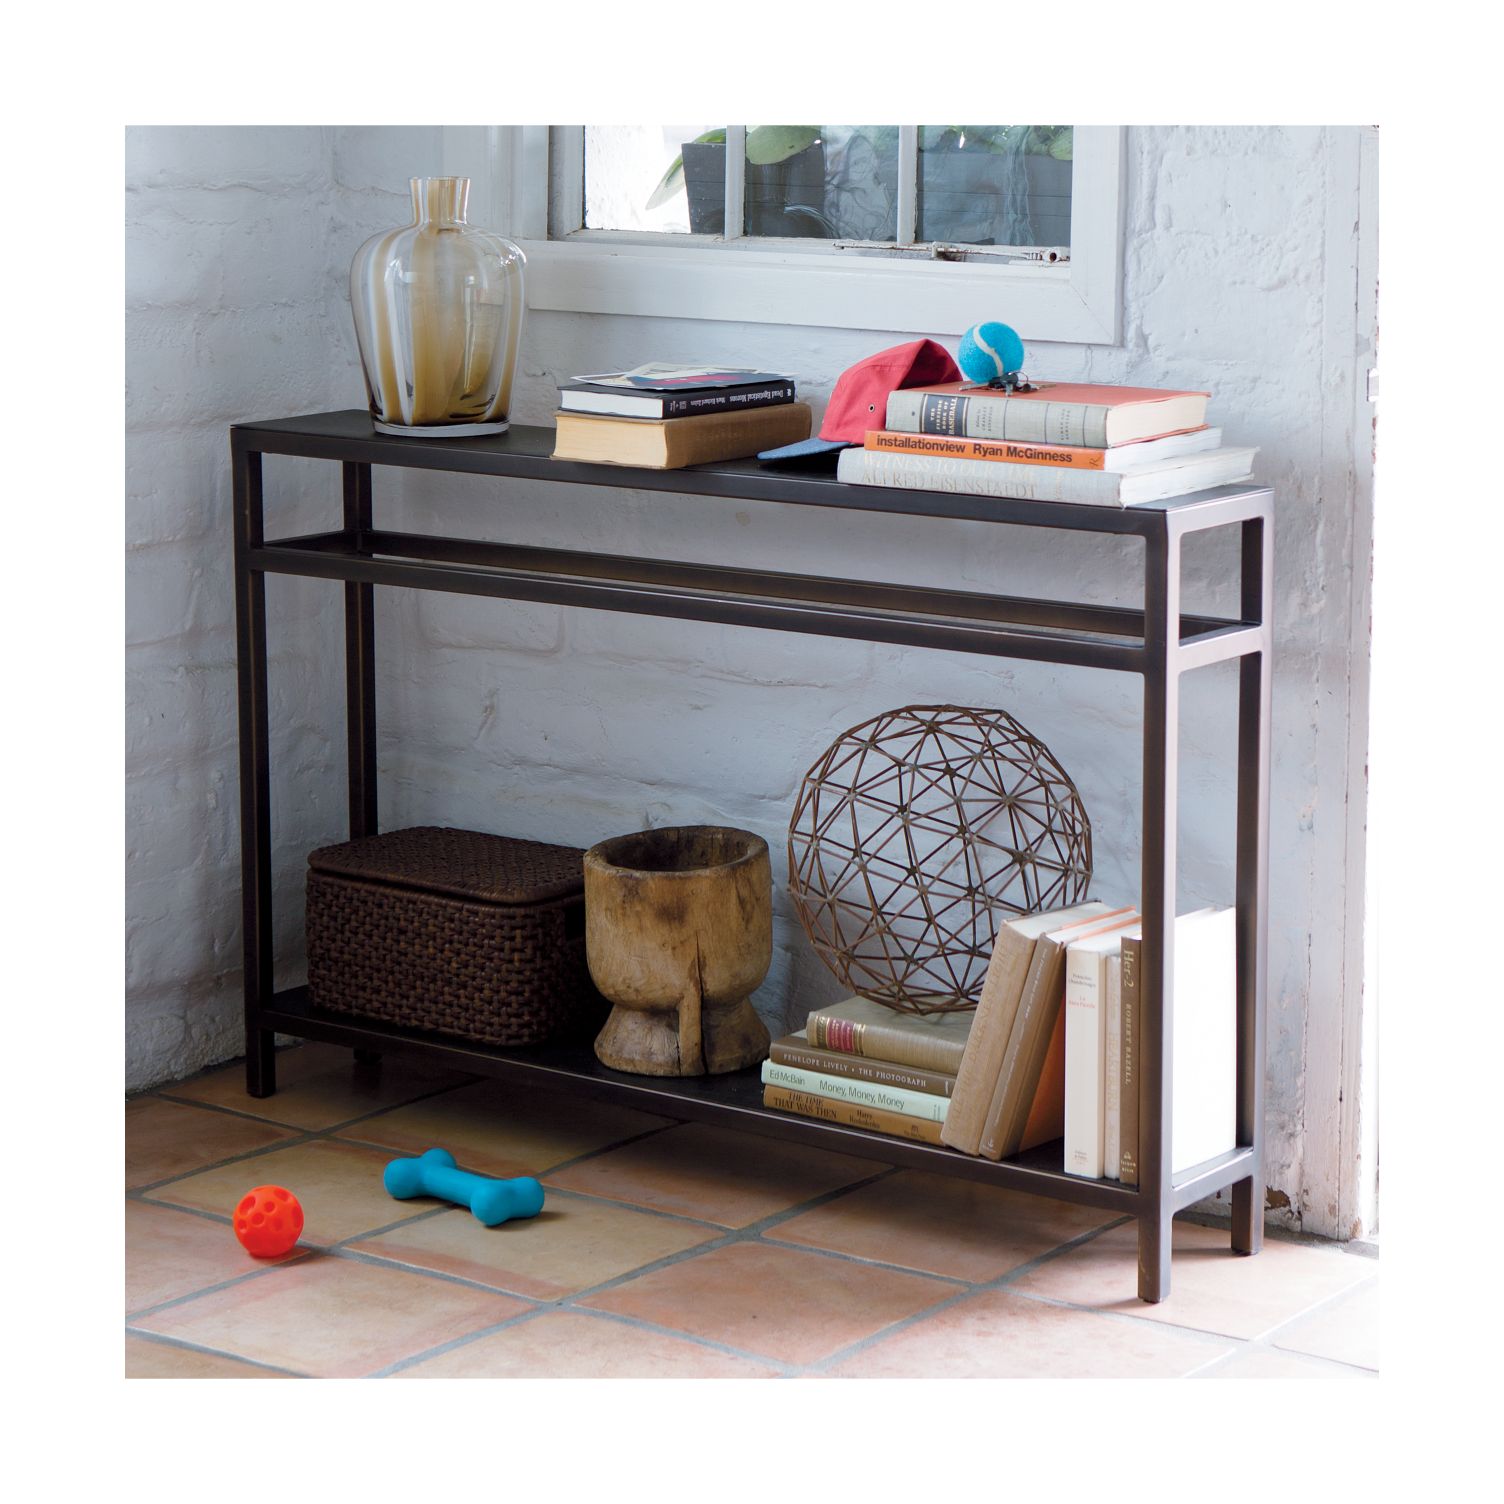
If there’s no limit to what your entryway can hold, then bring it on! We now share some fun design ideas that work for all tables, including those with more than one level. For starters, include a container or two to hold items such as keys, mail, shoes and more! Below we see a range of decorative and practical pieces on Crate & Barrel’s Echelon Console Table:
You can also choose a console table with built-in drawers for maximum storage, such as this lovely table from Cox & Cox:

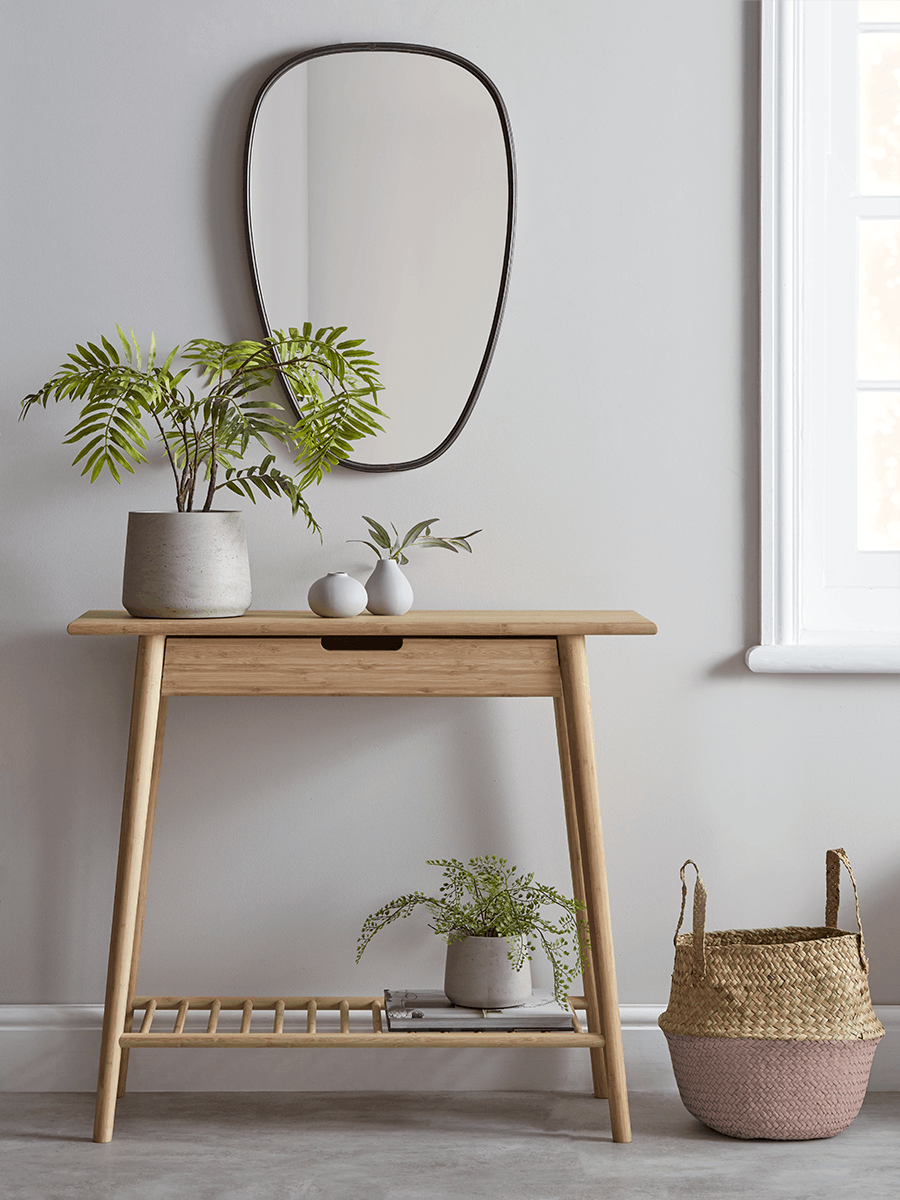
Another strategy worth trying: keeping it simple with a few items on the top level of your table and one container or plant on the bottom. The look here is one of simple beauty rather than abundance. [below: the Grey Topped Console Table from Cox & Cox]
To avoid a cluttered look, incorporate pieces of one color, such as the white planters and vases below. Greenery adds another dimension to this vignette featuring the Aalto Console Table from Cox & Cox:
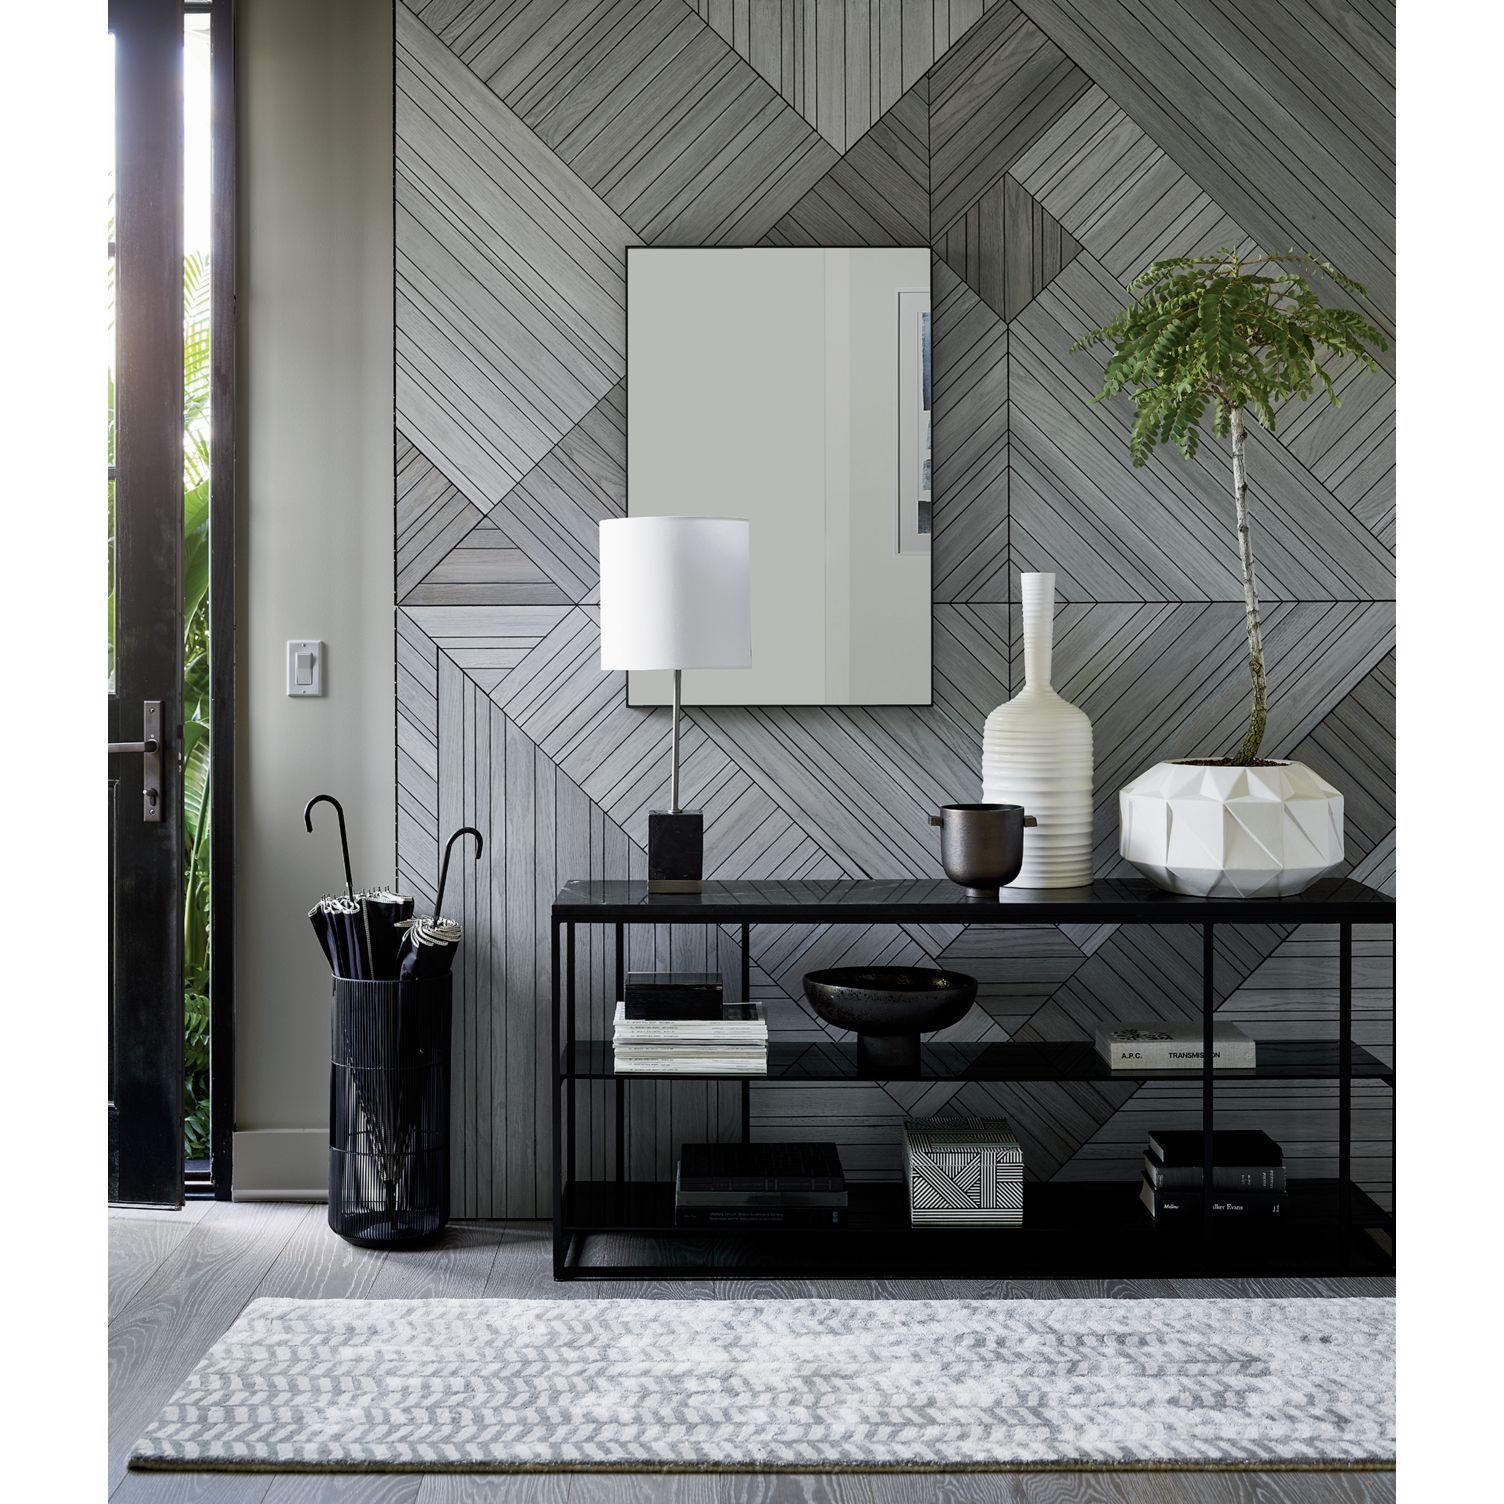
If you display multiple pieces on multiple layers, create an intentional, curated look. Try and avoid using the table as a dumping ground for items you’re carrying as you enter your home. [below: the Caged Black Marble Media Console from CB2]
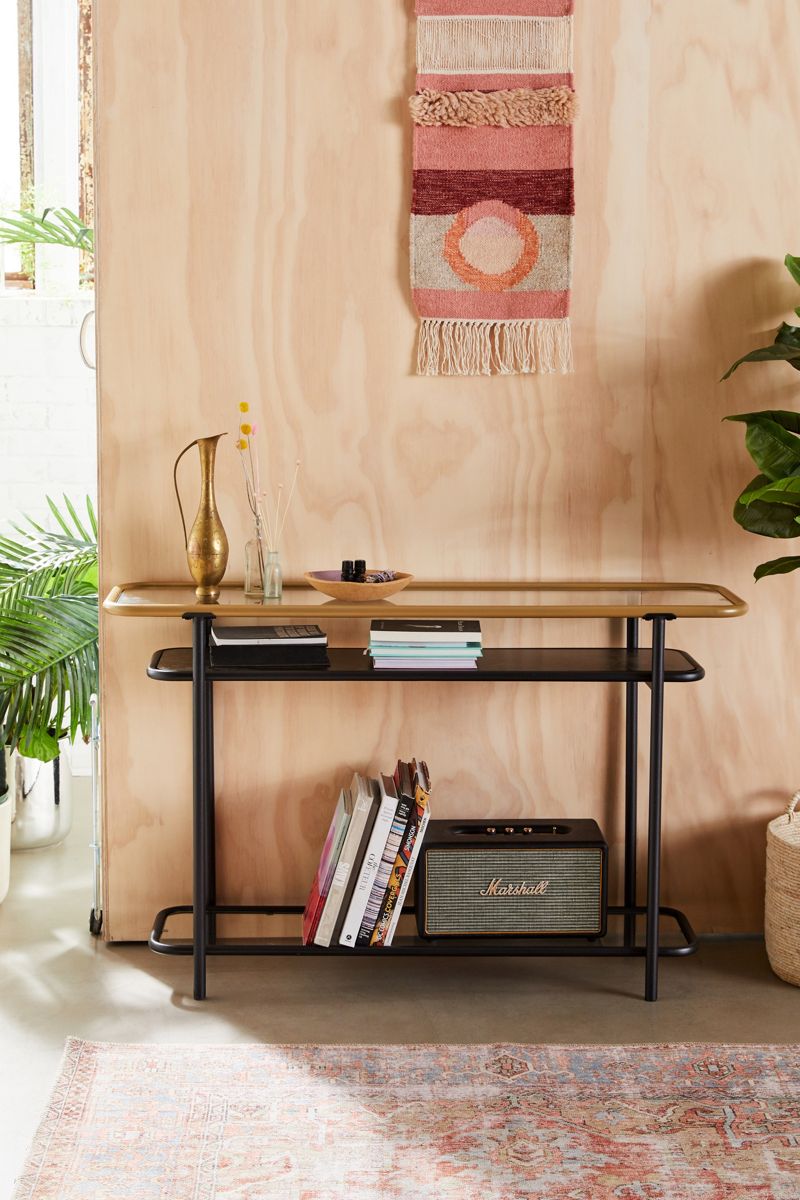
Last but not least, don’t feel the need to fill every part of every shelf. As always, empty space can create a tranquil feel, especially when it comes to entryway console tables that welcome you into the home. Below we see the Wesley Console Table from Urban Outfitters, which holds items ranging from dried flowers to a bowl that contains smaller items.
We hope today’s post has armed you with plenty of tips and tricks for creating a calm, useful console table display. Happy decorating!!
You're reading Tips for Decorating a Console Table in an Entryway, originally posted on Decoist. If you enjoyed this post, be sure to follow Decoist on Twitter, Facebook and Pinterest.
from Decoist http://bit.ly/2MyPGAy
25 Cheap DIY Ponds to Bring Life to Your Garden
Allison&Graham: Vernacular Memphis Homes Meet Dark, Dashing Upgrades
35 DIY Shoe Rack Ideas for Organized Homes
Modern Montreal Duplex Showcases Industrial Minimalism at its Functional Best
Fizzy Design Rush: Add Some Refreshing Reds With Iconic Coca-Cola Decor
Coca-Cola themed décor and art work always manages to turn heads and steal the show. It’s vintage and eye catching and an instant conversation starter that adds color and class to your home. Step in for Coca-Cola inspired wardrobes and kitchens, banners and signs that shout out the brand today.
![]()
by See Materials
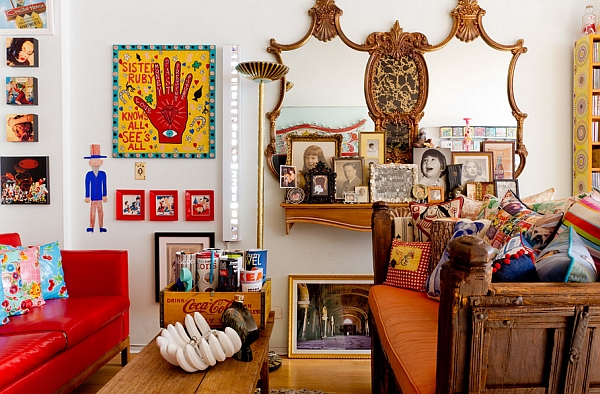
If you are one of those who has spent some time at the local flea market or antique show, then you would have already come across several Coke classics and collectibles. Apart from the cultural value, Coca-Cola decor is a wonderful way to add some color to your modern interiors. Nostalgic, fun and timeless in its own unique way, this soft drink-themed merchandise is showcased in the versatile inspirational images that follow –

by Sheridan Interiors, Kitchens and Baths
by Knight Architects
by Brian Benda
by Jay Greene Photography
Live on the Coke Side of Life
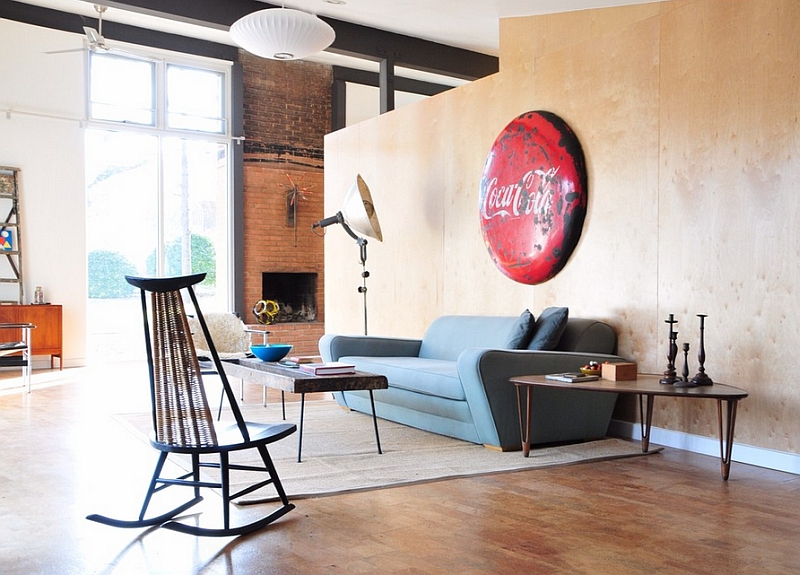
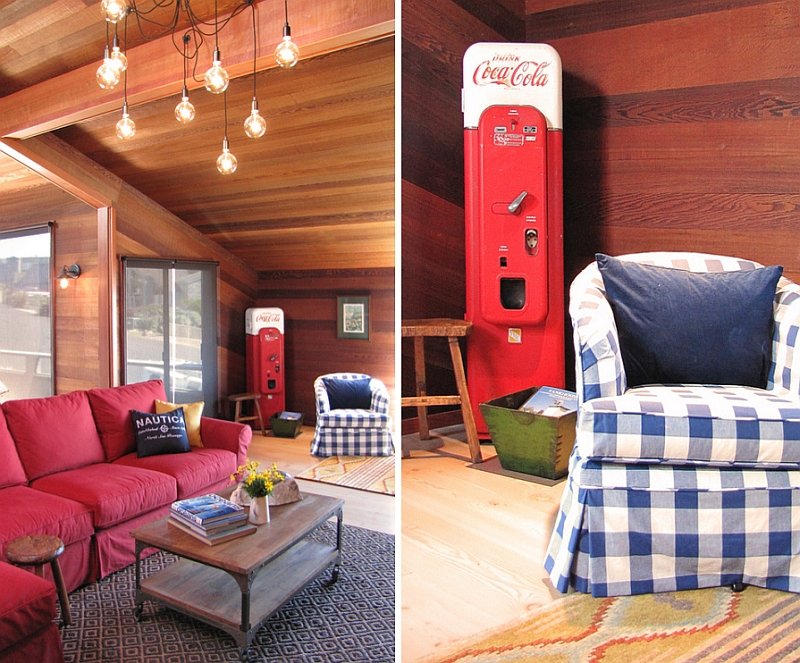
A lot of times, the image of decorating with antique Coke novelties is the one of overwhelming a room in red, along with black and white. We get that most people are trying to recreate the retro-style magic of the ’50s and ’60s Coke diner. But that is not your only option. There are plenty of other ways in which you can decorate with vintage Coke machines, large framed posters and other iconography. Use that rare coke poster just as any other poster in the home by framing it and accentuating the space with the right accent lighting.
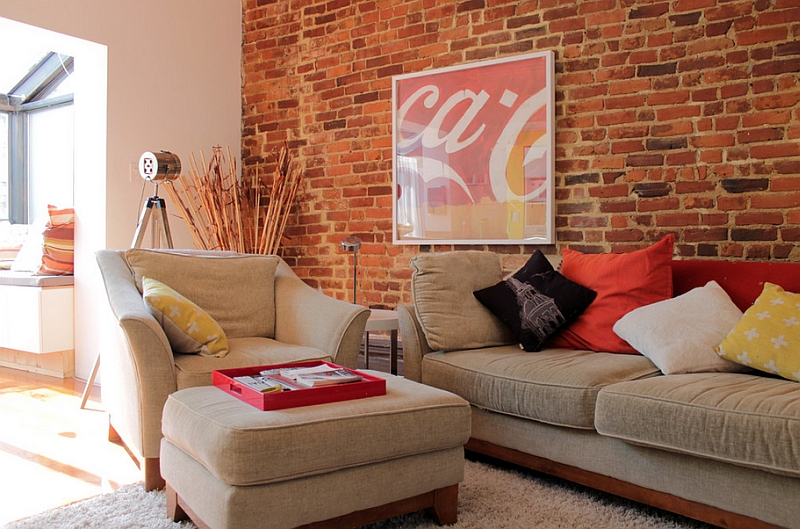
Photograph by Laura Garner
by Urban Colony
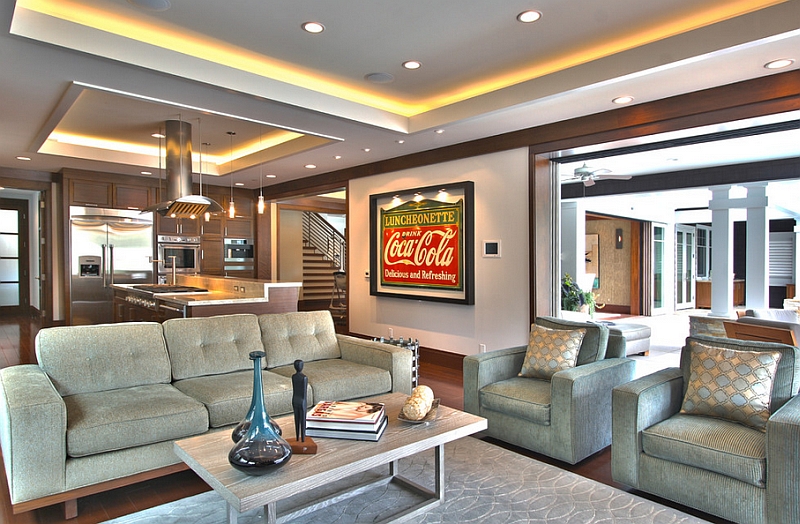
There are many modern re-interpretations of the classic Coke poster that you can use in minimal and transitional spaces. A restored vending machine in the corner or even a large button-style minimalist Coke sign can get the job done with finesse. Remember that at the end of the day, too much red can be visually overwhelming, unless you are going all-out to embrace the Coke theme!
by Irene Turner at Home
by Rosichelli – Design
by Studio 80 Interior Design
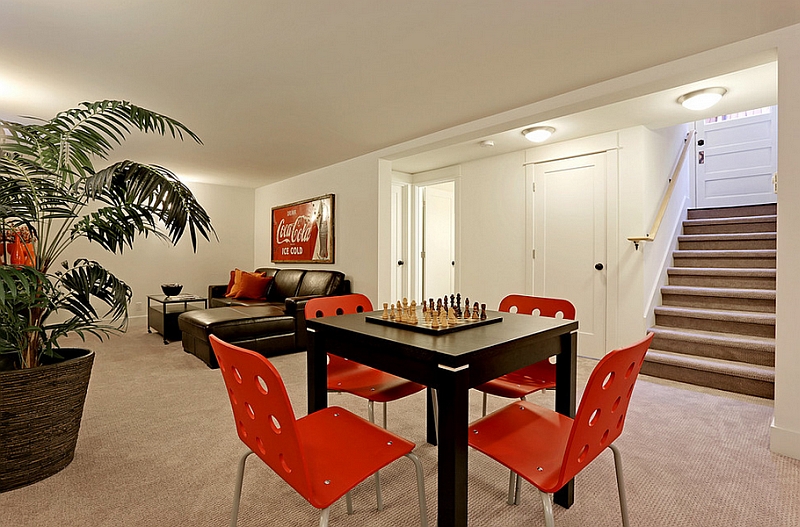
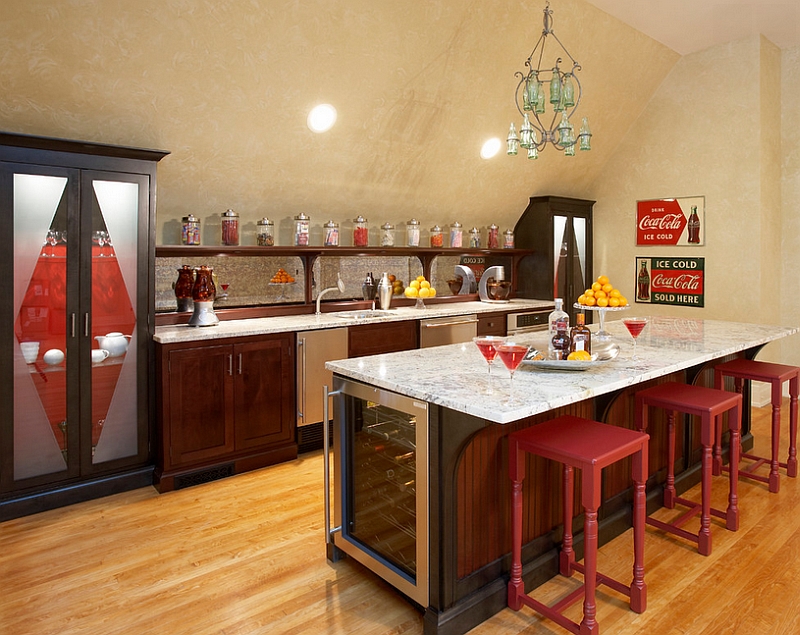
Where There’s Coke There’s Hospitality!
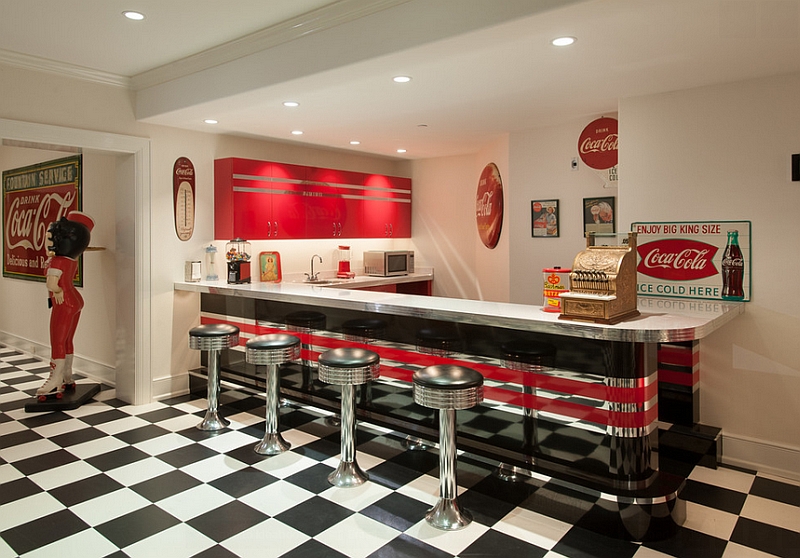
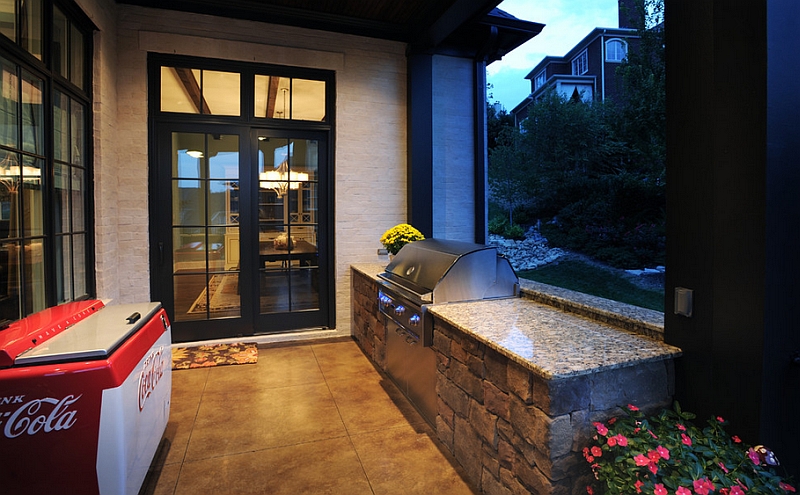
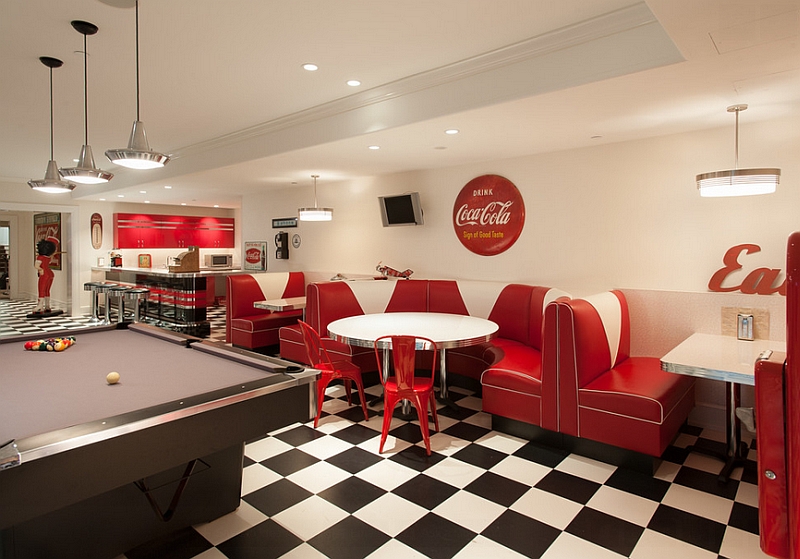
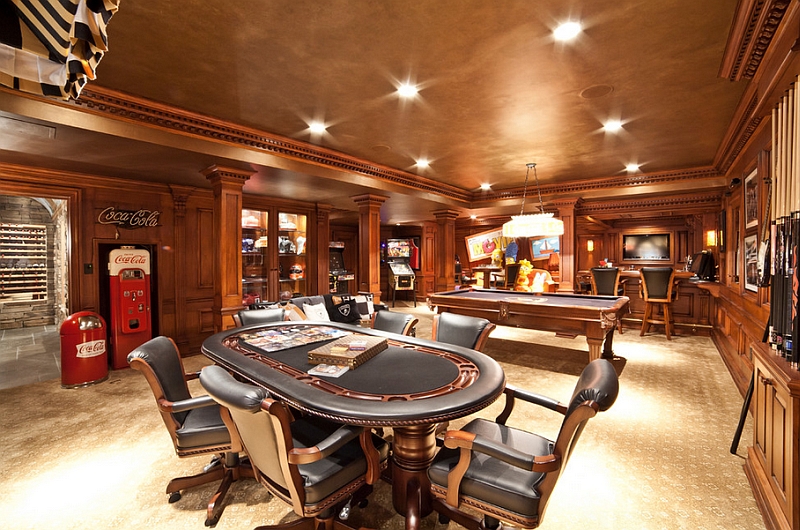
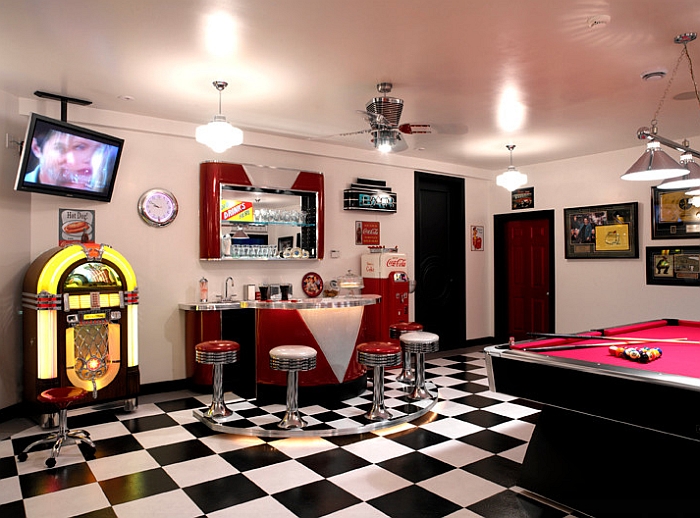
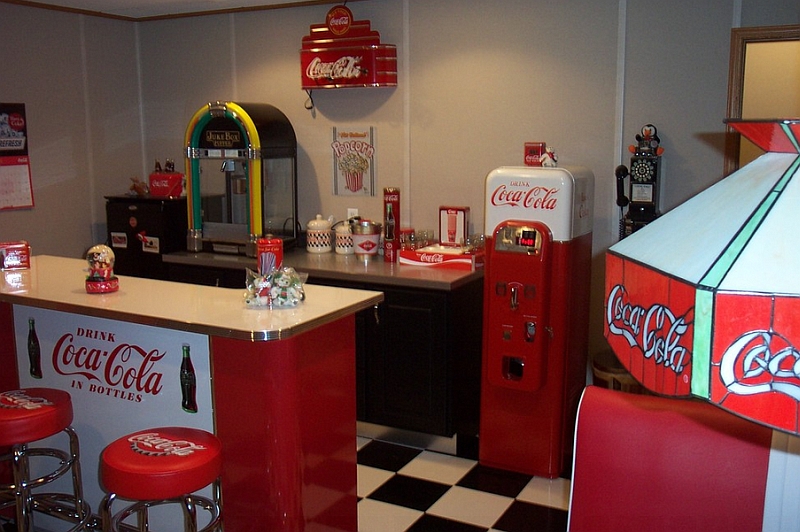
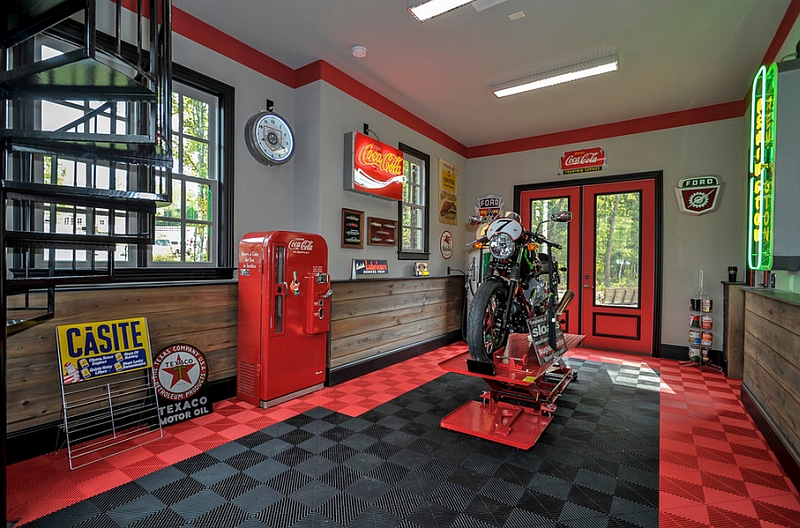
Why not embrace the tagline and philosophy that propelled Coke through the ’40s and ’50s? The fizzy sugar rush of the drink was combined with the idea of friends, family and good times very early in its marketing. That very image has persisted now for nearly a century! Celebrate this spirit of togetherness by decorating your game room, family area or even the man cave in the basement with Coke-inspired decor. Now, this is one place where you can go all out with the reds, and for the serious collectors, there is the possibility of decking out the space with some special vintage finds. A perfect way to add some cheer to the fun times!

by CHC Creative Remodeling

by Don F. Wong Photography
by WL Bars and Interiors
by Volkman Kitchen and Bath
by Kings Chapel Community
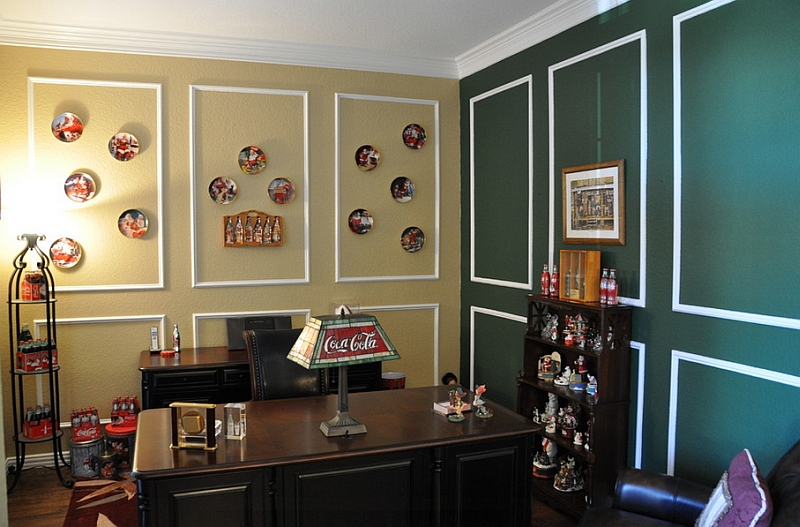
A Refreshing New Feeling!
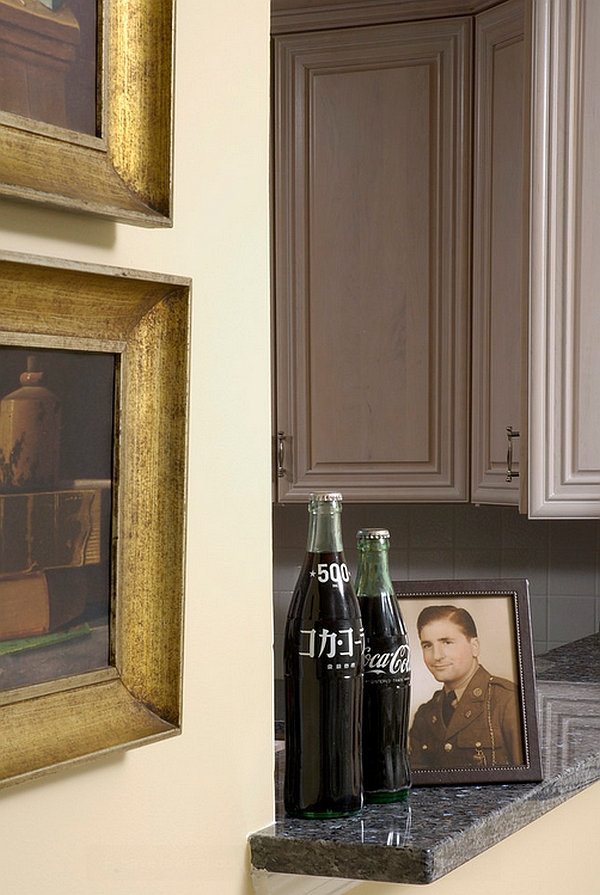
At Decoist, we are not just about going out and spending some cash to bring home amazing decor. (Though that is often what the lazy ones among us do.) It is time to take that old Coca-Cola crate and bottles and turn them into appealing and inventive decor. The DIY possibilities with a crate are obviously endless, and you can craft anything ranging from rustic wall shelves to magazine holders and home office organizers! One of the ideas that we absolutely loved is the use of spray painted Coke bottles, shown below. Easy to execute and a whole lot of fun, this decorative statement can be personalized with summer colors if you are not too keen on the fall gold version showcased here.
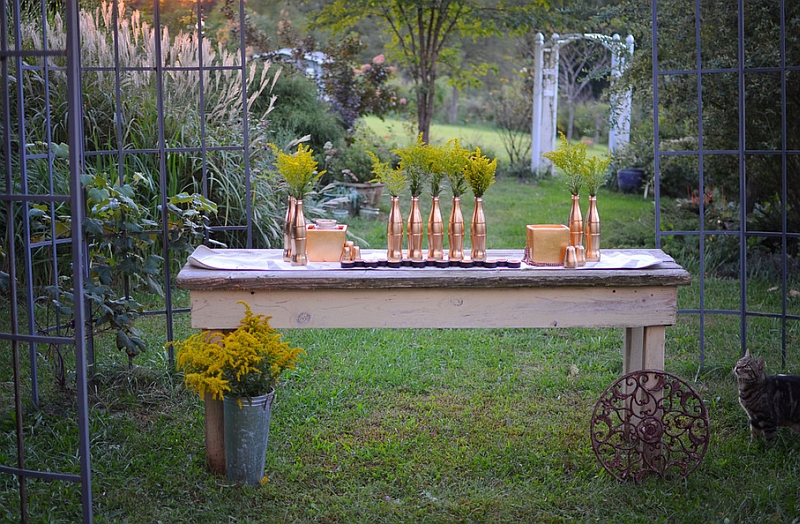
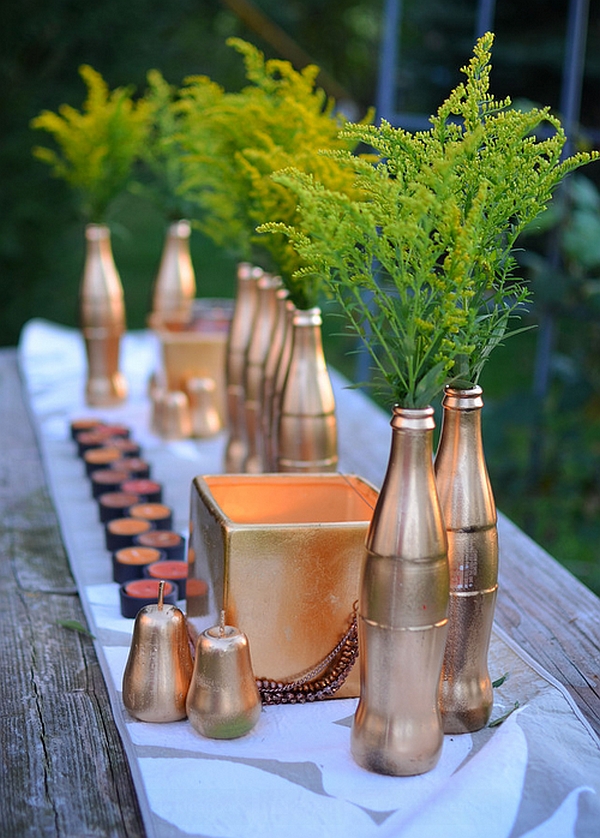
Photography by Amy Renea
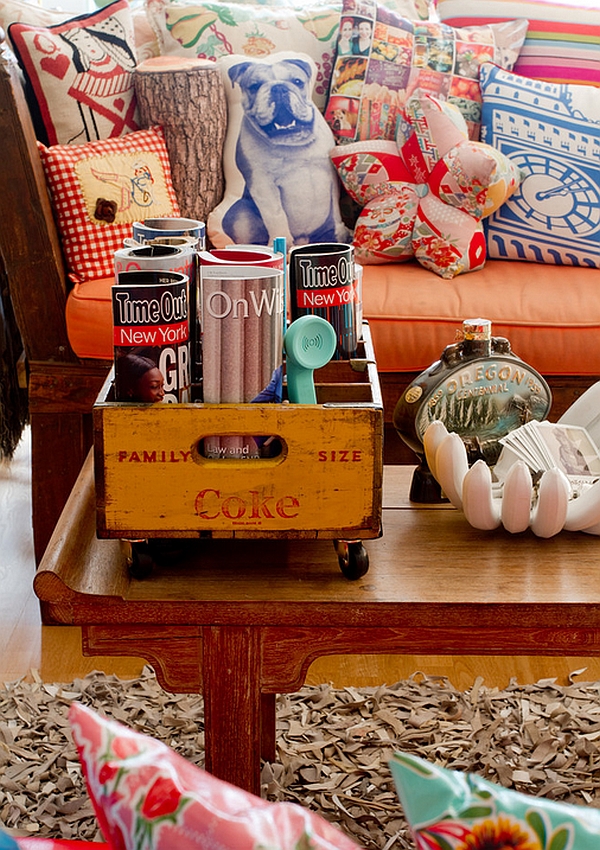
by Rikki Snyder
by Sara Bates
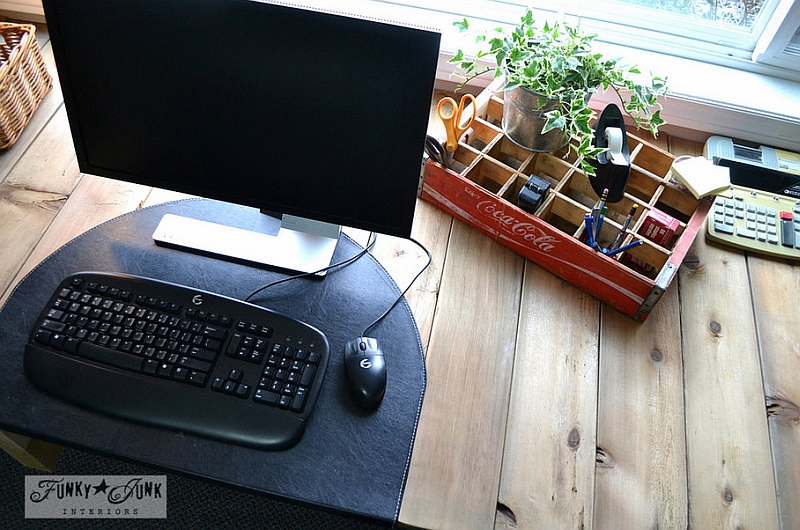
by Funky Junk Interiors
by Paula Grace Designs
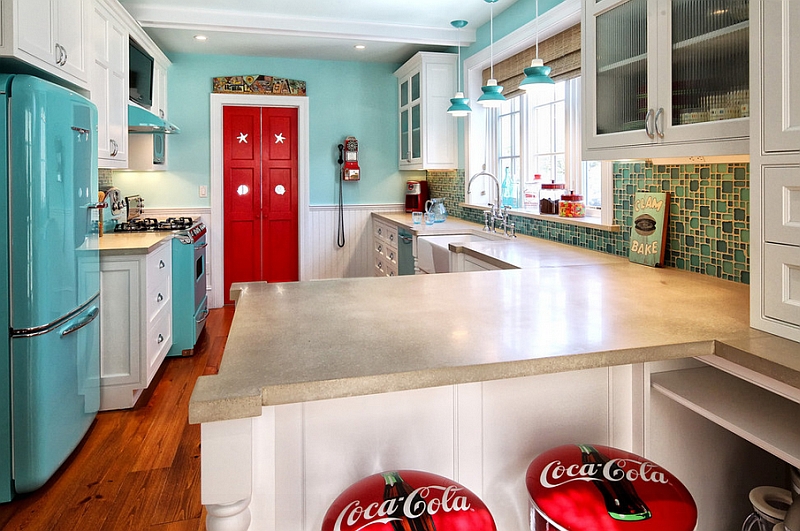
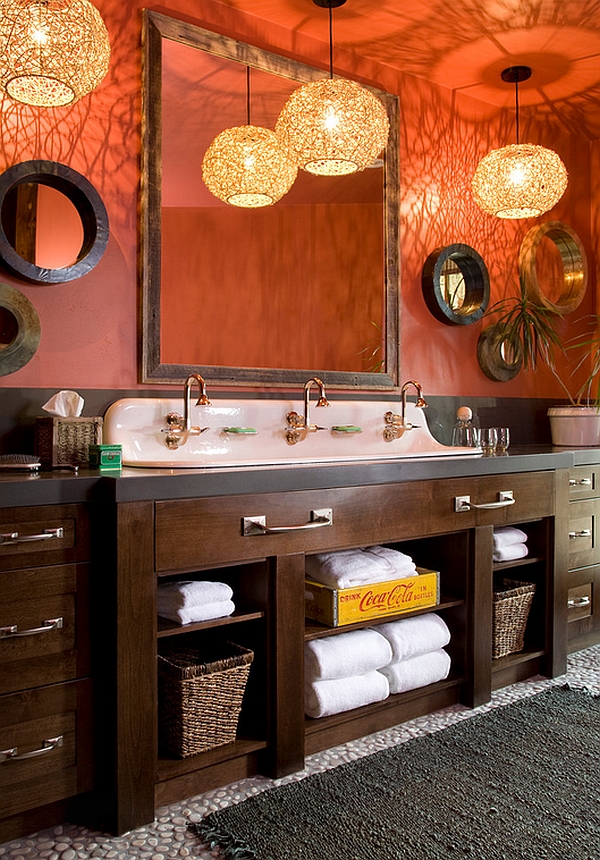
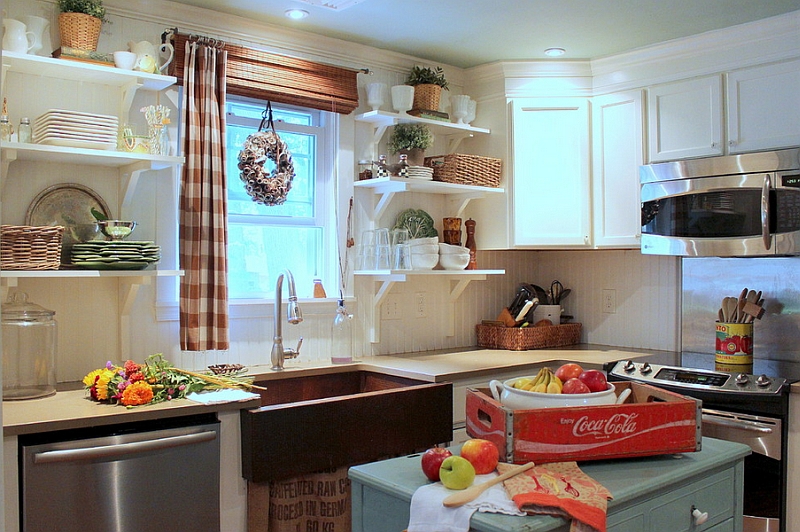
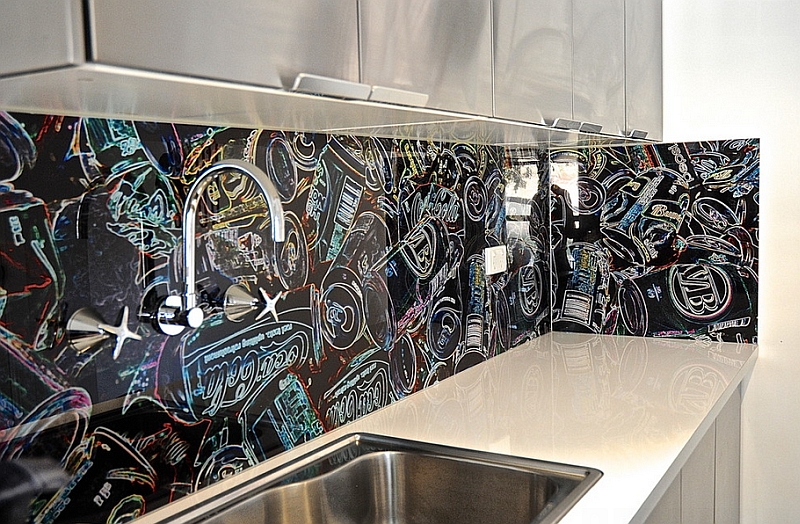
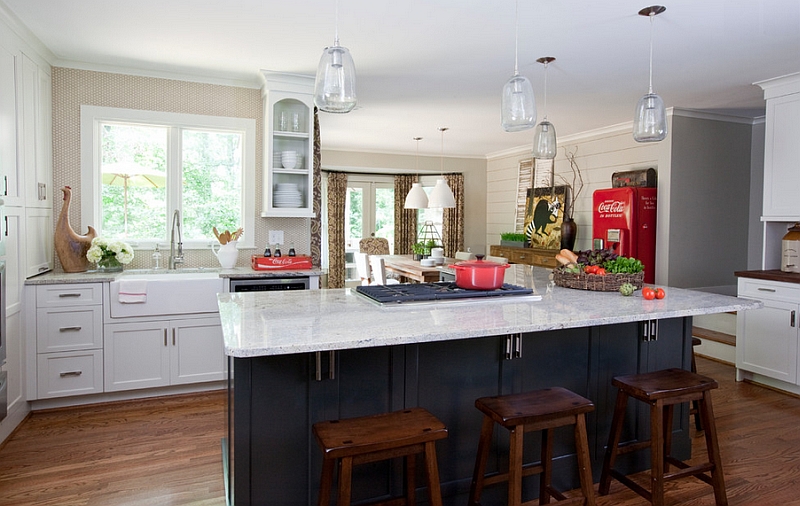
Open Happiness in the Kitchen
Many modern kitchens are trying their best to find that perfect balance between the old and the new. While functionality has taken a modern turn, a large number of homeowners still prefer a few classic design elements in the kitchen. Simple and unassuming, Coke banners and posters add this timeless touch without demanding too much in terms of effort and time. You can obviously craft a retro-style diner right next to the kitchen to enhance this look. The kitchen is one of the easiest places to incorporate eclectic and colorful features. Coke accessories also allow you to easily define and elevate the focal points in your culinary space.

by Alan Design Studio
by Luci.D Interiors
by Cristi Holcombe Interiors
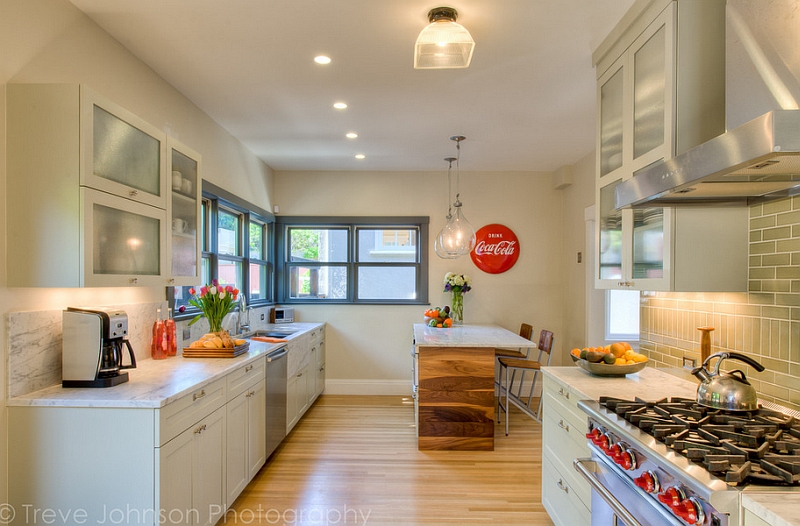
by Treve Johnson Photography

by Designer for Triton Homes, Owner Triton Interiors
by Lilija Gelazis
Are you someone who loves to decorate with Coca-Cola decor? Is there some special poster or item that you particularly cherish? Maybe there is a rare Coke collectible on your wish list. Let us know…
You're reading Fizzy Design Rush: Add Some Refreshing Reds With Iconic Coca-Cola Decor, originally posted on Decoist. If you enjoyed this post, be sure to follow Decoist on Twitter, Facebook and Pinterest.
from Decoist http://bit.ly/2WvGFgt

0 comments: